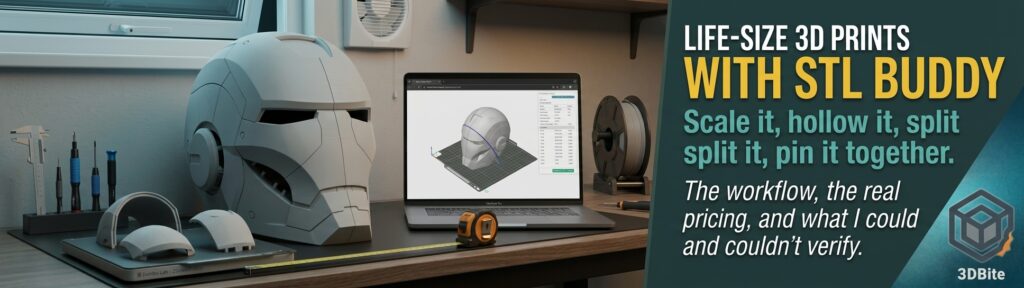
A life-size print is a different kind of project from everything else that comes off a desktop printer. The finished object is far bigger than the build plate, so the real work is planning: deciding the size, making the model light enough to be practical, cutting it into pieces that fit, and designing the joins so they come back together cleanly. The Nutcracker build on this site was a small taste of that, at around 70cm tall, over 20 plates, and about 3kg of filament, and that was a model whose designer had already done the splitting. This post is about doing that planning yourself, using the life-size tools in the STL Buddy toolbox.
First, which STL Buddy is this?
The earlier STL Buddy post covered the iPhone scanning app and the stlbuddy.co image-to-STL and viewer tools. The tools in this post are on a different site, stlbuddy.com, which is a maker toolbox of 67 tools spanning personalised gifts, storage builders, cosplay, model editing and a few Etsy-selling calculators. The name is shared and I can’t confirm the two sites are connected, so check the address before you sign up for anything. The life-size work lives in the cosplay and model-editing categories of the .com site.
What I could and could not verify
This is worth saying plainly, because the headline tool is the least documented. Make It Life Size is described on the site simply as “Prepare large models at the size you need.” Its controls load inside the page and are not described anywhere public, so I have not invented a button-by-button walkthrough for it. What I can describe properly is the surrounding workflow, because the neighbouring tools are better documented: Model Splitter shows its full interface publicly, Make It Wearable is described in detail, and the learning hub gives the site’s own checking advice. The rest is general print planning that applies to any large build.
The tools involved, and what each one costs
| Stage | Tool | What the site says it does | Tier |
|---|---|---|---|
| Fit a design to a real body | MyFit | Fit cosplay armour to an adjustable body model and export each piece at your chosen size | Free |
| Start from a helmet | Mandalorian Forge | Customise and prepare a helmet for printing | Maker |
| Set the real-world size | Make It Life Size | Prepare large models at the size you need | Inventor |
| Make it light enough to wear | Make It Wearable | Hollow models, cut eye openings and split wearable parts for printing | Inventor |
| Cut it to fit your printer | Model Splitter | Place cuts, divide a model into separate parts, add alignment pins | Inventor |
The pricing is the first thing to understand, because three of the five tools sit in the top tier. Design and preview are free in the modelling tools, and you pay when you download. Inventor is $32 a month and covers every tool in the table, with unlimited downloads. Without a membership, an Inventor-tier download costs 10 credits, and credits are sold in one-time packs: 40 for $10 and 100 for $20. That works out at roughly $2.50 per Inventor download on the small pack and $2.00 on the large one. Eligible new members can take a 14-day trial of a paid tier, but it needs a credit card through Stripe and renews automatically at the monthly price unless you cancel before the renewal date.
For a single one-off project, credits are almost certainly the cheaper route. A membership only makes sense if you are building several large things in a month.
Step 1: decide what “life-size” actually means
Life-size is only meaningful against a real measurement, so take it before you touch any software. For something wearable that means the actual dimensions of the person: head circumference and the height and width of the skull for a helmet, shoulder width for a chest piece. For a prop it means the real dimensions of the object it copies. Write the numbers down in millimetres, because the 3D printing world standardised on millimetres long ago.
This matters because an STL file has no units of its own. The site’s own learning hub says it directly: an STL describes the surface as triangles and carries no reliable colour, material or unit settings, so you must confirm the size in your slicer. A model built in inches and read as millimetres comes out 25 times too small, which is a mistake you want to catch on screen rather than after a day of printing.
For wearable work, MyFit is the useful free starting point. It lets you fit armour to an adjustable body model and export each piece at your chosen size, so the sizing comes from a body you have configured rather than a guess.
Step 2: understand what scaling does to cost
This is the part that surprises people, and it is pure geometry. Scale a model up by a factor and a solid object’s volume grows with the cube of that factor, so the filament and print time explode. A hollow shell with a fixed wall thickness grows roughly with its surface area, which is the square of the factor. That difference is the whole argument for hollowing.
| Scale factor | Solid volume (relative) | Hollow shell material (roughly, relative) |
|---|---|---|
| 1x | 1 | 1 |
| 1.5x | 3.4 | 2.3 |
| 2x | 8 | 4 |
| 3x | 27 | 9 |
Treat the shell column as a rough guide, since real prints also depend on infill, wall count and internal ribs. Even so, a life-size solid print is rarely sensible. Hollowing is what makes a wearable piece light enough to wear and a big prop affordable in filament, and it is what the Make It Wearable tool is built to do.
Step 3: hollow it, and cut the openings
Make It Wearable hollows the model and cuts openings such as eye holes, then splits it into wearable parts. Two practical points apply to any hollowing step. First, keep the wall thick enough to survive being handled, because a very thin shell dents and cracks under the normal knocks of wearing and transport. Second, check the result from every side before you export, as the learning hub advises, looking specifically for thin walls, gaps and separate floating parts. Rotating the model costs nothing, and finding a hole after printing costs hours.
Step 4: split it to fit your bed
Model Splitter is the best-documented tool in the set, and its interface shows how a sensible split works. You upload an STL or OBJ, up to 100 MiB and 1,000,000 triangles, and the file stays on your device rather than being uploaded. The viewer shows a bed outline, defaulting to 256 × 256mm, which happens to match the Bambu A1’s plate, and it warns when the model extends beyond it.
Then you place the cuts yourself. You can start with a straight cut, dragging across the model in the viewer, or draw a curve to follow the shape of the model, which is how you hide a seam along a natural edge rather than slicing straight through the middle of a face. Alignment pins are added so the pieces register against each other, and you preview the split before exporting.
Two details in the tool’s own text are worth taking seriously. Exports keep the actual model scale and the assembled positions, so you arrange the parts on your plates in the slicer rather than in the splitter. And it tells you to review and repair the exported parts in your slicer and to test the pin fit with your own material. That last instruction is the most important one in the whole workflow, and the next step explains why.
A rough sense of how many pieces to expect helps with planning. On a 256mm plate, with some margin lost at the edges, you can count on roughly 230mm of usable length per piece. A 600mm-tall prop therefore needs at least three pieces stacked vertically, and a shape that is also wide will need splits in more than one direction. Add a few more pieces for parts that have to be printed in a particular orientation, and the part count climbs quickly.
Step 5: test the joints before the big print
Pins and sockets only work if the printed clearance matches your printer and filament, and that varies. Print one small pin-and-socket pair first and check the fit, which is the same logic as the tolerance gauge in the Benchy alternatives post. A pin that is too tight will crack a finished part during assembly, while one that is too loose leaves a wobbly joint that glue has to carry on its own. A few minutes on a test pair saves a reprint of a large piece.
If your design needs a repeatedly assembled joint, such as a visor or a removable panel, a printed pin is the wrong answer, and the metal-insert approach in the heat-set inserts post is worth reading before you commit.
Step 6: in the slicer
Import every exported part and confirm the dimensions before slicing anything, since the splitter keeps true scale but the slicer is where mistakes in units show up. Then treat each piece as its own small project.
Orientation matters more on split parts than on most prints. The cut faces are flat, and printing each piece cut-face-down avoids supports on the join surface, which is a trick the multi-part printing post covers in the context of colour. The orientation for strength post applies as well, because a thin wearable shell is only as strong as its layer bonds. Where supports are unavoidable, the support settings guide is how you keep them from scarring a surface you plan to paint.
If you use Bambu Studio’s own Cut tool for any of this instead, the 2.8.4 beta notes mention smoother dovetail cutting, covered in the 2.8.3 and 2.8.4 post, and the Assembly Guide feature from the assembly guides post is a good way to document a many-part build as you go.
Step 7: plan the print run like a project
This is the same discipline as the Nutcracker build. With many plates, the sensible approach is to sort them by duration: the long prints go overnight or while you are out, and the short ones fill the working day. If you have two machines, as the A1 and A2L give this workshop, split the parts across both so the whole project takes a few days rather than a week or more. Label each part as it comes off the plate, because a pile of near-identical curved shells becomes a puzzle very quickly. The unattended printing safety post is worth rereading before you leave a machine running through the night.
Keep your downloads organised too. STL Buddy states that it does not offer customer file storage, so whatever your browser downloads is the only copy you have.
Step 8: material, assembly and finish
For anything you will wear or carry around, the glass transition point of the material matters more than usual. PLA softens at roughly 55-65°C, as the PLA post explains, which a hot car or a sunny convention hall can reach. PETG, covered in the PETG post, holds its shape to around 70°C and tolerates a knock better, at the cost of being fussier to print and sand.
Assembly is a dry fit first, glue second, which is the same advice PA1_MAKER gives on the gingerbread train. Large shells show layer lines and seams clearly, so the finishing route is filler primer, sanding through the grits, then paint, as set out in the painting guide. If you want a glossy hard-shell look instead, the epoxy method in the PLA polishing post is the quicker route to a smooth surface than sanding a very large area by hand.
The honest verdict
The STL Buddy approach is sensible and easy to follow, because it puts sizing, hollowing and splitting in one place and keeps your model on your own device. What it does not do is remove the genuinely hard parts of a life-size build, which are the filament, the print time, the joints and the finishing. It also costs money for the tools that matter most, and Model Splitter is the one with real documentation. There are free splitters available too, and Bambu Studio’s own Cut tool covers the basics, so it is worth being clear about what the paid tier is buying you, which is convenience and a joined-up workflow rather than a capability you cannot get elsewhere.
My suggestion is to start with the free MyFit tool to settle the sizing, buy a small credit pack rather than a subscription, and test the pin fit on a single pair before committing to the full print. If you have used Make It Life Size itself, I would genuinely like to hear how its controls work in practice, since that is the one part of this workflow I could not see for myself.
The toolbox is at stlbuddy.com, with a learning hub at stlbuddy.com/learn for the site’s own getting-started guidance.