The calibration routine post lists temperature as one of the early steps and moves on quickly. This post is the beginner-friendly companion that slows down on it, because a temperature tower is one of the easiest calibration prints to run and one of the easiest to misread. The OrcaSlicer wiki puts the stakes plainly: there is no other calibration that can have such a big impact on print quality as temperature calibration. Many stringing, weak-layer and rough-surface complaints turn out to be a temperature problem in disguise.
What a temperature tower is
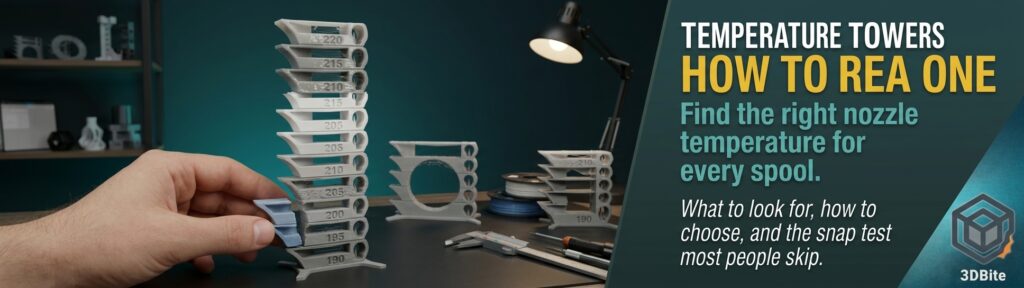
A temperature tower is a vertical test print made of stacked sections, with the nozzle temperature changed at each step. The slicer inserts the temperature changes at the right heights, so a single short print gives you a side-by-side comparison of how your specific filament behaves across a range of temperatures. Instead of guessing from the number on the spool label, you can see what each temperature actually does, and pick the one that gives the best overall result.
The spool label is a starting point, not an answer. The recommended range on the box is a manufacturer’s generalisation, and the best temperature for a given spool shifts with the pigment, the additives, your printer’s hotend, your print speed, and even the room. The filament brands post has a good example of how sensitive colour can be: one brand’s red PLA turned noticeably orange when printed too hot. Two spools labelled the same material can want different temperatures, and a tower is how you find out.
Why temperature matters so much
Temperature controls how fluid the plastic is when it leaves the nozzle, and almost everything you see on a print follows from that. The OrcaSlicer wiki summarises both ends of the problem. Too low a temperature can lead to under-extrusion, poor layer adhesion, and stringing. Too high a temperature can cause filament degradation, clogging, and stringing as well. Stringing appears at both ends for different reasons, which is one of the first things that confuses beginners.
The practical consequence is that no single temperature is best at everything. Colder plastic holds its shape better on bridges and overhangs and strings less, but it bonds between layers less strongly. Hotter plastic fuses layers more firmly and flows more easily, but it oozes, sags and loses fine detail. The tower exists to find the best compromise for your needs.
Before you print one: three things that will fool you
Wet filament. Moisture produces stringing, bubbling and rough surfaces at every temperature, and a tower printed from a damp spool will tell you something misleading about a problem the temperature cannot fix. If the spool has been open for a while, dry it first using the guidance in the filament drying post.
The wrong speed. A forum thread on this exact question lands on a sensible answer: set the print speed you actually plan to use before running the tower, and let it use that. Faster printing needs more heat to melt the plastic in time, so a tower printed slowly will recommend a temperature that is too low for your everyday fast profile. The speed ceiling is explained in the over- and under-extrusion post.
A bad first layer or an uncalibrated flow. If the base of the tower is peeling or the walls are visibly wrong for other reasons, sort that out first with the first layer troubleshooting post. A tower tests temperature, and it can only do that cleanly if nothing else is going wrong.
Getting a tower
There are three common routes, and the first is the most convenient.
OrcaSlicer’s built-in tower. Open the Calibration tab in the top menu, choose Temperature, set a start and end temperature, and OrcaSlicer generates the model and inserts the temperature changes automatically, stepping by 5°C per section. The reference model is designed around a 0.4mm nozzle at 0.2mm layer height, and when the option is enabled it scales the tower to your nozzle diameter so the features stay readable with other nozzle sizes. If you already run OrcaSlicer alongside Bambu Studio, as the OrcaSlicer versus Bambu Studio post suggests many people do, this is the easiest option.
A ready-made tower from MakerWorld. For Bambu Studio users, there are PLA and PETG temperature towers adapted from OrcaSlicer’s own model, with a 3MF that works in both slicers. These are quick to load and already set up for the usual ranges for each material.
Check your own slicer’s Calibration menu. Some guides say Bambu Studio has a built-in temperature tower, while the existence of the adapted MakerWorld versions suggests otherwise for at least some releases. The menus change between versions, so look in yours before downloading anything.
Whichever you use, prefer a tower where each step is clearly labelled with its temperature. Many generic tower models are not, and a tower you cannot read afterwards is nearly useless, because you will remember that one section looked best without knowing what temperature it was.
Choosing the range and step
Pick a range that brackets the manufacturer’s recommendation, with the recommendation somewhere in the middle, and keep to 5°C steps. A span of around 30°C works well. Smaller steps add print time without giving you more useful information, and larger steps risk jumping over the sweet spot. Use the material posts on this site for sensible centre points.
| Material | Reasonable range to scan | Where to read more |
|---|---|---|
| PLA / PLA+ | 190 to 220°C, with 205 to 215°C the usual middle ground | PLA post |
| Silk PLA | 205 to 230°C, since it typically needs more heat than standard PLA | Silk PLA post |
| PETG | 230 to 260°C, with 235 to 250°C common | PETG post |
| TPU | 210 to 240°C, brand and grade dependent | TPU post |
Treat those as places to start scanning, not as final answers. Run the tower per material and per brand, and rerun it when you change colour within a brand, since pigments change behaviour.
How to read the tower
Once printed, take the tower off the plate and examine each section in turn. You are looking at four things, and the trick is that they pull in different directions, so you are looking for a balanced section rather than a perfect one.
| What to check | How to check it | Which way temperature pushes it |
|---|---|---|
| Stringing | Look for fine hairs or wisps stretched across the gaps between the pillars | Gets worse as temperature rises, so cooler sections are cleaner |
| Layer adhesion | Feel for separation lines, and gently try to flex or snap a section | Improves as temperature rises, and weak sections usually mean too cold |
| Bridging and overhangs | Look for sagging or drooping on spans and curling on angled faces | Generally better when cooler, since plastic sets faster in the air, but too cold hurts flow |
| Surface finish | Look at the wall texture, gloss, and any blobs or bulging corners | Excess gloss, blobs and corner bulges point to too hot; dull, rough or patchy walls can point to too cold |
The key idea is the one that causes the most beginner confusion. The section that looks cleanest is not automatically the right answer, because a very cold section can look beautiful and be weak. That is the point made by one guide on reading these towers: do not mistake the cleanest-looking section for the mechanically safest choice. The sensible rule is to choose the lowest temperature that still gives clean layer bonding and a smooth surface, low enough to keep stringing and overhangs sharp but not so low that layers can be separated.
The snap test: do not skip it
Looking at a tower only tells you about appearance. To judge strength, take the sections you are considering and try to bend or snap them, as you would feel for a weak joint. A section that breaks along a clean layer line with little effort is too cold for good bonding, however nice it looks, and this ties directly into the layer-weakness problem covered in the orientation for strength post. If you are printing decorative pieces only, strength matters less and you can lean toward the cooler, cleaner end. For functional parts, lean toward the warmer side of your acceptable window.
Making the decision
Work from the bottom of your range upwards, or the top downwards, whichever you find easier, and note the section where the main problems drop away. A reliable way to decide is to pick the lowest section that has no layer-adhesion weakness, then check that stringing and bridging at that temperature are acceptable. If the two conflict, for example the strong section strings badly, you have found a case where retraction and cooling need attention rather than more temperature fiddling. The stringing post covers what to do next.
Most filaments also have some wiggle room, so you can be a few degrees either side of the ideal without causing a visible problem. A beginner should not agonise over whether the best section is 210°C or 215°C. The goal is to avoid being clearly too hot or clearly too cold.
Saving the result
A result you do not save is a result you will forget. In OrcaSlicer, enter the chosen value under the nozzle temperature field in the filament profile and save the profile. In Bambu Studio, the MakerWorld tower’s instructions describe going to the Project Filaments section, clicking the three dots beside the filament profile, and saving it as your own profile. Give it a descriptive name with the brand, colour and date, so you can tell it apart from the factory profile later, the same habit of named, dated profiles the calibration routine post recommends.
Common mistakes
- Printing from wet filament, which blames the temperature for a moisture problem.
- Running the tower at a slow speed and then printing everything fast, so the chosen temperature is too low in everyday use.
- Choosing the shiniest or cleanest-looking section without testing strength.
- Using an unlabelled tower and guessing which section was which.
- Applying one brand’s result to another brand’s spool of the same material.
- Rerunning the whole test for every tiny change, rather than saving a good result and moving on to the next calibration step.
Where it fits in the wider routine
Temperature comes early in the routine for a reason. It affects flow, so it is best settled before you tune flow rate and pressure advance, otherwise those later results are calibrated against a temperature you may change afterwards. Once the temperature is saved, move on to the next steps in the calibration routine, and revisit the tower only when you change filament, nozzle or speed profile in a meaningful way.
The summary
A temperature tower is a short, cheap print that replaces guesswork with a direct comparison. Dry the filament, set your real print speed, scan a range that brackets the label, and judge each section on stringing, layer bonding, bridging and surface. Choose the lowest temperature that still bonds well rather than the prettiest section, confirm with a snap test, and save the result in a named profile. Done once per filament, it quietly removes a whole category of problems that otherwise get blamed on retraction, cooling, or the printer itself.