
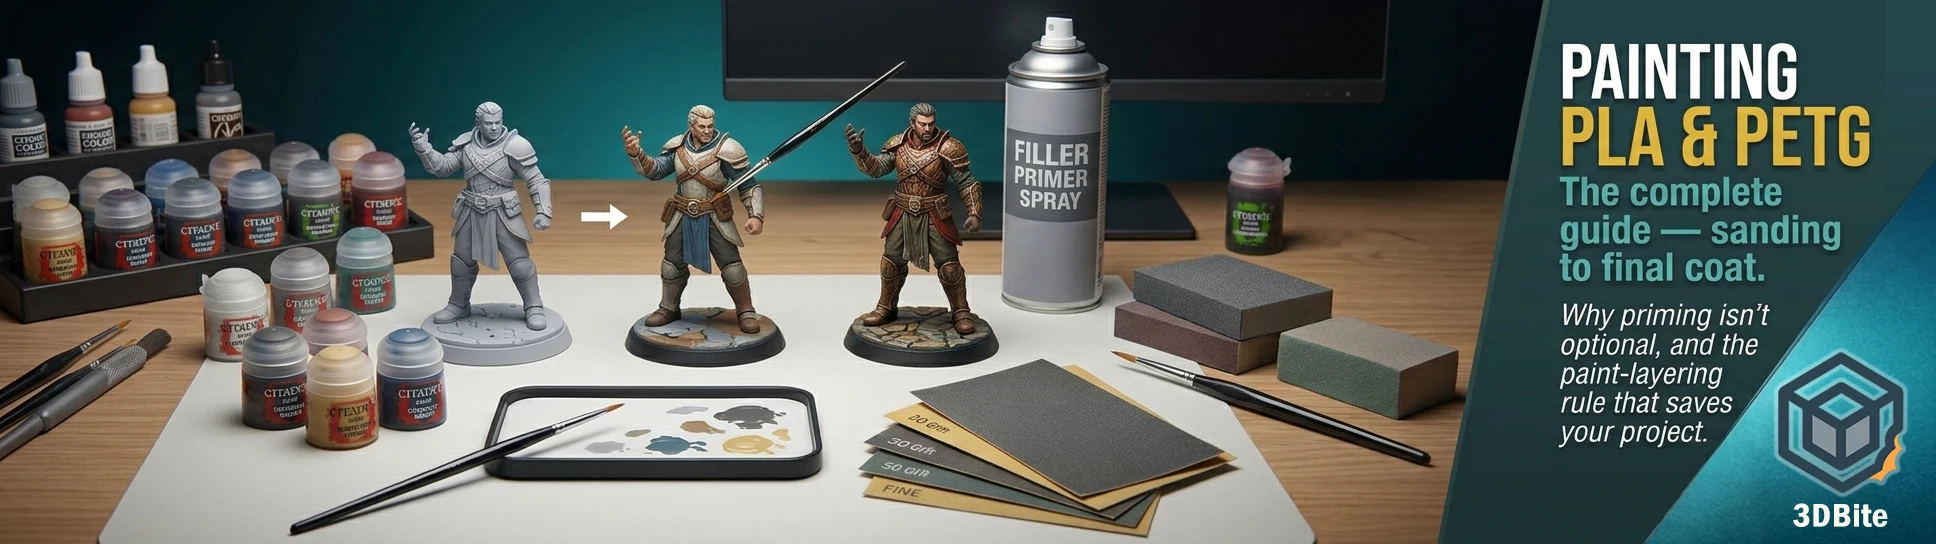
Multi-colour AMS printing and multi-part colour separation cover a lot of ground on this site, but there is a category of finish neither approach touches: paint. Weathering, shading, gradient effects, metallic finishes, fine detail that no filament colour boundary could ever achieve — this is where a brush or a spray can does something plastic colour simply cannot. Both PLA and PETG take paint well once you understand what each one specifically needs, and getting the prep right is the difference between a finish that looks genuinely professional and one where the paint flakes off the first time the piece gets handled.
The chemistry problem, in one paragraph
PLA is what is called a low-surface-energy plastic, which in plain terms means paint and adhesives naturally struggle to bond to it — the surface does not readily accept a liquid coating without some help. This is not a flaw in the material; it is simply a property of the polymer. Every step in the process below — sanding, priming, the specific paint types recommended — exists to work around this one basic chemistry problem. PETG shares the same underlying issue and is, if anything, described consistently across every source as slightly more resistant to adhesion than PLA, meaning it needs the surface prep taken a little more seriously rather than less.
Step 1: Clean and prepare the surface
Remove any support material, clean up stray strings with the heat gun technique covered in the heat gun guide, and trim any excess with pliers or a scraper before touching sandpaper to anything. Oils from handling the print — fingerprints, in plain terms — sit on the surface and interfere with everything applied afterward, so a wash with simple dish soap and warm water right before priming is a small step that several sources specifically flag as making a genuine difference to adhesion consistency. Let the print dry completely before moving on.
Step 2: Sand through the grits
This is the same progressive sanding logic covered in the PLA polishing post, applied here specifically as paint prep rather than as an end in itself. Start with a coarse grit around 200-400 to knock down the visible layer lines and any larger surface imperfections, working in circular motions rather than tracking along the layer lines, since sanding across the ridges removes them more efficiently than sanding parallel to them. Progress through to a finer grit — 600 to 1000 is the commonly recommended range for paint prep specifically, somewhat less aggressive than the 2000-3000 range used for a genuine polished-plastic finish, because paint and primer will fill in some of the remaining fine texture on their own. For PETG specifically, a deliberate 220-grit scuff pass is worth doing even on a print that already looks reasonably smooth, precisely because PETG’s greater paint resistance means the primer needs a rougher mechanical surface to properly grip onto.
Wipe the model down thoroughly after sanding — a dry cloth or compressed air — to remove every trace of sanding dust. Dust left on the surface interferes with primer adhesion in exactly the same way surface oils do, undoing a chunk of the benefit the sanding was meant to provide.
Step 3: Prime — do not skip this
Every source covering this topic agrees on one point without exception: priming is not optional if you want a finish that actually holds up. Primer does two jobs simultaneously — it promotes genuine adhesion between the low-surface-energy PLA or PETG and the paint layer above it, and it fills in the fine residual texture that sanding did not fully remove, evening out the surface before colour goes on. Spraying paint directly onto a bare, unprimed print is described repeatedly as the fastest way to ruin an otherwise good print — paint applied straight to plastic without primer is prone to peeling, chipping, and an uneven, patchy finish that no amount of careful colour application afterward can fix.
A filler primer — Rust-Oleum Filler Primer and Tamiya Surface Primer both come up repeatedly as recommended choices — specifically labelled for plastic surfaces is the right product. Apply in light, even coats from roughly 6-10 inches away, letting each coat dry for 15-20 minutes before the next rather than building up a single thick pass. After the final coat has cured fully — allow at least an hour — a light pass with 600-grit sandpaper knocks down any texture the spray itself introduced, leaving a genuinely smooth, uniform base ready for colour.
Step 4: Choose the right paint type
Acrylic paint is the consistent recommendation across every source for both PLA and PETG, and for good reason: it is easy to work with, dries fast, comes in a genuinely enormous range of colours, and does not carry the solvent risk that other paint families do. For miniatures, figurines, and detailed decorative pieces specifically — the category that covers most of the multi-part builds already featured on this site — acrylic brushed or airbrushed is the standard, professional-grade choice.
Standard spray paints (Krylon Fusion All-In-One is named repeatedly as a genuine industry staple for exactly this application) are the faster route for covering a larger surface uniformly, and they work well over a properly primed PLA or PETG surface. The important warning, stated plainly across multiple sources and worth taking seriously: avoid solvent-heavy paints — lacquer thinners, enamel-based solvent paints — directly against PLA or PETG. These solvents can warp, soften, or actively dissolve the plastic surface underneath, undoing the print rather than finishing it. This is a genuinely different situation from ABS, which tolerates and even benefits from solvent-based treatment (the acetone vapour smoothing covered in the PLA polishing post, which explicitly does not work on PLA or PETG, works precisely because ABS is chemically compatible with that specific solvent in a way PLA and PETG are not).
Lacquer sprays — Tamiya’s TS range is the name that comes up most often — can produce a genuinely professional, factory-moulded-looking finish when used properly over a compatible primed surface, and are popular among more experienced modellers for exactly that reason. But lacquer and acrylic do not mix safely in just any order, and this is worth understanding before layering different paint types on the same piece.
The layering rule that prevents a ruined paint job
This is a genuinely important technical point that gets glossed over in a lot of quick guides. The safe rule, consistently described as “hot over cold,” is this: you can generally apply an acrylic layer over a fully cured lacquer base without problems, but spraying a hot lacquer directly over a fresh acrylic layer risks the lacquer’s stronger solvent melting and disrupting the acrylic layer underneath, producing bubbling, wrinkling, or a genuinely ruined finish. If a project involves switching between paint chemistries — a lacquer base coat with acrylic detail work on top, for instance — that specific order (lacquer first, fully cured, acrylic afterward) is the safe direction. Reversing it, or mixing chemistries without understanding which is “hotter,” is a common and entirely avoidable way to ruin hours of careful work at the very last step. When in doubt, stick to a single paint system throughout a project rather than mixing types, or allow at least 48 hours between different chemistries to ensure full outgassing and cure before applying the next layer.
Technique: thin coats, always
The single most common mistake in this whole process, named specifically across multiple sources, is applying heavy, thick coats in an attempt to hide print lines or achieve full coverage quickly. Thick paint pools in the surface crevices and fine detail, ruins the crispness of anything with intricate geometry, and takes considerably longer to dry properly, increasing the risk of drips and an uneven finish. The correct technique is mist coating — several light, quick passes that each dry within minutes, building up colour and coverage gradually rather than trying to achieve full opacity in one application. This preserves fine surface detail and produces a noticeably more even, professional-looking result than fewer, heavier coats ever will, and it is worth the extra patience it demands.
Material-specific notes worth knowing
PLA is described consistently as extremely paint-friendly once primed properly — acrylics and standard spray paints both perform reliably. The one consistent warning is to avoid hot solvent-based lacquers applied directly without a compatible primer barrier, for the dissolving-risk reasons covered above.
PETG takes paint slightly less readily than PLA and benefits from the extra 220-grit scuff pass mentioned earlier, plus a genuinely thorough primer coat rather than a token one. Once properly prepped, it performs well with both acrylics and spray enamels, and the finished durability is comparable to a well-prepared PLA piece.
For context beyond the two materials this post focuses on: ABS accepts paint excellently and uniquely benefits from acetone vapour smoothing before priming — hanging the print in a sealed container with a small amount of acetone on a paper towel for 15-30 minutes melts the surface slightly and fills layer lines without any sanding at all, a technique that, worth repeating clearly, does not work on PLA or PETG. TPU’s flexible surface means paint adheres less permanently and is best reserved for cosmetic pieces rather than anything that will flex repeatedly in use. Nylon is genuinely difficult to paint reliably due to its hydrophobic surface and is better dyed than painted where colour change is the goal.
Ventilation: not optional
This connects directly to the concerns raised in the fumes and ventilation post, and it applies with real force here — spray primers, spray paints, and particularly lacquers all release solvent vapours during application and while drying, and this is a genuinely different exposure category from the printer fumes discussion. Acetone specifically carries a NIOSH-published IDLH (immediately dangerous to life or health) threshold, and OSHA has specific ventilation regulations covering spray finishing operations for good reason. Prime and paint outdoors or in a genuinely well-ventilated space, never in a small closed room, and if working with lacquers or solvent-based products regularly, a proper respirator rated for organic vapours — not just a dust mask — is the correct equipment rather than an optional extra.
The finished summary
Clean the print. Sand progressively through the grits, coarser for PETG than PLA given its greater paint resistance. Prime with a plastic-specific filler primer in thin, even coats, letting each fully cure. Choose acrylic for the most forgiving and widely compatible result, or a compatible spray system if a specific finish demands it — avoiding solvent-heavy products applied directly to bare PLA or PETG. Apply colour in thin mist coats rather than heavy single passes. Respect the hot-over-cold layering rule if mixing paint chemistries on the same piece. And ventilate properly throughout, treating this as seriously as any other solvent-adjacent workshop task. Done properly, both PLA and PETG take paint to a genuinely professional standard — the plastic is not the limiting factor here. The prep work is.
The PETG 220-grit scuff-before-primer note is the part most people skip, then blame the paint. PLA is pretty forgiving once a filler primer is on it; PETG really does need that extra mechanical tooth or the first knock flakes a corner. Hot-over-cold is the other trap. I wrinkled a lacquer topcoat over still-gassing acrylic exactly the way this describes, last hour of the job. If you mix systems, lacquer first, fully cured, then acrylic detail; otherwise pick one chemistry and stay there. Thin mist coats also save generated figurine work where AMS cannot do weathering or a metallic edge. For prompt-to-print STLs (luphra.com), layer lines disappear under primer a lot faster than people expect if you do not dump a thick first pass into the recesses.