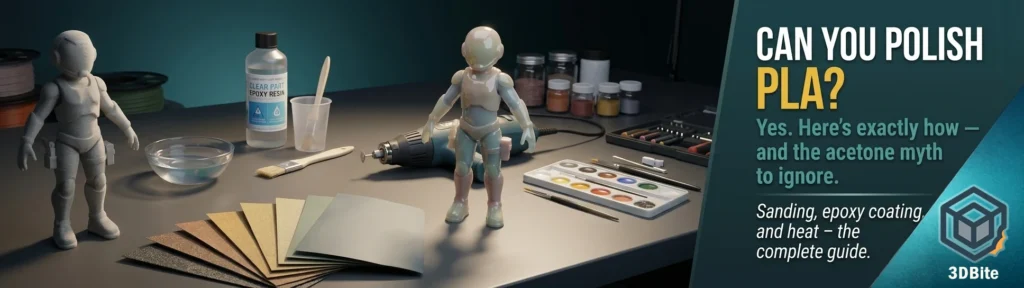
Yes, you can absolutely polish PLA to a smooth, glossy, layer-line-free finish. The bit that trips people up before they even get started is a piece of advice that circulates constantly and is simply wrong: acetone vapour smoothing, the technique that works so well on ABS, does not work on PLA. Search this topic and you will find a genuine split in what gets written about it — plenty of older tutorials describe an acetone vapour bath for PLA as though it were standard practice, while the chemistry and the more careful, recently published guides all agree it does not actually smooth the surface. PLA and acetone simply do not react the way ABS and acetone do. Getting this cleared up first matters because attempting it wastes a print, and possibly ruins one that was otherwise fine.
Why acetone works on ABS and not on PLA
Acetone vapour smoothing works on ABS because acetone is genuinely a solvent for that specific polymer — it partially dissolves the ABS surface, and as the plastic re-solidifies, the layer lines melt into each other and the surface levels itself out. This is real, well-documented chemistry, and it is why ABS smoothing tutorials are consistently reliable.
PLA has a fundamentally different chemical structure, and acetone simply does not dissolve it the same way. Exposing PLA to acetone vapour does not produce a smooth, melted surface. At best it does nothing useful. At worst, prolonged exposure leaves the surface gummy, tacky, or unevenly softened without actually levelling the layer lines, and can leave the part more brittle than before treatment. If you have seen a tutorial describing an acetone vapour bath for PLA, treat it as outdated or simply incorrect rather than an alternative technique worth trying — the more rigorous guides published in the past two years are consistent and unambiguous on this point.
Genuine chemical solvents for PLA do exist — ethyl acetate and tetrahydrofuran (THF) both have some documented effect on PLA’s surface. Both are considerably harder to source safely than acetone, more hazardous to handle, and the chemical smoothing route is described consistently across the more careful guides as difficult to control — easy to over-expose a part and turn fine detail into a featureless blob. Given that reliable, controllable, and genuinely safer alternatives exist and produce excellent results, chemical vapour smoothing is not the recommended route for PLA in this guide, and is not something to attempt without serious research into ventilation and chemical handling first.
The reliable method: progressive sanding
This is the technique that every credible source converges on as the safest and most controllable route to a genuinely polished PLA surface, and it is the one already referenced across several posts on this site — the same wet-sanding progression covered in the transparent printing guide for achieving clarity on PETG applies to PLA polishing with the same underlying logic.
Step 1: Assess and prep
Remove any support material, clean up stray strings with the technique covered in the heat gun guide, and identify any layer shifts, blobs, or genuinely deep defects that sanding alone will not resolve efficiently. For anything with a significant gouge or void, filling with an epoxy putty or a specific gap-filling primer before sanding saves considerable time compared to trying to sand a deep defect flat.
Step 2: Coarse sanding — 150 to 220 grit
Start with a coarse grit in this range and work in circular motions, rubbing against the grain of the visible layer lines rather than along them — the layer ridges are more efficiently knocked down by a sanding motion that crosses them rather than tracks parallel to them. This stage is doing the heavy lifting: removing the actual height of the layer lines rather than just polishing what is already there. Expect this to take genuine time on anything larger than a small figurine — this is the labour-intensive part of the process that every guide is honest about.
Step 3: Progressive fine sanding — 400, 600, 800 grit
Move through each grit in sequence rather than skipping steps — each grit’s job is to remove the scratch pattern left by the previous, coarser grit, and skipping a step leaves visible scratches that the next finer grit cannot fully erase on its own. Switch to wet sanding for this stage: keep the sandpaper and the part surface wet with water throughout. This serves two purposes — it prevents the friction heat that dry sanding generates from softening and re-deforming the PLA surface (a genuine risk given how low PLA’s glass transition temperature is, as covered in the hot weather post), and it flushes away the fine plastic dust that would otherwise clog the sandpaper and reduce its effectiveness.
Step 4: Final polish — up to 2000-3000 grit
For a genuinely glass-like, high-shine finish, continue the wet sanding progression up to 2000 or even 3000 grit. At this stage, the sandpaper is doing very little material removal and is instead refining the surface to an increasingly fine, even texture. A final pass with a plastic polishing compound or automotive buffing compound on a soft cloth or buffing wheel brings out genuine gloss. This final stage will not remove any remaining deep ridges or defects — those need to be addressed at the coarse sanding stage — but it transforms an already-smooth matte surface into a properly polished, reflective one.
The alternative or complementary method: epoxy resin coating
This is the method that consistently gets described as the most effective route to a genuinely glass-like finish with meaningfully less manual labour than sanding alone, and it is worth understanding as a complement to sanding rather than strictly an alternative. A two-part clear epoxy — Smooth-On XTC-3D and ArtResin are the two names that come up repeatedly — brushed or poured thinly over a printed surface flows into the valleys between layer lines through capillary action, filling them, then self-levels and cures into a hard, glass-smooth shell.
The practical process: mix the two-part epoxy according to the product’s specific ratio and working time, apply a thin, even coat with a brush (thin coats specifically to avoid drips and to preserve fine surface detail rather than drowning it under a thick pooled layer), and let it self-level and cure fully before handling. For a print with only mild layer lines, a single thin coat can produce a genuinely smooth, glossy result on its own. For a print with more pronounced surface texture, a light sanding pass first — enough to knock down the highest points of the layer ridges — followed by the epoxy coat produces a better final result than epoxy alone, since the resin has less height differential to fill and levels more completely.
The genuine advantage of this method is speed relative to full progressive sanding — a thin epoxy coat achieves in one application what a full 150-to-3000-grit sanding sequence takes considerably longer to achieve manually. The trade-off is that epoxy adds a small amount of dimensional thickness to the part, which matters for anything with tight-fitting mating surfaces or precision tolerances, and it is a genuinely separate material bonded to the surface rather than the PLA itself being polished — worth knowing if the finished part needs to remain purely PLA for any reason, food-adjacent display use being the obvious example covered in the food safety post, where an epoxy coating changes the surface chemistry entirely and any food-contact assumptions about the underlying PLA no longer apply.
The heat gun method: fast but riskier
The heat gun guide already covers surface smoothing as one of several genuine uses for the tool, and the same technique applies here as a faster alternative to sanding for larger prints or complex geometry where full manual sanding would take a long time. A heat gun on a low setting, held a few inches away and kept moving continuously, softens the surface enough for the layer lines to blend into each other without fully melting the model’s shape. This method is genuinely faster than sanding for large surfaces, but it carries real risk with PLA specifically — PLA’s low glass transition temperature means the margin between “softening enough to blend layer lines” and “visibly deforming the part” is narrower than with ABS. The guidance from the heat gun post applies with extra caution here: light sanding afterward is usually still needed to achieve the best final result, and this method benefits from practice on a sacrificial test piece before attempting it on a print that matters.
Choosing the right method for the job
Sanding and priming is the gold standard for functional parts where dimensional accuracy genuinely matters — for anything that needs to fit against another component to within a fine tolerance, manual sanding offers the precision to target specific high spots without disturbing the geometry elsewhere, in a way that a chemical or heat-based method cannot match. It is labour-intensive, but it is the method with the most control.
Epoxy resin coating is the right choice for cosmetic and display pieces where a genuinely glass-like, high-shine finish is the goal and a small amount of added dimensional thickness is not a concern — the seasonal builds and figurines that make up a large share of what actually gets printed here are a good match for this method specifically, particularly on pieces destined for a shelf rather than an assembly with tight fits.
Heat gun smoothing suits large or geometrically complex prints where full sanding coverage would take a genuinely long time, provided you accept the higher risk of surface deformation and are prepared to finish with light sanding regardless.
The honest summary
PLA polishes to a genuinely excellent, professional-looking finish — the “PLA can’t be smoothed like ABS” framing that sometimes circulates undersells what is actually achievable. What PLA cannot do is the specific acetone vapour bath trick that makes ABS smoothing comparatively effortless. Once that specific expectation is corrected, progressive wet sanding through to a high grit, an epoxy resin coat, or a careful heat gun pass — used individually or in combination — all produce results that stand up well against the layer-line-free surface people assume only resin printing can achieve.