
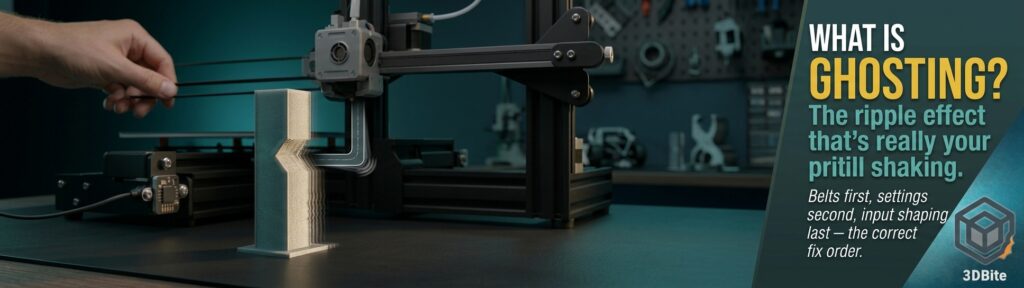
Pull a print off the bed, look at it under a raking light, and you spot a faint series of ripples trailing behind a corner or a raised letter — like an echo of the shape repeated fainter and fainter as it fades into the surrounding surface. That is ghosting, also called ringing, and it is one of the most common and most misunderstood print quality problems in FDM. It looks mysterious the first time you see it. It is not. It is your printer’s frame, physically, still shaking slightly after the toolhead has already moved on, and every ripple you see is the nozzle recording that shake directly into the plastic. This post covers what is actually happening, how to diagnose it properly rather than guessing, and the correct order to fix it in — because fixing it in the wrong order wastes far more time than the problem itself deserves.
What is actually happening, mechanically
When the toolhead reaches a sharp corner or a raised feature, it has to decelerate, change direction, and accelerate again — often within a fraction of a second. The toolhead, the belts, and the frame all have mass, and mass resists sudden changes in velocity. When the printer commands a sharp direction change, the physical structure does not stop instantly with it; it overshoots slightly, then oscillates back and forth a few times before settling, exactly like a plucked guitar string ringing after being struck. If that oscillation happens to match — or resonate with — the natural vibration frequency of the printer’s own frame, the effect amplifies rather than damping out quickly, and the nozzle keeps depositing plastic while it is still physically wobbling. Each little wobble becomes a visible ripple frozen into the surface, and because the oscillation decays gradually, you see a fading series of ripples rather than a single blip — hence “ghosting,” an echo of the corner repeated fainter each time.
This is worth distinguishing clearly from a related but different fault: layer shifting. Ghosting is a surface ripple — a cosmetic wave pattern that follows the print’s actual intended geometry closely, just with a faint echoing texture layered on top. Layer shifting is a genuine mechanical failure — a skipped step, a slipped belt, or a jammed axis — that produces a hard, visible offset where everything above a certain layer has shifted bodily to one side relative to everything below it. If what you are looking at is a clean, sharp step rather than a fading ripple, that is a different problem with a different cause, and the fixes in this post will not address it.
Diagnose first: is this actually ringing?
Before adjusting anything, print a proper ringing test tower rather than guessing from a finished model. A ringing tower is a simple test shape — usually a rectangular or cylindrical tower with a bump or notch at one height — specifically designed to trigger a sudden direction change and show the resulting echo pattern clearly on an otherwise plain wall. Klipper’s own documentation, which many machines’ underlying motion systems trace back to, uses this exact test as its standard calibration reference: a suggested layer height around 0.2-0.25mm and an outer perimeter speed of roughly 80-100mm/s for the test specifically, since the goal is to provoke and clearly show the ringing rather than to represent your normal print settings.
Genuine ringing produces a specific, recognisable pattern: a series of ripples following the curved or corner shape of the notch, fading in amplitude as they move away from the trigger point. If the pattern you are seeing on your test print does not follow that curved, decaying pattern — if it looks more like random roughness, a consistent texture across the whole surface, or a repeating pattern that does not fade — the defect you are looking at is probably something else entirely: under-extrusion, a partially worn nozzle as covered in the nozzle wear post, or cooling inconsistency rather than true mechanical ringing. Confirming the pattern actually matches ringing’s specific fingerprint before spending an evening adjusting belts and acceleration values is worth the ten minutes a test tower takes to print.
The correct order to actually fix it
This is the point that every serious source on this topic agrees on and that a lot of quick-fix guides skip past: check mechanical causes first, then tune motion settings, and only then reach for input shaping as the final refinement. Input shaping is a genuinely powerful compensation tool, but it is compensating for a specific, measured vibration frequency — and if your belts are loose, your frame is wobbling on an unstable table, or your carriage mass changes because you swap a hotend, the frequency you tuned for last month is no longer the frequency your printer actually produces today. Tuning input shaping before fixing the mechanical causes underneath it means tuning for a moving target, and any mechanical change afterward can silently undo the calibration. Fix the physical machine first. Calibrate the software compensation last.
Step 1: belt tension — the most common actual cause
Loose belts cannot properly transmit and damp the toolhead’s motion — they flex and lag slightly rather than moving in lockstep with the motor, which directly amplifies oscillation rather than resisting it. Over-tight belts cause the opposite problem: excess stress on bearings and pulleys, and a shifted resonance frequency that can introduce ringing at a different, unexpected point in the speed range. The commonly cited test across every source researched for this post is the same: a belt should sound like a low, taut bass note when plucked, not a slack thud and not a high, over-strained twang. Some machines expose a numeric tension reading through HMS or an equivalent monitoring system — the A1 and A2L both check belt tension automatically via vibration frequency, as covered in the maintenance guide, and following that prompt when it appears addresses this specific cause without any manual guesswork.
Older belt-driven printers using the wider 3mm-pitch GT belts are meaningfully more prone to resonance artefacts than modern machines using the 2mm-pitch GT2 standard that the A1, A2L, and most current hardware use. If you are troubleshooting ringing on an older, inherited, or budget machine specifically, checking which belt pitch it uses is worth doing before assuming the fault lies purely in tension or settings.
Step 2: frame stability and the surface it sits on
This is the cause that gets underestimated most consistently, and it is genuinely one of the cheapest fixes on this whole list. A printer is, in practice, a precision vibration-generating machine, and the surface it sits on either absorbs that vibration or feeds it straight back into the frame. A hollow desk, a wobbly table, or a shelf that flexes under the printer’s own weight all amplify ringing regardless of how well-tuned the belts and settings are. Anti-vibration pads — simple rubber or silicone feet, a few pounds for a set — decouple the printer’s own vibration from whatever surface it sits on, and multiple sources report this as producing a genuinely noticeable improvement on its own, particularly on a hollow or lightweight desk. A heavier, more solid surface underneath the printer — a slab of paving stone with a foam or rubber mat beneath it is the specific trick that comes up repeatedly across current guides — adds mass that resists transmitting vibration in the first place. Loose frame bolts on the printer itself are worth checking at the same time; a frame that flexes internally introduces the exact same problem that a wobbly table does, just at a smaller scale.
Step 3: reduce mass on the moving carriage where practical
The heavier the toolhead or bed that has to decelerate and re-accelerate at every corner, the more force is involved in that direction change, and the more vibration energy gets generated and needs to dissipate afterward. This is precisely why direct-drive extruders — which carry the extruder motor on the moving carriage rather than mounting it off to the side with a Bowden tube — tend to be more susceptible to ringing than Bowden setups, and why adding a direct-drive conversion to a printer that did not previously have one can introduce new ringing that was not present before, simply because the moving mass has increased. This is not a reason to avoid direct drive — the printability benefits, particularly for flexible filaments as covered in the TPU grades post, are real. It is a reason to expect that a heavier toolhead configuration may need somewhat more conservative speed and acceleration settings to compensate, rather than assuming identical settings will produce identical ringing behaviour across two different hardware configurations.
Step 4: speed, acceleration, and jerk — the fastest manual fix
Once the mechanical causes above are ruled out or addressed, motion settings are the next lever, and they are genuinely the fastest thing to test — a settings change and a reprint, no tools required. Reducing outer wall and perimeter print speed specifically — down toward 40-60mm/s as a starting test range — is the single quickest diagnostic and fix: if ringing disappears at a meaningfully lower speed, the cause is confirmed as motion-related rather than a genuine mechanical fault, even if you ultimately want to run faster for the rest of the print. Acceleration is the more direct lever for ringing specifically, since it controls how abruptly the direction change itself happens — reducing to somewhere in the 500-1500mm/s² range as a conservative starting point tends to resolve a meaningful proportion of ringing on its own. Jerk (or the equivalent junction deviation setting on newer firmware) governs how much instantaneous velocity change is allowed at a corner without any acceleration ramp at all, and reducing it alongside acceleration compounds the improvement.
Step 5: input shaping — the calibrated finishing touch
Input shaping (sometimes called vibration or resonance compensation) is firmware-level correction that measures the actual resonant frequency of each axis and then deliberately shapes the motion commands sent to the motors so that the printer’s own vibration at that specific frequency is electronically cancelled out, rather than being left to ring on its own after every direction change. It is supported in Klipper and in some Marlin implementations, and Bambu’s own machines run a version of this automatically as part of their pre-print calibration sequence — the A1 and A2L both perform vibration compensation before every print without any manual accelerometer setup required, which is one of the reasons ringing tends to be a smaller everyday problem on these machines than on an unconfigured open-source printer straight out of the box.
For machines where input shaping requires manual calibration — most Klipper builds specifically — the process uses an ADXL345 accelerometer mounted rigidly to the toolhead, running a frequency sweep test while the firmware measures the actual resonant frequency of each axis independently, since the X and Y axes virtually always have different mass and belt paths and therefore different resonance. The single most common mistake in this calibration process, flagged specifically and repeatedly in dedicated guides, is mounting the accelerometer with tape or a zip tie rather than a rigid screw mount or a press-fit holder — a loosely mounted sensor rattles at its own frequency rather than measuring the printer’s actual vibration, and the resulting calibration tunes the printer for a frequency that does not exist. The sensor should not wiggle at all when nudged with a fingertip; if it does, the calibration data from that mount is unreliable regardless of how carefully the rest of the process was followed.
The other genuinely important point about input shaping, worth repeating because it explains why “just turn on input shaping” is not a universal cure: it is a compensation tool, not a substitute for the mechanical fixes above. It corrects for a specific measured vibration profile — change the belt tension afterward, add a heavier hotend, or move the printer to a different table, and the profile it was tuned against has shifted, meaning the compensation it applies is no longer accurate for the machine’s new physical state. Resonance and input shaping settings are genuinely printer-specific and even axis-specific; there is no universal best value to copy from another machine or another guide, and settings from a different printer generation or belt configuration should be treated as a rough starting point rather than a value to copy verbatim.
The full settings checklist
| Step | What to check | Target / test |
|---|---|---|
| 1. Confirm it is genuine ringing | Print a ringing test tower | Look for fading ripples following a corner or notch, not random texture or a clean offset |
| 2. Belt tension | Pluck test on X and Y belts | Low, taut bass note — not a slack thud, not a high strained twang |
| 3. Frame and surface | Check frame bolts; check the table or desk the printer sits on | No visible flex under hand pressure; consider anti-vibration pads or a heavier base if the desk is hollow or wobbly |
| 4. Toolhead mass | Note any recent hotend or direct-drive upgrades | Heavier toolheads may need more conservative speed/acceleration to compensate |
| 5. Print speed | Reduce outer wall / perimeter speed as a diagnostic | Test at 40-60mm/s — if ringing disappears, cause confirmed as motion-related |
| 6. Acceleration | Reduce printer or per-feature acceleration | Test in the 500-1500mm/s² range as a conservative starting point |
| 7. Jerk / junction deviation | Reduce alongside acceleration | Lower values reduce instantaneous velocity change at corners |
| 8. Input shaping | Run resonance calibration if the firmware supports manual tuning; confirm it is already active if the machine calibrates automatically | Rigid accelerometer mount if manual; recalibrate after any belt, hotend, or table change |
A note specifically for the A1 and A2L
Both machines run vibration compensation automatically before every print as part of the standard HMS calibration sequence, which meaningfully reduces how often ringing shows up as an everyday problem compared to an unconfigured open-source printer. If ringing does appear on either machine despite that automatic calibration, the most likely causes are the mechanical ones covered in steps two through four above — a belt tension issue the HMS system has not yet flagged, an unstable desk the printer sits on, or a print running at a speed genuinely beyond what the current mechanical state can handle cleanly — rather than a failure of the automatic input shaping itself. Working through steps one to four before assuming the built-in calibration has failed is the sensible order, exactly as it would be on any other machine.
The summary
Ghosting is your printer’s frame physically ringing after a direction change, recorded directly into the plastic. Confirm it is genuine ringing with a proper test tower before assuming any specific cause. Fix belt tension and frame stability first, since these are the root physical causes that everything else compensates around rather than solves. Tune speed, acceleration, and jerk next, since these are the fastest manual levers and the best diagnostic for confirming a motion-related cause. Reach for input shaping last, as the calibrated final refinement rather than the first thing you try — and recalibrate it any time something mechanical changes, since a shaping profile tuned against yesterday’s belt tension is not tuned for today’s.
The mechanical-first order here is the part most ringing guides skip. I wasted a week retuning input shaping on a CoreXY after every filament swap, then found the X belt a half-turn loose — once tension was even and the frame was on a solid surface, the old IS profile suddenly looked fine again. A quick ringing tower at 80–100 mm/s outer walls is worth the filament before touching accel/jerk; if the ripple does not fade away from the notch, chase extrusion or cooling instead. For printable fixtures and ringing towers I generate as STLs (luphra.com), dropping outer-wall accel first (then jerk/junction) usually clears ghosts on sharp lettering without gutting print time on long straights.