Let me be clear before the first subheading: I like the AMS. I use it regularly. Having four colours loaded and ready, sending a multi-colour job from my phone without touching the machine, watching a complex figure emerge from the plate already fully coloured — all of that is genuinely good. This is not a post about the AMS being a mistake. It is a post about a specific and important truth that gets lost in the enthusiasm around automated multi-colour printing: for a meaningful category of models and situations, printing each colour separately and assembling the parts by hand produces a better result, costs less, fails less, and delivers something that the AMS approach cannot.
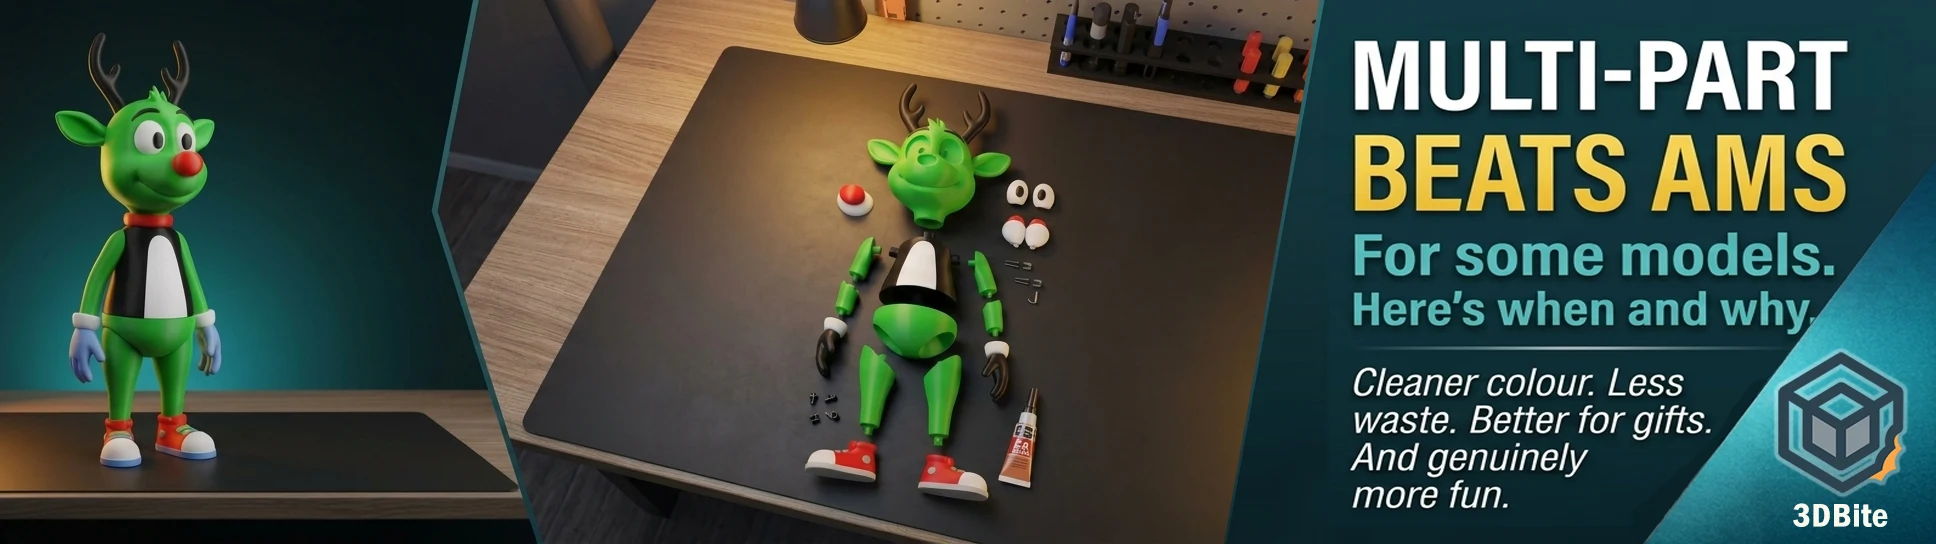
I have printed the Mario, Luigi, and Yoshi figures. I have printed ENIQUE3D’s Rudolph and the festive lampposts. I am partway through the Not-So-XL Grinch. Every one of these is a multi-part build where each colour is a separate job, the parts slot and glue together after printing, and the AMS is not involved at any stage. These are not compromise solutions for people without an AMS. They are, in most measurable ways, the better approach for this category of model. This post explains why.
What multi-part printing actually means
When a designer releases a model as “No AMS” or “multi-part,” they have done something more complex than simply exporting each colour as a separate file. They have redesigned the model’s geometry around the fact that each colour will be a separate printed part, considering how the parts will be oriented for best print quality, where the joins will fall, how the connectors will work, and how the assembly sequence will proceed. A well-designed multi-part model is not a single-piece model split into sections by colour. It is a model whose entire architecture is built around the fact that it will be assembled — with connector geometry, locating features, and join placement all considered as part of the design.
ModelLover’s Super Mario series on MakerWorld — the source of the Mario, Luigi, and Yoshi figures — is the clearest example of this from my own printing. Each figure is a designed assembly. The separate body sections are not arbitrary splits — they are designed to produce the cleanest possible surface on each colour zone when printed individually, to join at locations where the seam is least visible in the finished figure, and to create a strong enough mechanical join that the assembled figure can be handled without concern. The design work that enables this is considerable, which is partly why ModelLover’s consistent quality across the series is worth both the boost on MakerWorld and the active appreciation of the community that downloads these files.
Waste reduction: the most quantifiable advantage
The AMS waste arithmetic is documented extensively on this site — in the AMS reality check post, the prime tower waste guide, and the tool changers post. The short version: every colour change on a single-nozzle AMS system requires flushing the previous colour from the shared melt zone, and that flushed material is waste. On complex prints with many colour changes, the waste can be substantial — community testing has documented cases where the purge material outweighed the finished model.
Multi-part printing generates zero purge waste. Each colour job is a single-colour print with no colour changes. There is no prime tower. There is no purge chute. The only material consumed is the material in the model itself. On a five-colour figurine with hundreds of colour change layers, the difference between the AMS approach and the multi-part approach in terms of total filament consumed is not marginal — it is transformative. The Mario figure, printed as five separate colour jobs, consumed approximately the weight of the finished model in filament. The same result printed on the AMS would have consumed the model weight plus the purge material for several hundred colour changes across the height of the figure.
At eSun PLA+ prices of £13 per kilogram, the material saving on a single complex figure might be £1–£3. That sounds minor in isolation. Across a year of regular multi-colour printing — seasonal pieces, figurines, gift projects — it adds up to a meaningful saving. More importantly, it represents material that produced something useful rather than being binned. The economics argument for multi-part is not dramatic per print. It is consistent across every print of this type, and it compounds.
Colour separation: why multi-part looks cleaner
This is the advantage that is hardest to quantify and most immediately visible in the finished print. On an AMS multi-colour print, colour transitions happen at the layer boundary — the change occurs when the AMS switches filament between one layer and the next. The physical reality of that transition, even with well-optimised purge volumes, is that the boundary between colours is a layer line. There is a potential for very slight colour bleed at that boundary, a slight softening of the colour edge, and the characteristic layer line texture that FDM produces.
On a multi-part print, colour boundaries are physical geometry. The red of Mario’s jacket ends where the white of his gloves begins because those are two separate printed parts with a physical join between them. The boundary is as crisp as the part geometry and the assembly precision allow — which is very crisp if the designer has done their job and you have done yours during assembly. There is no purge bleed. There is no layer-line texture at the colour boundary. The colour separation is clean in a way that AMS printing structurally cannot match, because the AMS is working with a layer-by-layer constraint and the multi-part approach is working with physical geometry.
The practical effect on completed figures is visible and significant at normal display distance. Side by side, a carefully assembled multi-part Mario and an equivalent AMS-printed Mario do not look like the same print. The multi-part version has sharper colour definition at every boundary. The gloves read as white. The jacket reads as red. The transition between them is a clean geometric edge. The AMS version’s equivalent transitions have a slight softness — a zone of mixed colour that the printer could not avoid producing even with optimal settings. This is not a failure of the AMS. It is a consequence of how single-nozzle colour changing works. The multi-part approach simply sidesteps the constraint entirely.
Orientation freedom: each colour in its optimal orientation
This advantage is less discussed than waste and colour separation but it has significant practical impact on print quality. When a multi-colour model is printed as a single AMS job, the entire model must be oriented to a single position on the build plate. That orientation is a compromise — some colour zones will be printing in their optimal orientation and others will not.
A figurine printed in a single AMS job is typically oriented vertically — the figure stands upright on the plate and grows layer by layer. This is correct for the body sections, which are roughly cylindrical and print well upright. It is less ideal for the face, which has horizontal features — the brim of a hat, the underside of a chin, the horizontal eye detail — that would print with better surface quality face-up. It is actively poor for shoes or boots, whose flat soles would print perfectly as the base of a separate job but print as the very top layers of a vertical figure with visible layer lines on the most visible flat surface.
Multi-part printing lets each piece find its optimal orientation. The boot parts print sole-down on the build plate, producing a perfect smooth PEI surface on the part that will face outward in the assembled figure. The hat prints brim-down, with its complex geometric features supported properly by the build plate rather than hanging in mid-air over the figure’s head. The face details print in the orientation that makes supporting their geometry trivial rather than requiring complex support structures. Each part is designed and printed to produce its best possible surface on the faces that matter, in an orientation that makes support minimal.
Repairability: the advantage nobody thinks about until they need it
Printed display pieces get handled, moved, displayed on shelves, transported to give as gifts, and occasionally dropped. The Rudolph on our Christmas tree has been handled by multiple people. The Mario figure on my godson’s shelf has been picked up and put down hundreds of times by a child. These are not objects living in a glass case. They are objects that exist in the physical world and experience the physical world’s consequences.
A single-piece AMS print that breaks is, in most cases, finished. Depending on where the break occurs, repair may be possible with glue and patience, or the break may involve too many small pieces in too complex a geometry to reconstruct. More practically, a break in an AMS print often occurs at a layer boundary that was already a weak point — and repairing a layer-boundary failure means either accepting the repair line or reprinting the entire piece, which means another full AMS job with all of its associated waste and time.
A multi-part printed figure that breaks almost always breaks at a joint — the connection between two parts. This is the weakest point in the assembly, and it is designed to be a point of connection rather than a monolithic piece of material. Repairing a broken joint means applying fresh CA glue to two flat surfaces and pressing them together. It takes sixty seconds, is nearly invisible in the finished repair, and the result is often stronger than the original joint because the glue fills any gap that the original assembly left. More importantly, if a specific part is damaged badly enough to need replacement — the nose snapped off, a small detail broken away — reprinting a single colour job for just that part takes a fraction of the time and cost of reprinting the entire figure. The modularity of the multi-part design is also a modularity of repair.
This repairability advantage is particularly relevant for printed gifts — especially gifts for children. A child who receives a Mario figure is going to handle it. Accepting that possibility means accepting that joints might give way eventually, and the multi-part design means that outcome is a five-minute repair rather than a ruined gift. I have repaired the Yoshi figure’s arm joint twice. Both repairs took less time than it would have taken to reprint anything.
Scalability: the advantage that grows with print volume
Build volume constraints affect AMS and multi-part printing very differently. An AMS single-piece print is limited by the build plate in all three dimensions simultaneously — the finished model must fit within 256mm in every direction on the A1. For many decorative models this is adequate. For large seasonal pieces, detailed large-scale figurines, and architectural display models, it is a meaningful constraint.
Multi-part printing handles build volume constraints elegantly. The Grinch build from ENIQUE3D assembles to 68cm tall. No single part of that figure exceeds the A1’s build plate. The parts that make up the body are individually small enough to print two or three per plate. The assembly produces a finished piece at a scale that is simply not achievable as a single AMS job on a standard A1. This is not a workaround. It is the intended use of the design — the designer built the model specifically to be assembled, with scale as a design goal that multi-part enables and single-piece printing precludes.
The Rudolph figure stands similarly tall. The festive lampposts reach heights that would not fit on the A1 plate by a significant margin. In every case, the multi-part design is what makes these scales achievable on accessible hardware. Owning a machine with a larger build plate — which I am actively considering in the form of the A2L — would reduce this constraint but not eliminate it. Models designed at the scale of the Grinch would still require assembly on any machine that fits on a normal desk.
Scalability also applies in a different sense: printing multiple copies. When the Mario figure was such a hit that a second one was requested — by a different family member who saw the first — printing a second copy as a multi-part build means simply running the same colour jobs again. No new file preparation, no new slicer work, no AMS setup changes. The job queue is the same as the first run. For any model that becomes a regular gift — which seasonal pieces and character figures tend to become — the multi-part approach’s repeatability is a practical advantage over the single-piece approach’s one-time setup.
The two-printer benefit: parallel colour jobs
The Yoshi build was the first project where having a second printer on the desk produced an obvious practical benefit, and it pointed to something broader about how multi-part printing scales with hardware. The A1 ran the green body sections while the Kobra X ran the white underbelly and eye components simultaneously. The two colour jobs that could run in parallel did run in parallel, reducing the overall build time considerably compared to running everything sequentially on a single machine.
An AMS single-piece print cannot be parallelised in this way. A single AMS job on a single machine runs from start to finish, and a second machine cannot contribute to it. Multi-part printing’s individual colour jobs are independent — any of them can run on any compatible machine with the right filament loaded. Two machines printing different colour jobs simultaneously is genuinely more efficient than one machine printing all colours sequentially, and the workflow is simple enough that managing it adds no meaningful overhead. The multi-part approach scales naturally with hardware in a way that single-piece printing does not.
The kit-form experience: why assembly is a feature not a bug
There is something that the language around multi-part printing consistently undersells, and it is the experience of the assembly itself. Building a multi-part figure from individually printed colour components is satisfying in a way that watching an AMS plate complete is not. It is more active, more tactile, more engaged. The figure emerges gradually through a physical act of construction rather than appearing fully formed from the plate.
The Airfix comparison is apt. Airfix model kits — the plastic scale models that have been a staple of the hobby market for decades — are entirely capable of being manufactured as pre-assembled, pre-painted finished products. They are not. They are sold as kits because the assembly process is part of the value. The satisfaction of building something, following a sequence of steps, holding each new completed sub-assembly, and seeing the finished model emerge from the process is the experience that buyers are paying for. The finished Spitfire sitting on the shelf means something different if you assembled it yourself than if you bought it assembled.
Multi-part 3D printing offers exactly this experience. The completed Mario figure on my godson’s shelf is not just a colourful toy. It is a thing that was made — assembled, glued, held, turned over to check the joins, displayed with the satisfaction of having built it. The child who received it knows that it was made specifically for him, and that knowledge is not abstract. It is embedded in the object, which is clearly constructed rather than manufactured. The assembly marks are not flaws. They are evidence of making.
For gifted prints specifically, the multi-part approach also opens a possibility that single-piece printing does not: giving the assembly as an experience rather than the finished object. A set of printed parts, packaged thoughtfully with a small tube of CA glue and a brief assembly guide, is a maker’s gift — something to be built as well as owned. For the right recipient, particularly young people who enjoy models and making things, this is a better gift than a finished figure. It is participatory. The recipient builds their own version of the thing, and their finished figure is theirs in a more active sense than something that arrived complete.
The failure mode comparison: what happens when things go wrong
This is the advantage that becomes most visible at the worst possible moment. An AMS print that fails mid-job — a filament tangle at the 60% mark of a complex multi-colour figure, a slicer error that causes a layer shift at the waist of a five-hour figurine — is a complete loss. Five hours of machine time, the purge material, the filament in the model up to the failure point, and the emotional investment in a project that came close to completing. Starting over means the full job again.
A multi-part print that fails loses one colour job. The failure is contained within the specific plate that failed, because each colour job is independent. The green Yoshi body that delaminated at layer 45 is one job on one plate. The white underbelly running simultaneously on the other machine was unaffected. Reprint the failed job, continue with the assembly using the successful parts. The loss is proportional to the size of the failed job, not the size of the total project.
This failure mode difference becomes more significant as the total complexity of the project grows. A single-piece AMS print of the Grinch would be an enormous investment of time in a single print job — any failure at any point in that job loses everything. The multi-part Grinch distributes that risk across dozens of smaller, independent jobs. If the hat print fails, I reprint the hat. The thirty other jobs that have completed successfully are unaffected. This is a real and practical advantage for anyone printing large, complex, time-consuming projects.
When the AMS wins instead
The case for multi-part printing is genuine and I have been making it at length. But intellectual honesty requires being clear about where the AMS approach is the better choice, because this post is not anti-AMS and the nuance matters.
Fine painted colour detail. A model with colour variation that cannot be expressed as physical geometry — spots, gradients, surface-painted patterns, micro-scale detail across a curved organic form — needs the AMS. Multi-part printing requires colour boundaries to be geometric features of the model. If the colour you need lives in the middle of a continuous surface rather than at an edge, multi-part has no solution and AMS is the only FDM approach that addresses it.
Remote print convenience. The AMS’s single-job workflow is what enables setting a print from a phone and walking away. Multi-part printing requires managing a sequence of jobs — loading each colour, running each job, keeping track of what has been printed and what remains. This is manageable for someone who is present and engaged with the project. It is not the right approach for unattended remote printing where simplicity and reliability are the priority.
Models without good non-AMS alternatives. MakerWorld’s model library is heavily weighted toward AMS-optimised files because the AMS is what most of its users have. For many models, a well-designed non-AMS version simply does not exist, and creating one would require more design work than is practical. If you want to print a specific model and it only exists in an AMS-optimised format, the AMS is the path of least resistance.
Speed for repeat volume. If you are printing the same multi-colour model repeatedly — a production run of ten copies of the same figurine — the AMS’s one-plate-per-job approach may be faster in total time than the multi-part approach’s sequential colour jobs, depending on the model’s complexity and colour structure. The multi-part approach’s per-unit efficiency advantage is strongest on single copies and complex colour structures.
How to identify a model that suits multi-part printing
Not every multi-colour model is better served by multi-part printing, and not every designer provides a non-AMS version. These are the signals that a model is a strong candidate for the multi-part approach.
Clear geometric colour boundaries. If the model’s colours are cleanly separated at surface features — a jacket that is a distinct geometric form from the figure beneath it, boots that are clearly separate pieces from the trousers, a hat that has its own geometry rather than being a colour painted onto the top of a head — then multi-part printing can express those boundaries perfectly without any compromise. Flat transitions, clean edges, and geometric separation are the design features that multi-part handles best.
Large scale. Any model whose intended display size exceeds the build plate of your machine is automatically a candidate for multi-part printing, because single-piece printing is not an option at that scale regardless of AMS capability. The scaling potential of multi-part assembly is the primary reason that impressive large-scale seasonal builds like the Grinch and Rudolph are designed as assembly models rather than single-piece prints.
Gift or display use. Models that are going to be handled, displayed, transported, or given to people who will interact with them physically benefit from multi-part repairability. A display piece on a shelf benefits from the cleaner colour separation. A gift benefits from the assembly experience. Both of these factors apply to the seasonal builds and character figures that make up a large proportion of hobbyist printing for non-technical purposes.
Designer investment in assembly quality. ENIQUE3D and ModelLover — the two designers whose multi-part builds I have printed most extensively — have both invested heavily in making the assembly experience as good as the print experience. ENIQUE3D’s connector systems, dry-build documentation, and part identification guides are as considered as the model geometry. ModelLover’s eye locating pins and the careful colour zone geometry across the Mario series represent real design effort in the assembly direction. When a designer has made this investment, the multi-part print is better precisely because the assembly was a design goal rather than an afterthought.
The bottom line
The AMS is a brilliant piece of hardware that changed what desktop FDM printing can do for a large population of users. Multi-part printing is a design approach and workflow that, for a specific and important category of models, produces better results — in colour definition, in scale, in repairability, in waste efficiency, and in the satisfaction of the assembly experience — than the AMS can match.
These are not competing philosophies. They are different tools for different jobs. A workshop with both the AMS and the knowledge of when to bypass it entirely is better equipped than one that defaults exclusively to either approach. The Mario figure on my godson’s shelf is better for being built rather than printed whole. The remote print I sent from my phone last week is better for being an AMS job rather than requiring me to be present for a sequence of colour jobs. Both things are true. Neither approach wins unconditionally.
What matters is knowing which one to reach for when. For large seasonal builds, character figures with clean geometric colour zones, prints that need to survive handling, prints that will be given as gifts, and prints that would exceed the build plate as a single piece — reach for the multi-part approach. For fine painted detail, remote printing convenience, and models where no good non-AMS version exists — reach for the AMS. Use both deliberately and you are using both correctly.