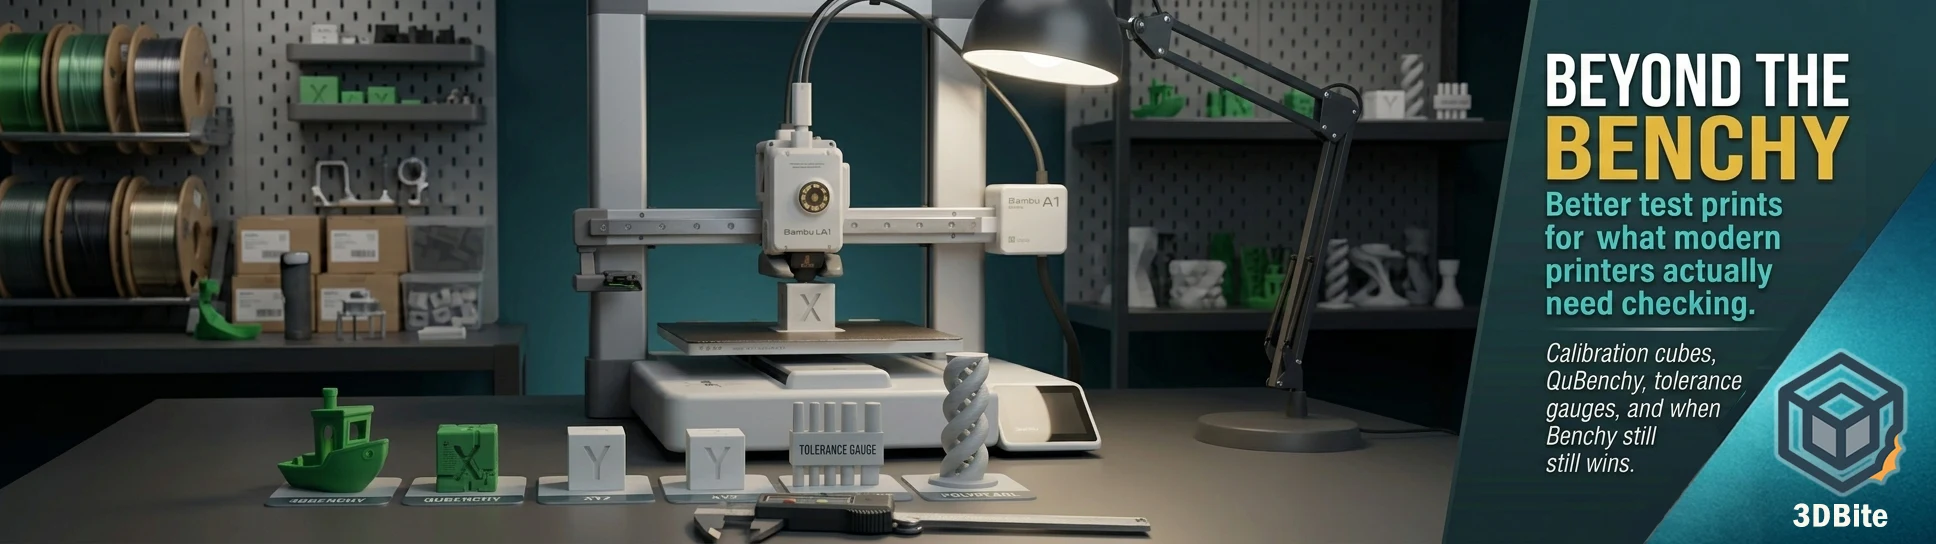
Benchy has been the default test print for so long that printing one is treated almost as a rite of passage — unbox a new machine, print a Benchy, post it online. As of February 2025, the model was formally released into the public domain by Creative Tools, the studio that designed it, which if anything has cemented its status further. But it is worth asking honestly whether Benchy is still the right test for what a modern machine like the A1 or A2L actually needs checking. The answer, once you dig into it, is more nuanced than either “still the gold standard” or “completely obsolete” — and there is a genuinely useful set of alternatives worth knowing about depending on exactly what you are trying to test.
Why Benchy has started to feel less useful on modern hardware
Benchy was designed to be a torture test — a single small model exercising overhangs, bridging, retraction, and fine detail simultaneously, specifically because the printers of its era struggled with all of those things and a single revealing test print was genuinely valuable. HowToGeek’s 2026 piece makes the fair point directly: with the surge of more advanced and affordable printers, any cheap, average machine can now produce a decent Benchy without much effort. A test that any reasonably competent modern printer passes easily is not doing much diagnostic work any more. Modern machines like the A1 also calibrate themselves automatically before every print — auto bed levelling, automatic first-layer calibration, vibration compensation — which removes a meaningful chunk of what Benchy was originally checking for in the first place. HowToGeek’s framing is blunt about this: you don’t really need to benchmark your printer the way you once did, at least not with the same model that was designed for a very different generation of hardware.
None of this makes Benchy useless. It remains a genuinely good print for testing overhangs, bridging, and general first-layer quality on a specific filament or after a settings change, and it will always have value as a familiar, comparable reference point — everyone knows what a good Benchy looks like, which makes it useful for troubleshooting discussions and comparing results across the community. But treating it as the single definitive test, particularly on hardware as automated as the A1 or A2L, misses a lot of what is worth actually checking.
For dimensional accuracy: the XYZ calibration cube
If there is one benchmark worth keeping in the routine even in 2026, HowToGeek’s own recommendation is the calibration cube — a simple 20mm cube with clean flat faces and precise corners. Its value is specificity: it tests almost nothing except whether the printer produces a part at the dimensions the slicer intended. Measure the finished cube with digital calipers on all three axes. If it comes out at 20.1mm rather than 20.0mm, that is a flow rate or steps-per-mm calibration issue rather than anything Benchy’s more visually complex geometry would clearly isolate. Benchy tests a dozen things at once, which makes diagnosing exactly which setting is wrong harder than it needs to be. The calibration cube tests one specific thing cleanly, which is precisely what makes it still valuable even on a self-calibrating machine — auto bed levelling does not fix an incorrect flow rate, and this is the print that reveals that specific problem.
For a genuinely comprehensive single-print test: QuBenchy
This is the most interesting entry on this list and worth genuine attention. QuBenchy was designed specifically in response to the problem described above — its creator states plainly that with the surge of more advanced printers, any decent machine can produce an acceptable Benchy, which defeats the point of a benchmark. QuBenchy packs more than 80 distinct tests and design features into a compact 3x3x3cm cube: chamfer versus fillet versus sharp edge behaviour, wall thickness variation, embossing and engraving quality, round versus polygonal shape accuracy, surface textures, overhangs at multiple angles, and considerably more, all in a single 38-minute, 11-gram print that requires no supports. It is released under a CC BY-SA 4.0 licence, explicitly permitting commercial use, remixing, and sharing.
The genuine advantage over Benchy is density of information per gram of filament and per minute of print time — QuBenchy is testing design features and edge-case geometry that Benchy’s boat shape simply does not include, at a fraction of the material cost. For anyone specifically wanting to compare printer profiles, filaments, or design choices systematically — exactly the kind of comparison this site runs regularly across the A1 and A2L — QuBenchy is a genuinely more useful reference than Benchy, and worth adding to the toolkit specifically for that comparative use case.
For quick calibration checks: Marvin and Cali Cat
Marvin is a small character model designed to be printable in quick multiples, which makes it well suited for testing a single variable across several prints — different nozzle temperatures, different speeds — without the filament cost or time investment of a full Benchy for each variation. Improvements in bridging, layer uniformity, and detail sharpness are all visible on the finished Marvins, and printing three or four at slightly different settings side by side is a genuinely efficient way to dial in a specific parameter.
Cali Cat serves a similar quick-check purpose and has been downloaded more than 400,000 times, which speaks to how widely the community has adopted it as a fast, simple test for overhangs, detail resolution, and bed adhesion on a new filament or after a settings tweak. Its main virtue is speed — a fast print that reveals bed adhesion problems and general print quality quickly, without the full commitment of a longer benchmark.
For fit and tolerance testing: a tolerance gauge
This is a category of test print that Benchy does not address at all and that matters directly for functional printing. A tolerance gauge is a small print featuring pegs and matching slots at a range of incrementally different sizes. Testing which pegs fit smoothly into which slots reveals your printer’s real-world dimensional accuracy at the tolerances that actually matter for parts that need to mate together — snap fits, press fits, assembled joints. If pegs consistently fit too tight, retraction or flow settings may be over-extruding slightly; if fits are consistently loose, the reverse adjustment applies. This is directly relevant to anything using the heat-set insert techniques covered in the inserts post or the threaded design work in the threads and screws post — both rely on printed dimensional accuracy being genuinely predictable, and a tolerance gauge is the specific print that validates whether it is.
For genuine torture testing: the PolyPearl tower and the Torture Toaster
These sit at the demanding end of the spectrum, genuinely deserving the “torture test” name. The PolyPearl Tower — described by its designer as a torture tower with a twist, literally — combines bridging, curves, overhangs, and stringing tests in a single spiralling tower shape, and is consistently cited as one of the better all-in-one tests for machines and filaments that need a genuinely thorough workout rather than a quick check. The Torture Toaster pushes small detail and difficult overhang angles specifically, testing cooling performance and retraction under genuinely demanding conditions rather than the comparatively gentle geometry Benchy presents. Both are worth reaching for specifically when qualifying a new filament, a significant hardware change, or a hotend upgrade like the E3D ObXidian covered in the nozzle size guide — situations where you genuinely want to find the edge of what the setup can handle rather than confirm it handles the easy stuff.
For moving-part and mechanism testing: Benchmark Bot
Benchmark Bot is a print-in-place model — meaning the finished print already has functioning moving joints without any assembly, straight off the plate. This tests something none of the other models here address at all: clearance tolerances for parts that need to move against each other without fusing together during printing. For anyone interested in mechanisms, articulated figures, or any print-in-place design, this is the test that reveals whether your specific settings produce clearances tight enough to look good but loose enough to actually articulate.
The HowToGeek argument worth taking seriously: skip the test print entirely
This is worth including because it is a genuinely reasonable position rather than just contrarianism. The HowToGeek piece argues that on a modern, largely self-calibrating machine, the most useful thing to print first is not a benchmark at all — it is something you actually want, on the basis that there is presumably a reason you bought the printer in the first place. A first print that is a genuinely useful functional item or a piece you are excited to make gives you real information about the printer’s out-of-box performance while also being something worth keeping, rather than a boat that exists purely to be photographed and then set on a shelf or binned.
This is not bad advice, and it reflects a genuine shift in what “testing” a modern printer actually requires. The counter-argument, and the reason a dedicated test print still earns its place even on an A1 or A2L: a purpose-built test model gives you a clean, comparable baseline before you have introduced any variables of your own — a complex or unusual first project confounds “is the printer working correctly” with “did I slice this well,” and separating those two questions is exactly what a proper test print is for. The sensible middle ground is what most experienced users actually do: run a fast calibration cube or Cali Cat to confirm the baseline is sound, then move straight to printing things you actually want, saving the heavier torture tests for genuine troubleshooting or major setting changes rather than routine use.
Which one to reach for
| What you need to check | Best model |
|---|---|
| General “is everything working” quick check | Cali Cat or Marvin |
| Dimensional accuracy after a nozzle or steps-per-mm change | XYZ calibration cube |
| Comprehensive comparison across filaments, profiles, or design features | QuBenchy |
| Fit and tolerance for functional parts that need to mate together | Tolerance gauge |
| Genuine stress test after a hotend upgrade or new material | PolyPearl Tower or Torture Toaster |
| Print-in-place mechanisms and moving parts | Benchmark Bot |
| Familiar reference point for troubleshooting help online | Benchy — still the universal comparison model |