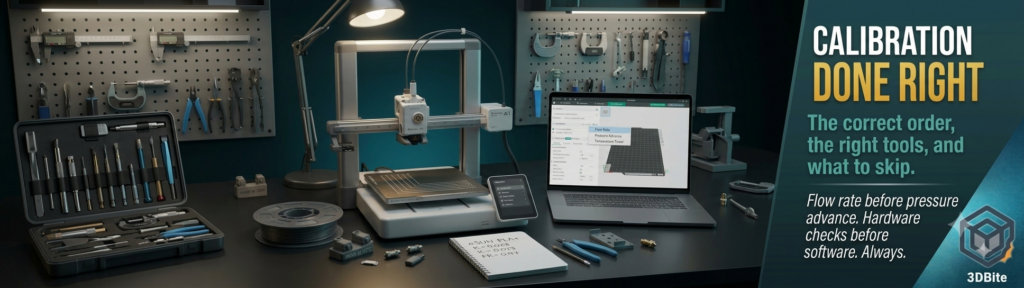
Calibration on a Bambu machine is not the same conversation it is on a Prusa or an Ender. Bambu’s built-in automation handles most of what those machines require you to do manually, and for someone printing Bambu-branded filament on a well-maintained A1 or A2L, the defaults are good enough that additional calibration produces only marginal gains. But “most” is not all, and the 20% that the automation does not cover is exactly where print quality differences between a well-tuned setup and a default one become visible — on third-party filament, on demanding surfaces, on corners and seams. This post covers what that 20% is, in what order to address it, and where each calibration actually lives in the software.
What Bambu handles automatically (and what it does not)
The A1 and A2L run an automatic calibration sequence before every print: bed levelling using a load-cell force sensor, Z offset calibration, vibration compensation, and on machines with LIDAR capability, flow dynamics calibration. The bed levelling and Z offset calibration is genuinely good on Bambu hardware — accurate, repeatable, and fast enough that running it every print adds negligible time while ensuring first-layer consistency regardless of thermal expansion or plate swap.
What the automatic calibration does not do: determine the optimal printing temperature for a specific filament, calibrate the flow rate (extrusion multiplier) for a specific third-party spool, fine-tune pressure advance for a material that behaves differently from the Bambu profile assumptions, or establish the maximum volumetric flow rate that your hotend can sustain with a given material. All four of these are filament-specific rather than machine-specific, which is why the machine cannot determine them automatically — they change every time you load a new filament type or brand. For Bambu’s own filament with RFID chips, the profile data covers these reasonably well. For eSUN, Sunlu, Polymaker, or any other third-party brand, those profiles are starting points that calibration refines.
The order matters more than most guides acknowledge
Each calibration step produces a result that feeds into subsequent steps. Running pressure advance before flow rate means your pressure advance calibration is based on an uncalibrated flow rate, which may not be accurate. Running temperature calibration last means you spent calibration time at a temperature that might not be optimal. The sequence below is the one that builds correctly: each earlier step creates a validated baseline for the next.
The full sequence for a new filament or a new brand on either machine: hardware checks, then first layer verification, then temperature, then flow rate, then pressure advance, then maximum volumetric speed. Not all five steps are needed every time — the relevant section below for each step notes when you can skip it and when it genuinely matters.
Step 0: hardware checks before any calibration
Software calibration on dirty or worn hardware produces calibration data that is specific to the current (degraded) state of the machine rather than its optimal state. A few physical checks before running calibration are worth the five minutes they take.
Clean the nozzle exterior. Burnt filament residue on the heater block or around the nozzle tip affects heat distribution in the melt zone, which introduces inconsistency that calibration cannot diagnose or correct. Heat to printing temperature and clean with a brass brush — never steel, which scratches the nozzle tip.
Inspect the build plate. A plate with contamination in the first-layer zone will produce inconsistent first-layer height readings during calibration. IPA wipe before running any calibration that involves a first-layer print — temperature towers, flow rate cubes, pressure advance patterns — and verify the surface looks clean under a raking light source.
Check belt tension via HMS. If the HMS system is showing a belt tension alert, address it before calibrating. Pressure advance calibration on a machine with loose belts produces a K value that compensates for mechanical slop as well as actual pressure dynamics — the value will be incorrect for the machine in its properly tensioned state.
Dry your filament. The single most common cause of apparent calibration failure is wet filament behaving inconsistently. If the filament has been sitting open for more than a few days, or in the AMS Lite for extended periods as covered in the workflow costs post, dry it before calibrating. Calibrating wet filament produces settings that are correct for wet filament and incorrect for everything else.
Step 1: First layer height — the foundation of everything else
The A1 and A2L run first-layer calibration automatically at the start of every print. Manual intervention is only required after a nozzle change, a build plate swap to a new type, or if the first layer is visibly wrong on a print — too high (no squish, poor adhesion) or too low (plastic being scraped up by the nozzle).
To run manual first layer calibration on the A1 or A2L: on the printer’s touchscreen, go to Calibration → Calibration Wizard → Bed Levelling. The wizard runs a full bed mesh and sets the Z offset. For a new plate type or after a nozzle change, run this before any other calibration. A Z offset that is even slightly off makes everything that follows less reliable — a first layer that is too thick deposits more material than intended, which throws off flow rate readings, and a first layer that is too thin crushes the extrudate in ways that affect pressure advance patterns.
In Bambu Studio: Calibration menu at the top → First Layer Inspection runs automatically. Manual adjustment of the live Z offset is available during the first layer of any print via the touchscreen — accessible during the print by pressing anywhere on the screen and then selecting the Z offset option.
Step 2: Temperature — only when the defaults are clearly wrong
Temperature calibration determines the optimal nozzle temperature for a specific filament — the point where the material flows consistently with minimum stringing and maximum layer adhesion. For Bambu’s own PLA Basic and PLA Matte, and for well-profiled brands like eSUN PLA+ running on the eSUN profile, the default temperatures are well-established and temperature tower calibration adds little. For silk filaments, glow-in-the-dark, and anything with an unusual formulation, a temperature tower is worth running before any other calibration — because the optimal temperature affects everything else. Calibrating flow rate and pressure advance at the wrong temperature produces results that are correct only at that temperature.
In Bambu Studio: Calibration menu → Temperature. Set the range to test — for standard PLA, 190–220°C in 5°C increments is a sensible starting range. The printer produces a tower where each segment prints at a different temperature. Evaluate for stringing (lower temperature helps), surface quality, and layer adhesion (higher temperature helps) and choose the segment that represents the best compromise. This is a visual judgement, not an automated one on the A1.
In OrcaSlicer: Calibration menu in the top bar → Temperature Tower. OrcaSlicer’s temperature tower generates automatic G-code that changes temperature at each layer transition without requiring manual G-code editing. The process and evaluation are the same as Bambu Studio — visual inspection of the finished tower and selection of the best segment’s temperature.
When to skip this step: you are printing a filament with an established named profile in the slicer and the initial test prints look clean with no obvious stringing or adhesion issues. When to run it: new filament from an unfamiliar brand, silk or specialty filament formulations, or ongoing stringing that temperature and retraction adjustments have not resolved.
Step 3: Flow rate — the extrusion multiplier
Flow rate calibration establishes how much filament the slicer should tell the extruder to push relative to the theoretically correct amount. Different filaments have slightly different actual diameters, different viscosities, and different melt behaviours that mean the default extrusion multiplier of 1.0 (100%) is not correct for every filament. Over-extrusion produces blobs, rough surfaces, and filled-in gaps. Under-extrusion produces gaps in walls and weak layer bonding. Getting the flow rate right is the calibration step that most directly improves surface quality on outer walls.
In Bambu Studio: Calibration menu → Flow Rate. This prints two patterns — a coarse pass that identifies the approximate correct flow rate in 5% steps, and a fine pass that narrows it down within that range. On the A1, you assess the result visually: look for the test block where the lines are most evenly spaced and the surface shows no raised ridges between extrusion lines (over-extrusion) and no visible gaps (under-extrusion). Enter the result in the filament profile under Flow Ratio.
In OrcaSlicer: Calibration → Flow Rate. OrcaSlicer’s version uses a similar pattern approach. The advantage of the OrcaSlicer implementation for the A1 is that it is slightly more accessible for dark-coloured filaments — the pattern contrast is easier to read on non-white filament, and the documentation around result interpretation is more thorough. The MakerWorld quality guide specifically recommends OrcaSlicer’s flow rate calibration for eSUN and other third-party PLA+ brands for this reason.
Where the result goes: in OrcaSlicer, Process → Filament → Filament → Flow Ratio (under Advanced). In Bambu Studio, the equivalent is in the filament profile under the Advanced tab. Save this as a named profile for the specific filament — “eSUN PLA+ Black Calibrated” rather than overwriting the base profile, so the uncalibrated starting point is available if needed.
Step 4: Pressure advance — the most visible quality improvement
Pressure advance (called Flow Dynamics Calibration in Bambu Studio) is the calibration that makes the biggest visible difference to corner quality, seam appearance, and overall surface consistency. It determines how early the printer should reduce extruder pressure before a direction change, and how quickly it should ramp back up afterward. An incorrect pressure advance value produces one of two signatures: too low, and corners are rounded with a blob of extra material on the outside (over-pressure); too high, and corners have a gap or divot on the outside (under-pressure). These are the artefacts that stubbornly persist after tuning temperature and flow rate, and pressure advance is their specific solution.
In Bambu Studio: Calibration → Flow Dynamics. This runs the automatic K-factor calibration pattern. On the A1, the result is printed and you visually select the line that shows the cleanest corner transitions — the line where the corner material is even with the surrounding walls rather than bulging or pinched. The K value associated with the best line is entered into the filament profile. This process takes 5 to 10 minutes and stores the result in the filament profile for future prints.
The Bambu Wiki specifically recommends the Pattern mode over the Line mode for machines with textured plates — the thicker pattern geometry is less affected by the plate texture and produces a more reliable visual result. On the A1 with its standard textured PEI plate, use Pattern mode rather than Line mode if the line mode result looks ambiguous.
In OrcaSlicer: Calibration → Pressure Advance → PA Line or PA Tower. The PA Tower generates a taller print where the pressure advance value changes across height — useful for seeing the pattern across a wider range without running multiple shorter tests. The PA Line is faster and adequate for most filament calibrations. The result goes to the filament profile under Pressure Advance in OrcaSlicer, or K value in Bambu Studio.
Where the result goes in Bambu Studio: the calibration wizard applies the result automatically to the current session. To save it persistently, go to the filament profile → Filament Settings → Dynamic Flow Calibration → and enter the measured K value under the filament’s settings. Save as a named profile. In OrcaSlicer: Filament Settings → Advanced → Pressure Advance — the value displayed after calibration applies directly.
Step 5: Maximum volumetric speed — the ceiling for speed
Maximum volumetric speed (MVS) calibration determines the highest flow rate in mm³/s that your hotend can sustain with a specific filament before under-extrusion begins. This is covered in detail in the nozzle size post — the slicer uses this value to cap print speed automatically, and getting it right means the printer runs as fast as it can without exceeding the hotend’s melting capacity. Too high, and the slicer allows speeds that produce under-extrusion on fast moves. Too low, and the slicer caps speeds below what the hotend can actually sustain, leaving performance on the table.
This step matters most for anyone pushing print speed deliberately, anyone who has changed nozzle size, and anyone printing with a high-flow hotend upgrade like the E3D ObXidian. For a standard A1 printing eSUN PLA+ at the default speeds in the standard profile, the stock MVS value in the filament profile is close enough that testing is not a priority. For speed-focused printing or non-standard configurations, this calibration sets the ceiling correctly rather than by assumption.
In OrcaSlicer: Calibration → Max Flowrate. This prints a series of lines at increasing volumetric flow rates and you identify the point where under-extrusion becomes visible — the line that starts looking rough or gappy rather than solid and even. The flow rate of the last clean line is your MVS. This goes into the filament profile under Max Volumetric Speed.
Bambu Studio does not have an equivalent built-in MVS calibration — this specific test lives only in OrcaSlicer. If you use Bambu Studio for most printing but want to calibrate MVS, run this test in OrcaSlicer and then enter the result manually in the Bambu Studio filament profile under the relevant speed limit.
Retraction: when it is worth calibrating
Retraction on Bambu direct-drive machines is less sensitive than on Bowden machines, and the default retraction settings in the Bambu and eSUN profiles are well-established. Retraction calibration is worth running specifically when stringing persists after temperature and pressure advance are correctly set — at which point the remaining stringing is likely a retraction-speed or retraction-distance issue rather than a pressure or temperature one. OrcaSlicer’s Calibration → Retraction Test produces a tower that evaluates both parameters simultaneously, and the result is the combination of distance and speed that produces the least stringing for a given filament on a given machine.
How often to recalibrate
The machine-level calibrations — bed levelling, Z offset — run automatically before every print and do not need manual attention unless something changes: a new plate type, a nozzle change, a maintenance session that involved touching the build surface or toolhead.
The filament-level calibrations — temperature, flow rate, pressure advance — are needed once per filament brand and type, then stored in the named profile. Switching from eSUN PLA+ Black to eSUN PLA+ White does not require recalibrating if the same named profile is close enough — most same-brand, same-formulation filaments in different colours share the same calibration data within measurement accuracy. Switching from eSUN PLA+ to Polymaker PolyLite PLA, or from standard PLA+ to silk PLA, warrants its own calibration run because the polymer formulation and additive profile differ enough to affect the optimal values.
After any nozzle replacement: pressure advance must be recalibrated. The nozzle geometry affects how pressure builds in the melt zone, and a K value from a worn or different nozzle is not accurate for a new one. Flow rate calibration after a nozzle change is also worthwhile, as nozzle bore diameter variation (even within the nominal 0.4mm spec) affects extrusion volume.
Saving calibration profiles: the five-minute investment that pays back indefinitely
The full calibration sequence for a new filament takes thirty to sixty minutes. Running it once and saving a properly named profile means never running it again for that filament brand and type. The naming convention that makes this practical: brand, material, colour, calibration date — “eSUN PLA+ Black 2026-07” is specific enough to be useful and short enough to be readable in a dropdown. Save it before the slicer session closes. The Bambu Studio wiki notes that the firmware has changed settings in a way that broke profile compatibility twice in 2024 and once in 2025 — exporting calibrated profiles to a local backup file is worth the five seconds it takes.
In Bambu Studio: the filament profile dropdown → Edit → Save As with the new name. In OrcaSlicer: Filament Settings → the save icon → name the profile. Both slicers keep the saved profile available in the filament dropdown for all future prints on any model without needing to recalibrate.
The honest calibration position for a well-run A1 or A2L
Two years of printing on the A1 with primarily eSUN PLA+ has not involved running the full calibration sequence for every spool or every colour change. The named eSUN PLA+ profile calibrated in the first months of ownership has been the working profile ever since, updated once after a nozzle change. Most quality issues in that time were traced to wet filament or a worn plate rather than calibration drift. The full calibration routine described above gets run once per new filament type and once after hardware changes. That is the honest operational reality rather than a lab discipline.
For the A2L with less time in service, running the flow rate and pressure advance calibration for the primary PLA+ and PETG profiles is on the to-do list specifically because the machine is new enough that the default profiles have not been validated against this machine’s specific hardware. That is the most important time to calibrate — not constantly, not after every spool, but once and properly for each material type when the machine is new or after anything significant changes.