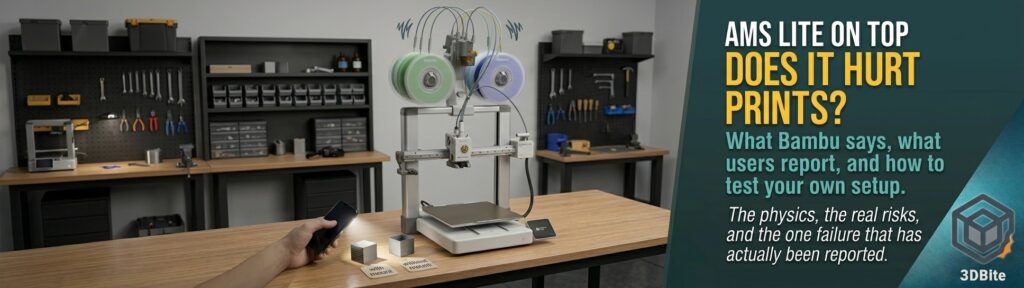
Bambu Lab officially supports mounting the AMS Lite on top of the A1 and A2L, and for a lot of people it is the only sensible option when desk space is tight. The worry is an obvious one, though. The AMS Lite plus four spools of filament is a lot of mass to put at the highest point of a printer that spends its life accelerating a toolhead and a heated bed back and forth. Does that cost you anything in print quality? I put the AMS Lite on top of my A2L because I had no choice, as space is tight, and I was concerned it might affect my prints. I have not noticed any negative impact on print quality. That is one data point, so I went looking for others, and this post covers what Bambu says, what other users report, what the physics suggests, and where a problem could still show up.
What Bambu officially provides
This is not a hack that users invented and Bambu tolerates. Bambu publishes its own top mount design on MakerWorld and calls it a tested solution for mounting the AMS Lite on top of the A1 and A2L. The set has two parts. The Top Mount Bracket works on both printers and is tilted forward for better balance, with an upper half that can swivel left and right to give access to the rear spools. The Z-Axis Stiffener is listed for the A1 only, and its stated purpose is to dampen back-and-forth printer movements. Bambu’s description says the stiffener’s elastic damper design at the bottom gives minimum wobble even when printing at Ludicrous speed with a fully loaded AMS Lite.
The A1’s official FAQ also addresses the exact worry in this post. Asked whether top-mounting affects the accuracy of vibration compensation, Bambu’s answer is that the spools should not slide down if the unit is installed correctly, and that to avoid affecting the accuracy of vibration compensation, you can add reinforcement to the column. That is a notable thing for the manufacturer to say, because it quietly admits the mass can matter, and it is why the stiffener exists. The hardware is a small screw kit of printed-part fasteners, with 13 BT3-12 screws for the stiffener clamp and the AMS Lite, 3 BT3-23 screws for the top mount latch, and 5 spare ST3-8 screws.
How much mass are we actually talking about?
It is worth doing the arithmetic rather than waving at “several kilograms”. Four full 1kg spools are 4kg of filament before you count the spools themselves and the AMS Lite body. One third-party article estimates roughly 2kg for the AMS Lite plus spools, which is a reasonable figure for a lightly loaded setup. A fully loaded one is considerably more, so somewhere between about 2kg and over 5kg is a fair range. For scale, the A1 has a net weight of 8.3kg, so the extra mass at the top is easily a quarter of the printer’s own weight and can be well over half. That is a substantial amount to carry at the top of a bed slinger.
A fair point in the other direction is that this mass is static. It does not move relative to the frame, so the moving mass that determines how hard the motors have to work, the toolhead and the bed, is unchanged. The question is therefore not “does the printer accelerate a heavier load” but “what does a heavy static mass at the top do to the way the frame responds to the forces the moving parts create”.
The concerns, taken one at a time
| Concern | What is actually going on | How worried to be |
|---|---|---|
| “Adding moving mass” | The AMS Lite does not move relative to the frame, so toolhead and bed inertia are unchanged | Not a real issue |
| Lower frame resonance | More mass at the top of a flexible structure generally lowers its natural frequency and can increase how far the top swings in response to the same shaking | A genuine physical effect, magnitude unknown for these printers |
| Centre of gravity moves up | A taller, top-heavy printer can rock more on a soft surface or poor feet | Depends on your desk and feet, and is easy to check |
| Calibration accuracy | The printer’s vibration compensation measures the machine as it is, so it can adapt, but only within the limits of the correction it applies | Largely handled, with limits at extremes |
| Spool movement | Spools and filament can move or tilt as the frame shakes, and the filament path changes tension on the toolhead | Usually minor, but a loose or tilted spool is worth noticing |
| Mount fatigue and failure | Constant vibration loads a printed bracket for thousands of hours | The best-documented real-world failure, see below |
What other users and writers report
Most of the reports are reassuring, but they are anecdotes rather than measurements, and a couple of voices push back.
| Source | What they say | How much weight to give it |
|---|---|---|
| Bambu Lab (MakerWorld listing and A1 FAQ) | A tested solution with minimal wobble even at Ludicrous speed fully loaded, and reinforcement recommended to protect vibration compensation accuracy | Official, but it is the manufacturer’s own claim and gives no numbers |
| Bambu forum user whose mount clip failed | Could not tell a difference between prints made with and without the mount | A direct, honest observation, though not measured |
| Prusa forum user running AMS Lite on an A1 | Loads four spools on top easily, takes almost no floor space, and says it does not affect print quality | A single user’s view, in a general discussion thread |
| Corb3D article on the A1 Mini | For about 95% of users no noticeable quality loss, because the printer recalibrates vibration before each print, with a warning that the fastest speeds may show minor artefacts and that a flimsy mount should be avoided | The reasoning is sound, but the 95% figure is stated without published test data |
| Sceptical Bambu forum commenter | Says it adds significant momentum to printer movements, though it may dampen some higher-frequency vibration, and expects fatigue on the mount over time | A reasoned caution from an experienced user, and the fatigue point is borne out |
| Community mount designers on MakerWorld | Claim a balanced centre of mass gives reduced vibration and better print quality | Marketing claims for a product, not evidence |
The honest summary of that table is that nobody has published a controlled test, and the practical consensus is that for ordinary use the effect is too small to see. The one thing that is genuinely documented is the mount itself failing.
The risk that is actually documented: the mount, not the quality
A Bambu forum thread describes the top mount clip giving way mid-print. The user heard a crash, found the AMS Lite hanging down onto the bed while the printer carried on printing, and had to partly reassemble the extruder to clear an error afterwards. The same thread contains the more useful advice. A reply points out that constant vibration eventually fatigues a printed mount, and recommends printing the mount in PETG, or a tough PLA+ at an absolute minimum, rather than ordinary PLA. The original poster fitted structural cable ties so the latch cannot hinge open even if the clip fails again, and kept the mount because they had no space to do otherwise.
That matters more than a theoretical ringing risk, because a falling AMS Lite can damage a print, the toolhead and the unit itself. It also connects to the filament choices covered in the PETG post and the PLA post: a part that lives under constant vibration is a good place for a tougher material, and the 70°C heat resistance of PETG is a bonus, not a necessity, in a room-temperature setting.
Why the printer can mostly cope
The A1 and A2L both run vibration calibration automatically as part of every print, as covered in the calibration routine post. The printer measures how the machine actually responds and sets input shaping to match, so a change in the frame’s resonance from a top-mounted load is something the system can partly measure and correct. That is the core of the optimistic argument, and it is a reasonable one. The limit is that input shaping corrects the frequency it finds, but it cannot make a flexible structure stiffer. If the extra mass lowers the frame’s stiffness-to-mass ratio far enough, you can still see ringing, which is why the stiffener and a sturdy mount exist and why high acceleration is where any problem would appear first.
Where a problem could still show up
If there is an effect, the sensible places to look for it are the same places ringing shows up anywhere, covered in the ghosting and ringing post.
- Fast profiles with high acceleration, particularly on outer walls, where a structure’s flex shows up as faint ripples behind sharp corners.
- Tall prints. As the gantry rises the structure is longer and more flexible, so this is a plausible place for an effect to be larger. That is a hypothesis from the geometry, not something I found measured anywhere.
- Matte-finish and dark filaments and any silk or glossy surface, which show surface artefacts more readily than a busy textured finish.
- A fully loaded unit compared with a nearly empty one, since the mass changes as spools are used up.
How to test your own setup
Because no controlled data exists, the most useful thing a reader can do is run their own comparison. It is a small test, and it answers the question for the specific machine, desk and mount you actually have.
- Choose a model with sharp corners and plain vertical walls, since ringing is easiest to see against flat surfaces. A calibration cube or a purpose-made test from the Benchy alternatives post works well.
- Print it with the AMS Lite off the printer, standing beside it on the desk, using your normal profile. This is your baseline.
- Print it again with the AMS Lite on the top mount and four reasonably full spools loaded, using the same profile and the same filament.
- If you can, repeat both at a faster profile with higher acceleration, since that is where any difference would be largest.
- Compare the walls side by side under a low-angle light, such as a phone torch held almost parallel to the surface. Look for faint repeated ripples behind corners.
If the two prints look the same, the top mount is not costing you anything you can see. If you find ripples on the mounted version only, work through the mitigation list below before concluding the top mount itself is the problem.
Mitigation checklist if you top-mount
- Use Bambu’s own bracket set, and on the A1 fit the Z-Axis Stiffener as well, since that is the official answer to this exact worry.
- Print the mount in PETG, or a tough PLA+ at minimum, with the walls and infill the official profile recommends, rather than a quick draft in ordinary PLA.
- Check that the latch is secure, and consider a cable tie as extra insurance against the latch opening, as the forum user did after their failure.
- Re-run the printer’s calibration after installing the mount, and again if you move the printer or change its feet.
- Make sure the printer sits on a firm, level surface with good feet, because a top-heavy machine on a soft surface will rock more. The anti-vibration pad discussion in the ghosting post applies here too.
- Inspect the mount periodically for cracks, stress whitening or any looseness at the joints, since fatigue is the failure mode that has actually been reported.
- Avoid very long unattended prints on a mount you have not yet checked for a few weeks of normal use, as covered in the unattended printing safety post.
Alternatives if you can find the space
The same forum thread offers two sensible alternatives. One user wall-mounted their AMS Lite, and said their second choice would have been a shelf over the printer, which can simply bridge across the machine without being fixed to the wall. Either approach removes the mass from the frame entirely. A shelf or wall mount does take some planning, and the filament path to the toolhead needs thinking through, but if you are ever unsure about the top mount, it is the cleanest way to rule it out.
It is also not the first time something heavy has sat on top of one of these printers on this site. The dual BCMU experiment on the A1 put two units there, and what ended that project was feeding reliability and firmware maintenance, covered in part two of that series, not any visible loss of print quality from the extra weight.
The verdict
For normal use, I would not worry. Bambu supports the arrangement and provides a design intended to handle it, the printer re-measures its own vibration behaviour before each print, and the people who report on it overwhelmingly say they cannot see a difference, which matches my own experience on the A2L. The caveats are real but narrow: there is no published measurement to back anyone’s confidence, extreme acceleration is where a problem would appear first, and the best-documented failure is a mount cracking or a latch giving way, not a quality problem. Print the mount in a tough material, use the stiffener on the A1, check it from time to time, and run a quick before-and-after test if you want proof rather than reassurance. If space allows another arrangement, a shelf or wall mount avoids the question altogether, but needing the space is a perfectly good reason to use the top mount as intended.