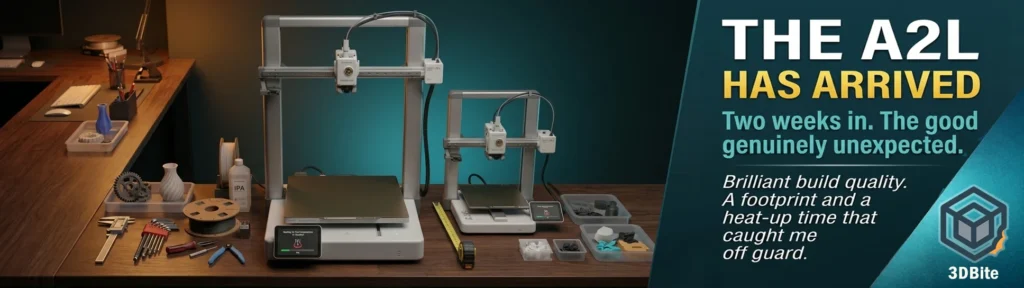
The A2L is on the desk. After two posts working through the announcement — the initial underwhelmed reaction and the deeper specs and strategy analysis — and after the Kobra X experiment ended in a return, I have placed the order and the machine has been running for two weeks now. This post covers why I actually went ahead with it, what the unboxing and build quality were like, the ecosystem experience, and the two genuine downsides that nobody flagged clearly enough before I had to discover them myself.
Why I decided to order it after all
The decision came down to three things converging at once. First, the A1 remains genuinely excellent after two years and that experience has not soured — if anything, the Kobra X comparison made me appreciate it more, not less. The build volume ceiling was the one consistent limitation I kept running into, and the A2L’s 330 × 320 × 325mm plate directly addresses that without requiring a step up to H-series pricing.
Second, having had the Kobra X on the desk for four weeks gave me genuine clarity on what I actually wanted from a second printer. The two-printer workflow itself is valuable — running parallel colour jobs, having a large-format option alongside the daily workhorse, not being limited to a single machine’s queue. What was not valuable was the ecosystem friction. Two sets of 3MF files for the same project, a slicer that crashed repeatedly, profiles that needed rebuilding from near-scratch, and an app experience that fell well short of what Bambu Handy delivers. The four week review was explicit about this conclusion: the right second machine is a Bambu Lab machine. The A2L is that conclusion put into practice.
Third, the underwhelming parts of the A2L announcement — no dual nozzle, the vinyl cutter I will not use — turned out not to matter for my specific use case once I thought it through properly. I am not buying the A2L for multi-colour efficiency. The A1 and its AMS Lite continue to handle that role. The A2L’s job is large-format, predominantly single-colour printing — large seasonal pieces, anything that has been hitting the 256mm ceiling. For that specific job, the missing dual nozzle is irrelevant and the vinyl cutter was never going to be used anyway.
The unboxing
The unboxing process follows the same general logic as the A1’s — Bambu’s documentation team has clearly carried over the structure that worked well there — but everything is sized up to match the larger machine. Bambu’s official unboxing guide lays out the sequence precisely: cut open the outer box, remove the moisture-proof bag, then work through the packed layers in order. The build plate comes out first, followed by the upper foam containing the accessory box, the purge wiper, and the spool holder. A second piece of upper foam sits beneath that.
The frame itself is lifted out by the toolhead cable area, holding the dark grey section rather than the X-axis directly — Bambu is explicit about this in the guide, and it matters more on the A2L than it did on the A1 simply because there is more frame to manage and more potential for an awkward grip to stress something during the lift. The instruction is to hold the Z-axis on both sides or the dark grey section behind it, and to stand the frame vertically on a stable surface once it is out.
Beneath the frame, a paper card sits over the base housing, which lifts out from both sides — again, no pulling on the zip ties, which hold components in place during transit and are not meant to bear any handling weight. The base housing contains the PTFE tube, filament samples, and the power cable tucked into its own foam cutout. From there it is the familiar Bambu sequence: tape removal from the X motor box, opening the privacy cover, attaching the external spool holder to the frame, and connecting the PTFE tube between the spool holder bracket and the toolhead’s filament inlet.
Final assembly is heatbed-focused — screwing the heatbed into the Y-carriage with the four mounting screws provided, connecting the Z motor cable, fitting the Z motor cover, and securing the Y-axis top cover with its locking tab. Power on, follow the on-screen calibration prompts, and the machine walks through its own initialisation. The whole process took longer than an A1 unboxing simply because there are more steps and larger components to manage, but nothing about it required more skill or care than the A1 did — just more patience and a slightly bigger clear workspace to lay everything out during the process.
Build quality: genuinely impressive
This is the part of the experience that has matched or exceeded expectations. The A2L is reassuringly heavy and the assembly process made it clear why. The additional bracing across the frame compared to the A1 is immediately apparent during setup — there is more metal, more structural reinforcement, and a noticeably more rigid feel to the whole chassis once assembled. This is not a stretched A1 that flexes more because the bed is bigger. Bambu has visibly engineered the extra rigidity needed to keep a much larger moving bed under control, and it shows.
Assembly itself was straightforward and followed the same logical, well-illustrated process that the A1 unboxing guide uses — Bambu’s documentation team clearly carried over the same approach for this larger machine. Nothing about the assembly process was more difficult than the A1, just slightly more involved given the larger components being handled. The closed-loop PMSM extruder and the granular dampening units built into the frame — both covered in the full specs post — are not abstract spec sheet items once you have the machine in front of you. The dampening units in particular are a visible part of the frame structure, and the overall sense is of a machine that has been engineered specifically to manage the physics of a much larger bed slinger rather than simply being an A1 scaled up naively.
The ecosystem advantage, realised properly
This is exactly what the Kobra X experience was missing and exactly what made the four-week review conclusion correct. Having the A1 and A2L in the same ecosystem, both running through Bambu Studio, has been seamless in a way that two-printer printing with the Kobra X never was. A single project can have parts and plates sent to whichever printer makes sense for that specific part — large single-colour sections to the A2L, smaller multi-colour AMS work to the A1 — without maintaining separate file sets, without re-tuning profiles per machine, and without the workflow friction that defined four weeks with the Anycubic machine.
Bambu Studio recognises both machines, manages both queues, and the experience of switching between them is exactly what “same ecosystem, different printer” should feel like. This is the single clearest validation of the decision to stay within Bambu rather than bring in a third-party second machine. It is not a dramatic feature — it is the complete absence of the friction that the Kobra X introduced, and the absence of friction is precisely the point.
The AMS decision and the BMCU plan
I went for the standalone A2L rather than the Combo. The reasoning: the A1 already has the AMS Lite handling multi-colour duties, and the A2L’s primary role is large-format single-colour work where multi-colour capability is a secondary consideration rather than the main requirement. If a multi-colour large-format job does come up, the AMS upgrade path documented in the full specs post — AMS Lite and AMS 2 Pro sharing the same buffer system, up to 19 colours when mixed — means I can add that capability to the A2L later without having bought it upfront and left it underused.
The plan for the A1 is to experiment with a BMCU rather than purchasing additional official AMS hardware — covered in more detail in a future post once I have it running. This keeps the A2L focused on what it is actually for while letting the A1 continue developing its multi-colour capability through the community DIY route at a fraction of the official cost.
The camera: better than the A1, but the same hardware limitation
On paper, the A2L uses the same camera as the A1 — and independent reviews confirm this is not just a paper similarity. The processor was not upgraded, so the camera is low frame rate and some error detection leans on the cloud, with the live remote feed still running at about one frame per second, the same limitation the A1 has always had. That said, in actual use the footage feels noticeably better than the A1’s — likely down to the larger bed giving more context in frame and slightly improved lighting and positioning around the build area, even though the underlying sensor and frame rate have not changed.
The genuine fix, as with the A1, is the same one I have been using for two years: an external webcam positioned for a clear view of the full plate. Both the A1 and the A2L now run their own dedicated external camera for actual monitoring, with the built-in camera left to do what it has always done well — AI failure detection and basic remote checking rather than serious visual oversight. This is not a complaint specific to the A2L so much as a confirmation that Bambu has not addressed the camera limitation that has been a known gap since the A1 launched, even on a machine launched in 2026 with several genuinely new hardware features elsewhere.
The downside that surprised me most: how long the bed takes to heat
This is the thing nobody flagged clearly enough in advance, and it has become the single most noticeable change to my daily workflow. The build plate takes a genuinely long time to reach temperature compared to the A1, and the message “waiting for bed temperature to equalise” is something you will see displayed a lot.
This is not a fault or a defect — it is basic physics that Bambu’s own documentation confirms directly. The A2L’s heatbed area is significantly larger than the A1’s, and Bambu’s own technical specifications note that the printer maintains maximum power for about three minutes just to get the heatbed moving toward target temperature, before the more gradual approach to the actual set point begins. More significantly, Bambu’s own first-layer optimisation guide for the A2L documents an automatic large-area first-layer leveling and heatbed insulation strategy that triggers under specific conditions — and when it triggers, after all other pre-print preparations are complete, an additional 500 seconds of waiting is applied specifically to ensure the heatbed has fully stabilised before the first layer begins. That is over eight minutes of pure waiting, on top of the initial heat-up time, before the nozzle even starts moving on certain print types.
On the A1, print prep time is something I have stopped thinking about entirely, as covered in the long-term ownership post. On the A2L, it has become something I actively factor into planning a print session — if I am queuing several jobs in a row, the cumulative heat-up and stabilisation time across multiple prints adds up to a meaningfully longer session than the equivalent run on the A1. This is the direct trade-off for the larger thermal mass that a bigger bed inherently carries, and the 80°C bed temperature ceiling — chosen specifically to manage power draw on a much larger heated area — does not change the fact that heating any large area to any target temperature simply takes longer than heating a small one. It is the correct engineering decision for safety and energy use. It is also a genuine adjustment to the workflow that nobody made clear enough before purchase.
The downside that should have been more obvious: the footprint
This one is, in retrospect, an obvious consequence of the bed slinger architecture that I should have anticipated more carefully, and it is worth stating plainly for anyone considering the same purchase: the A2L takes up significantly more desk space than the A1, and more than the brochure dimensions suggest.
The issue is the same one covered in the CoreXY versus bed slinger post — because the bed travels on the Y-axis, the machine needs clear space in front of and behind its static footprint for the full travel range, not just the footprint of the chassis itself. On the A1 this was already a consideration. On the A2L, with a bed that is roughly twice the area of the A1’s, the same principle applies at a significantly larger scale. Bambu’s own FAQ for the A2L specifies 120mm of clearance at the front, 250mm at the rear, and 300mm above the printer — and independent reviewers testing the machine in real desk conditions have found that even a standard 600mm-deep worktop is tight, with the printer and bed overhanging slightly rather than sitting comfortably within the surface.
The rear clearance specifically matters more than it sounds. The heatbed cable needs that space to move freely as the bed travels backward during printing, and pushing the printer too close to a wall risks the cable being compressed or worn over time — exactly the kind of slow-developing problem that would not show up as a fault until months into ownership. If you are planning where this machine will live, measure the depth available behind the desk position, not just the desk surface itself, and add a genuine 250mm beyond that for the cable. I underestimated this before the machine arrived and ended up rearranging the desk setup more than I expected to accommodate it properly.
Where things stand after two weeks
The build quality and the ecosystem integration are exactly what I hoped for and the reason the decision felt right despite the underwhelming announcement. The heat-up time and the desk footprint are genuine adjustments that I did not anticipate clearly enough and that anyone considering the same purchase should factor into both their workflow expectations and their physical space planning before ordering.
None of this changes the overall verdict so far: this is a good machine for the specific job I bought it for. A proper long-term review — including the first full-scale single-colour print test — will follow once there is enough printing time behind it to say something more substantial than first impressions.