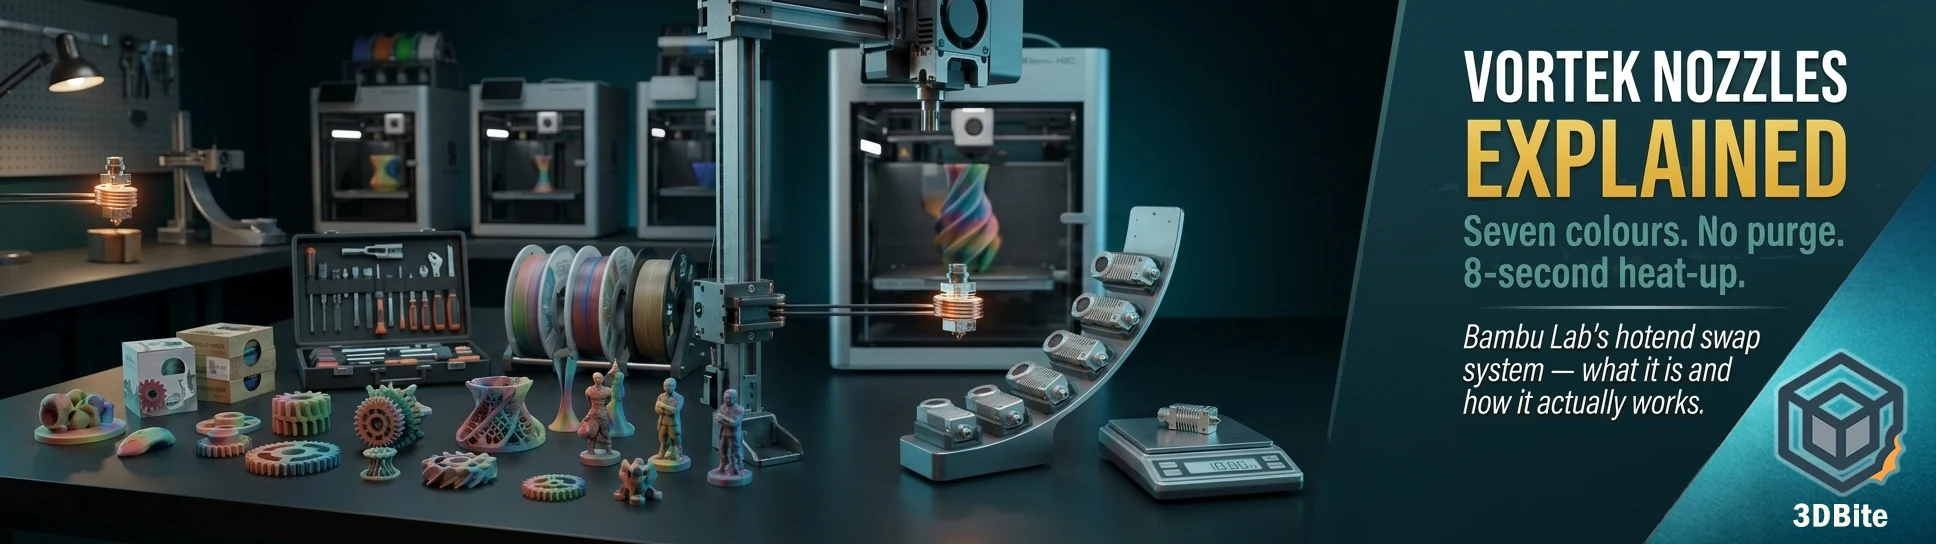
The Vortek system is Bambu Lab’s answer to a question the 3D printing community has been asking for years: why does switching between colours require flooding the hotend with waste filament every single time? Every other approach to this problem has involved either tolerating the waste, using a separate nozzle for each material, or building a full tool changer where the entire printhead is swapped. Bambu’s solution is a third category: swap only the hotend, heat it with induction in eight seconds, and carry on. No purge tower. No colour bleed. And no massive mechanical overhead. It ships on the H2C, which launched in November 2025, and the more you understand how it actually works mechanically the more interesting it becomes.
What Vortek actually is
The name refers to a hotend change system, not a nozzle in the conventional sense. A Vortek hotend is a single integrated unit weighing 10 grams — about the same as two teaspoons of water — measuring 20×15×56mm. Inside it: a nozzle, a heat break, a thermistor, and a small PCB. That PCB is the part that makes the Vortek architecture different from anything else currently on the market. It gives the hotend onboard intelligence and allows it to communicate with the printer without physical electrical contacts. There are no pins. No connectors that wear out. The data link and the heating both work through electromagnetic induction.
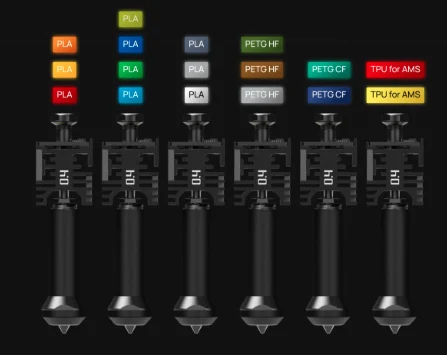
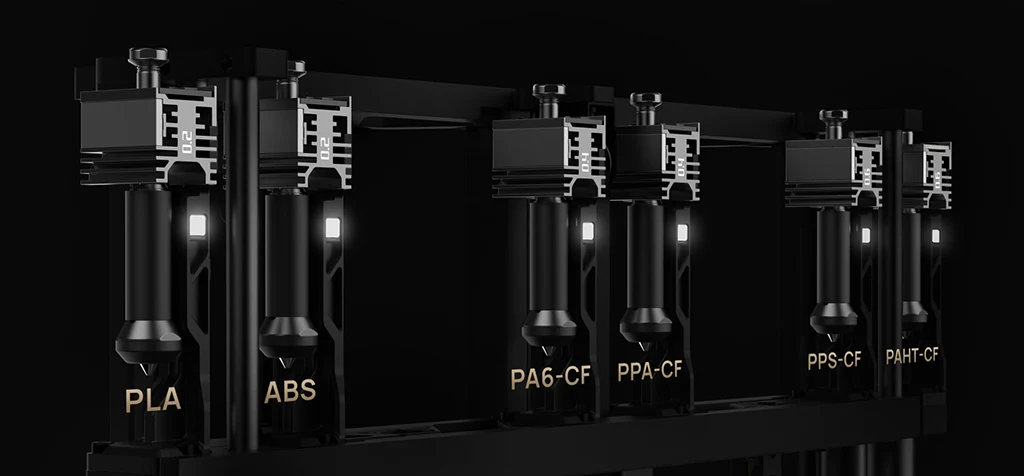
Six of these hotends sit in a rack on the right side of the H2C’s printhead. A seventh, fixed hotend occupies the left position and does not participate in the swap system. That seventh nozzle is always there, always at temperature if you want it, and works as a conventional left nozzle in dual-nozzle mode — the same configuration the H2D uses as its sole arrangement. Between the six swappable Vortek hotends and the one fixed left nozzle, the H2C can address seven different materials in a single print without any purge cycle at all.
The inductive heating: why eight seconds matters
Every conventional FDM hotend uses a resistance heater — a small cartridge element that gets warm by pushing current through a resistive material. That heater is wired to the printer. The wires flex as the toolhead moves, wear over time, and are a physical connection that constrains what you can do with swappable hotends. You cannot easily attach and detach a wired heater dozens of times a day across thousands of print hours without the connections degrading.
Inductive heating removes the wire entirely. The printer generates a high-frequency alternating magnetic field through a drive coil in the toolhead. When a Vortek hotend is picked up and seated, the U-shaped steel sleeve in the hotend sits within that field and eddy currents form inside the metal, converting the electromagnetic energy directly into heat. The same coil that provides heating also carries the data link. No pins make contact. The hotend arrives cold, heats to 350°C in approximately eight seconds, and prints. When the colour needs to change, it parks, cools, and the next one is picked up.
Eight seconds sounds fast because it is. A conventional hotend takes two to four minutes to reach printing temperature from cold. The Vortek’s eight-second heat-up changes the economics of hotend swapping entirely — if heating a new nozzle cost four minutes, the system would be impractical for anything but the most colour-sparse prints. At eight seconds it becomes viable on complex multi-colour jobs where hundreds of swaps accumulate across a print session.
How the swap sequence actually runs
The mechanics of a colour change on the H2C are worth understanding in detail because they show how Bambu has reused existing infrastructure rather than reinventing the whole system. Tom Sanladerer’s H2C review breaks it down clearly: the printer cuts the filament feeding the current hotend, the AMS begins retracting that filament back out, the toolhead simultaneously moves to the rack and parks the current hotend, picks up the correct hotend for the next material, and the AMS then feeds the right filament for that hotend back through the PTFE tube into the newly seated nozzle. All of this happens in parallel. The AMS retraction and the hotend swap run concurrently rather than sequentially, which is what keeps the colour change time manageable.
That means the AMS is doing real work here — this is not a self-contained tool changer where each head carries its own filament spool. Each Vortek hotend shares the single PTFE path from the AMS to the toolhead. When a hotend is parked in the rack, it has no filament in it. The filament travels from whichever AMS slot is assigned to that hotend, through the tube, into the seated hotend, and gets printed. So the AMS is still the filament management system; Vortek is the nozzle management layer on top of it.
After a swap, the H2C does need to extrude a small amount of material at the prime tower to stabilise pressure before returning to the model. The Bambu wiki describes this as a “small amount to balance pressure” rather than a full purge cycle. Independent testing has put the waste reduction at 58% compared to a standard AMS multi-colour setup. For seven or fewer colours, the purge can be eliminated entirely on some colour change pairs. Beyond seven materials — when additional AMS units extend the palette to 24 or more — conventional AMS purging kicks back in for the extra materials, since those are feeding through the conventional filament path rather than being assigned dedicated hotends.
The filament memory feature
Each Vortek hotend’s onboard PCB stores information about which filament it was last used with. When you start a new print, the printer reads each hotend’s stored assignment and suggests using the same material again. This removes the configuration step of telling the printer what each nozzle contains — it already knows, because the nozzle remembers. It also prevents the most common multi-material setup error, loading the wrong material into a slot that was previously used for something incompatible. The system surfaces a warning before it becomes a problem rather than after.
What it unlocks for materials
Dedicating a hotend permanently to one material — a Vortek hotend that has only ever seen PA-CF, for example — matters specifically for engineering materials. The contamination risk between a standard PLA and an engineering polymer is real: residue from a previous print affects the thermal behaviour and structural properties of the next material, particularly for precision engineering applications. On a single-nozzle AMS system, every filament change introduces some mixing at the hotend. With Vortek, an engineering material’s dedicated hotend has never been used for anything else, so there is no contamination risk at all.
The H2C’s 350°C nozzle and 65°C heated chamber support materials that the A-series and P-series cannot touch reliably: PA-CF, PC, PPS, and similar high-performance polymers. Those materials do not interact with each other any differently on the H2C than on any other machine, but the Vortek system’s dedicated hotend assignment makes it practical to keep an engineering material in permanent use without clearing it out every time you switch to a decorative colour for another project. The nozzle waits in the rack, material and profile intact, until you need it again.
Nozzle offset calibration at 25 microns
A toolhead swap system only works at print quality if the nozzle tip position is consistent after every swap. If nozzle A and nozzle B are 0.3mm apart in any axis, colour transitions will misalign visibly across every layer where a swap occurs. The H2C’s automatic nozzle offset calibration addresses this with a contactless inductive system that calibrates position to within 25 microns. There are no calibration plates, no manual steps, and no setup procedure on the user’s side. The printer runs the calibration automatically before each print. At 25 microns, the accuracy is tighter than the extrusion width of a standard 0.4mm nozzle, which means offset error is not a meaningful source of colour misalignment at any standard print quality setting.
The architecture decision: why this is not a tool changer
The distinction matters because it explains several of the system’s practical characteristics. A full tool changer swaps the entire printhead — motor, extruder, heater, nozzle, all of it. Each toolhead is fully self-contained, stays loaded with its filament, and the swap involves picking up and depositing a complete assembly. The Prusa XL and Snapmaker U1 work this way. It is a proven architecture with genuine advantages: no shared filament path, completely independent temperature management per head, and any material can be in any slot without the other heads knowing or caring.
Full tool changers are also heavy, complex, and more expensive per colour slot. The Vortek approach is lighter — a 10g hotend rather than a full printhead assembly — and reuses the AMS infrastructure that Bambu already manufactures at scale. It is probably not coincidental that the design avoids the specific mechanical architecture that competing tool changers have patented. Tom Sanladerer called the H2C Bambu’s “patent evasion masterpiece” in his review title, which overstates the cynicism somewhat but identifies the real point: Bambu has found a path to hotend-level colour separation without replicating what Prusa and others have already patented in the full-toolhead-swap space.
The practical consequence of sharing the AMS path is that the filament is not physically resident in the parked hotend when it is in the rack. It has to be fed back in when that hotend is picked up, which adds a small amount of time per swap compared to a system where filament stays loaded in each head. Sanladerer noted that Bambu recommends the shortest possible PTFE tube between AMS and printer to reduce this overhead. Future revisions might add preheating in the rack positions to cut the transition time further.
The third-party hotend question
This is where the Vortek system connects to the broader ecosystem discussion covered in the closed vs open ecosystems post, and it is the part of the H2C specification that deserves honest scrutiny rather than being glossed over in the technical enthusiasm. Previous Bambu hotends were proprietary in form factor but not in authentication — anyone could manufacture a compatible hotend, print the correct identification marks onto the heat sink, and the printer would treat it as genuine. The aftermarket for Bambu-compatible hotends was real and accessible.
Vortek hotends have onboard electronics. Those electronics communicate with the printer. When Sanladerer asked Bambu directly whether third-party Vortek hotends would be supported, the answer was no — citing thermal runaway protection concerns, specifically that the inductive heater could destroy a non-genuine hotend without the correct electronic handshake to control heating properly. That explanation makes physical sense: an inductive heater with no feedback from the hotend’s own temperature sensor is genuinely dangerous. But it also means the authentication system embedded in the Vortek hotend’s PCB functions effectively as a lock on the consumable ecosystem. Whether that lock is purely a safety measure or partly a revenue mechanism depends on how you read Bambu’s track record, and reasonable people read that differently. The hotend is a consumable that will wear and need replacement. All those replacements, on the current design, go through Bambu.
The build volume trade-off
The Vortek rack occupies space on the right side of the H2C’s build plate, which means the available print area is slightly smaller than the H2D’s on the X axis. The H2D’s build volume without the rack fits the full H-series chassis width. The H2C’s rack takes some of that back. The reduction is not large enough to make the H2C impractical for large prints, but it is worth knowing before assuming the H2C and H2D have equivalent build areas. If maximum build volume is the priority and multi-material waste reduction is secondary, the H2D is the better fit. If eliminating purge waste at up to seven colours is the priority, the H2C earns the lost centimetres.
Pricing and what you actually get
The H2C Combo sells at $2,399 / approximately £1,870 with one AMS 2 Pro included. That combination gives you the printer, one AMS unit feeding the swappable Vortek hotends, and the fixed left nozzle for a seventh simultaneous material. To run all six Vortek positions with AMS support simultaneously, Bambu recommends adding a second AMS 2 Pro and an AMS HT — two AMS 2 Pro units feeding the right-side hotends and the AMS HT feeding the left. That is additional spend on top of the Combo price.
The standard Combo ships with four 0.4mm hardened steel induction hotends plus 0.2mm and 0.6mm variants. A current firmware limitation means all hotends in a single print must match nozzle diameter — you cannot run a 0.4mm nozzle for the model and a 0.6mm for support material in the same job. Bambu has acknowledged this and indicated a software update will address it. Until that lands, nozzle size consistency across all active Vortek hotends is a constraint to plan around.
An upgrade path exists for existing H2D and H2S owners. The Vortek Upgrade Kit converts either machine to H2C specification, though Bambu rates the process at four to five hours and describes it as requiring technical skill. The kit ships in five separate packages. If you are considering this route, the total cost of machine plus kit will exceed buying an H2C directly, so unless you have a specific reason to keep the existing chassis the purchase comparison should include that.
Who this is actually for
The H2C does not replace the H2D or sit cleanly above it on every dimension. They are different tools for different workflows. The H2D’s two independent simultaneous nozzles make it the better fit for soluble support printing — where the support material and the model material need to be active at the same time without any switching overhead — and for rigid-plus-flexible material combinations where the two heads run continuously rather than taking turns. For complex multi-colour decorative work, figurines, terrain, props, anything where you are printing four, five, or six colours across a single job and the purge waste has been adding up frustratingly across months of printing, the Vortek system addresses something specific and real. The 58% waste reduction over a standard AMS single-nozzle setup is the number that matters for that workflow, and the published figure holds up under independent analysis.
Whether that is worth $2,399 depends entirely on your print volume and your colour ambitions. For a hobbyist running a few multi-colour prints a month, the A1 Combo at a third of the price is a more sensible entry point and the waste is a manageable annoyance rather than an operational cost. For anyone running regular complex multi-colour jobs where filament waste appears in the calculations — small print businesses, production-volume makers, anyone who has been doing the arithmetic on purge material and finding it uncomfortable — the H2C makes a coherent case that the price difference pays back.
For most of the community following this site, the Vortek system is something to watch, understand, and consider when the calculus shifts. Right now the A1 and A2L cover the workflow. When a project comes along that the purge waste genuinely cannot accommodate, or when the H2C’s price compresses to the point where it becomes a reasonable step rather than a significant investment, this is the machine and the technology it would be worth stepping into.