
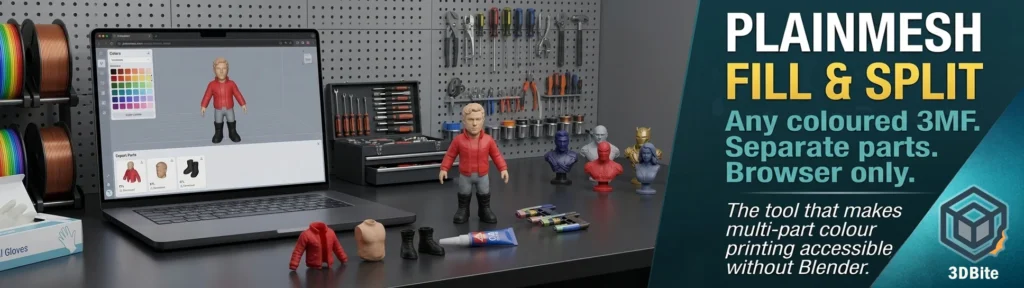
The case for printing each colour separately and assembling the parts by hand — rather than running everything through the AMS in one job — is something this site has covered in depth in the multi-part printing post. Cleaner colour separation. No purge waste. Each part in its optimal print orientation. Repairability. The argument holds up well, and the workflow has been the default approach for the figurine and seasonal build projects that end up here. The one friction point has always been the preparation step: taking a model and splitting it into separate single-colour files requires either a CAD tool, Blender, Meshmixer, or a fair amount of slicer-side manual work — none of which is fast or accessible to someone who is not already familiar with mesh editing tools. PlainMesh’s Fill & Split tool changes that calculation significantly. It is browser-based, no-install, and handles the part that has historically needed the most skill automatically.
What it actually does
Fill & Split lives at plainmesh.com/fill-and-split and the workflow has four steps. Upload a model. Define or refine the colour regions. Cut the model into parts at those region boundaries. Export the individual parts as separate STL or 3MF files. Each exported piece is watertight — manifold in mesh terminology — meaning it will slice in Bambu Studio or OrcaSlicer without mesh errors. The cut faces include built-in sockets: small interlocking features where the pieces fit back together after printing, so you are not eyeballing alignment during assembly.
That covers the basics. The more interesting part is what happens at step two, where the tool has features that go well beyond a simple plane-cut approach.
Auto colour detection from Bambu Studio 3MF files
This is the feature that makes Fill & Split specifically compelling for anyone in the Bambu ecosystem. MakerWorld contains thousands of multi-colour models distributed as 3MF files pre-configured with colour assignments, purge tower settings, and AMS slot mappings for Bambu machines. These are, by design, AMS-first files — the colour information is baked in for the purpose of single-job AMS printing. Taking that same file and extracting the colour zones as separate physical parts has historically involved either redoing the work manually in a mesh editor or finding a designer who has also released a non-AMS variant.
Fill & Split reads a Bambu Studio 3MF directly and detects the colour assignments automatically. Upload the MakerWorld 3MF, and the colour regions come through without any manual painting step. If you want to print a character figure from MakerWorld as separate hand-assembled parts — for cleaner colour boundaries, for the multi-part repairability argument, or simply because you are on the A2L running standalone without an AMS — the tool extracts that file’s existing colour intelligence and turns it into individual printable STL parts. PrusaSlicer 3MF files work the same way.
The painting tools for single-colour models
Not everything you want to print in multiple colours comes as a pre-coloured 3MF. A plain STL of a character, a logo, or a figurine might have no colour information at all — it is just geometry, and you want to define where each colour lives before cutting it apart. Fill & Split handles this with a set of painting tools applied directly to the model surface in the browser.
Smart Fill is the one worth understanding properly because it does something more considered than bucket-fill. It uses surface normal analysis — looking at the angle between adjacent triangles — to detect where geometric boundaries are. When you click on a surface region, it fills connected triangles that share a similar surface angle, stopping automatically when it reaches a crease, ridge, or edge rather than flooding across the whole model. On a figurine this maps closely to where you would want colour zones: a jacket boundary at a visible seam, a face region bounded by the jaw and hairline, a boot stopping at the trouser cuff. It is not reading the model’s intent, it is reading its geometry, but on well-modelled organic forms those often align closely enough that Smart Fill does most of the work and you refine from there.
The Brush tool paints colour region by region with an adjustable stroke, for areas where Smart Fill overflows or misses. Pen and Ellipse tools draw precise paths on the model surface for regions with clean defined edges — useful on logos, signs, or anything with straight-sided geometry where the brushwork approach is less controlled. The tolerance setting on auto-detection groups similar colour shades together, which matters when a 3MF has been painted with slightly varying colour values across a region rather than a single flat hex code.
The Cut step and the socket system
Once the colour regions are defined, switching to Cut mode lets you click each region to separate it into its own part. The tool generates sockets at the cut surfaces — matching male and female geometric features that let the parts locate against each other correctly during assembly. This addresses the most practically frustrating part of the multi-part printing workflow covered in the glue guide: aligning a cut face with a flat, featureless mating surface requires patience and usually a jig or some kind of locating reference. Interlocking sockets solve this without any extra design work on your part.
The remainder of the model — the part you did not specifically cut out — carries matching sockets for the removed sections. So cutting the jacket off a figurine leaves a body piece with jacket-shaped sockets, and a jacket piece with body-shaped pegs. Stack them in the slicer, print each in the right colour, assemble with CA glue. The precision of the socket geometry means alignment does not depend on your hands being steady.
Privacy and the no-server model
Everything happens locally in the browser. The page loads the processing code into your device’s memory and runs it there. Your model files are never uploaded to PlainMesh’s servers, which is the correct architecture for a tool that people use with models they may have purchased, models in development, or anything they do not want on a third-party server. This is the same approach the self-hosted printing tools covered in the self-hosted tools post take for different reasons — the private-by-default design is a meaningful choice rather than a technical detail, and it is worth stating explicitly.
The pricing model
The tool itself is free to use and the processing runs without restriction. Exporting the final cut parts requires joining the PlainMesh Patreon, which gives unlimited exports. This is the one constraint worth being clear about upfront rather than discovering at the point where you have spent time painting a complex model and are ready to download. The Patreon model funds ongoing development and server costs; it is a reasonable arrangement for a well-built specialised tool, but it is not a pure free tier. If you are evaluating before committing, the painting and cut preview workflow is fully usable without a subscription — you can see exactly what the exported parts will look like and verify the colour boundaries before deciding whether to subscribe for the download.
Where this fits in the multi-colour workflow
The multi-part printing argument on this site has always been that the approach produces better colour separation, less purge waste, more repairability, and better individual part orientation than a single AMS job. The honest limitation was the preparation overhead: multi-part printing requires either a model that was designed for it from the start, or someone with mesh editing skills doing the splitting work. Fill & Split removes the second barrier. Any model — whether it came pre-coloured from MakerWorld or as a plain STL you want to colour-split yourself — can go through a browser tool and come out as separate single-colour printable parts in a few minutes.
For the A2L specifically: the machine is currently running standalone without AMS, handling large-format single-colour prints while the A1 takes the multi-colour AMS work. Fill & Split creates a path to multi-colour printing on the A2L’s large build plate without needing AMS hardware attached — print each colour part as a separate single-colour job on the A2L, using its full 330mm plate, and assemble. For large seasonal builds that need both scale and multiple colours, that is a genuinely interesting workflow option that was not practical without a tool like this handling the geometry splitting.
The tool is at plainmesh.com/fill-and-split. No account required to try the painting and preview workflow. Worth spending twenty minutes with a model you have been meaning to print as multi-part to see how the Smart Fill handles the colour region detection before deciding whether the Patreon export tier makes sense for your workflow.
Fill & Split is the honest layer after generate. Colour regions in a 3MF are not the same as parts you can print and assemble. The remaining gap is still dimensional: once you split, can you change a real measurement without going back to Blender.