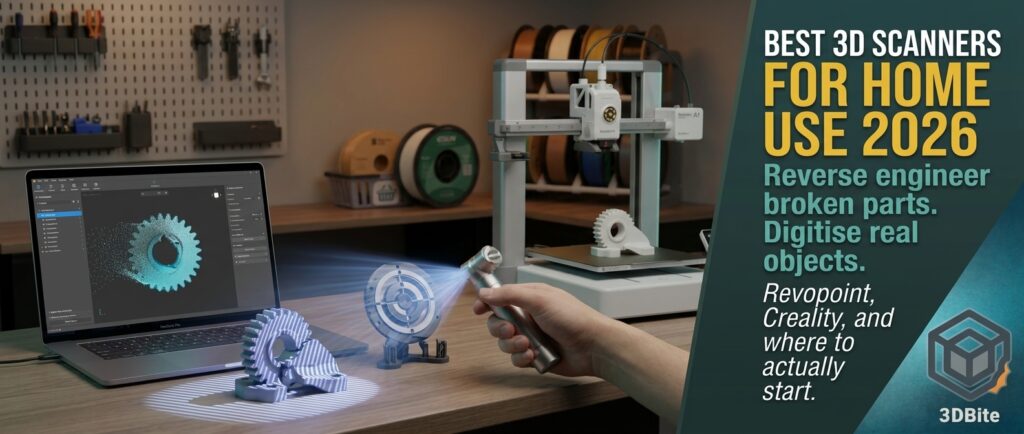
Everything on this site so far has started with a digital model — downloaded, generated, or designed from scratch — and ended as a physical print. A 3D scanner runs that pipeline in reverse: point it at a real object, and it produces the digital model instead of starting from one. I do not own one, and this is a properly researched roundup rather than a hands-on review, in exactly the same spirit as the resin printers post earlier this year. But the idea genuinely appeals — reverse-engineering a broken part that has no replacement available anywhere, digitising a found object, or capturing a physical prop accurately enough to print a duplicate — and having gone through the current market properly, it is a much more accessible category in 2026 than the “professional-grade equipment costing more than a car” reputation it used to carry.
How a 3D scanner actually works, briefly
Consumer 3D scanners in 2026 use one of two core technologies. Structured light scanners project a pattern of light onto the object and measure how that pattern distorts across the surface to calculate depth and shape — this is the more common and generally more affordable approach, and it works well on most matte, evenly lit surfaces. Blue laser scanners project narrow laser lines instead, which handle reflective, dark, and shiny surfaces considerably better than structured light because the laser wavelength penetrates and returns from those difficult surfaces more reliably. The trade-off is usually price — blue laser scanners with genuinely useful accuracy sit at a noticeably higher price point than the structured light equivalents.
The one universal caveat worth knowing before buying anything: dark, shiny, or transparent surfaces are the hardest thing any scanner has to capture, and budget structured-light scanners specifically will usually need a light dusting of scanning spray — a temporary matte coating — on anything beyond plain matte white objects. If most of what you would actually scan is painted miniatures, household objects, or matte plastic parts, this rarely matters. If it is dark tyres, glossy helmets, or metal components, it is worth factoring the spray requirement, or a blue laser scanner that avoids it, into the decision from the start.
The consensus best all-rounder for feeding a 3D printer: Revopoint POP 3 Plus / POP 4
This is the pick that comes up most consistently across independent sources for exactly the use case most relevant here — scanning something with the specific goal of printing it, rather than professional metrology or reverse-engineering to CAD tolerances. The Revopoint POP 3 Plus, around $450-699 depending on bundle, is described repeatedly as the top pick for most 3D printing workflows: 0.03mm accuracy, up to 105 FPS scanning, five scanning modes covering everything from small detailed objects to larger subjects, and what multiple sources independently call the most mature software in the consumer category. The newer POP 4 at around $872 pushes the same formula further and sits just under the $1,000 mark alongside the Creality CR-Scan Raptor as the strongest options below that price point.
The specific reason this matters for a printing-focused workflow rather than pure digitisation: a scan that feeds directly into a slicer needs to be genuinely watertight and clean, not just visually accurate, and Revopoint’s software maturity is repeatedly credited as the differentiator that makes the export-to-STL step painless rather than a separate mesh-repair project of its own.
The best genuine budget entry point: Creality CR-Scan Ferret / Otter
Creality’s own scanner range is worth taking seriously precisely because of the ecosystem argument that has made Creality’s printers popular — the Sermoon P1 and the wider CR-Scan range integrate directly with CrealityScan software and Creality Cloud, letting a scan move into mesh processing and then straight into a print job with minimal friction for anyone already comfortable in that ecosystem. The CR-Scan Ferret SE is named consistently as the most straightforward low-cost entry point available, with 0.16mm point distance and a sensible focus on medium-sized objects — it explicitly is not the right tool for tiny mechanical parts or dark, glossy surfaces without spray, but for a first scanner aimed at household objects, decorative pieces, and medium-scale reverse engineering, it is a genuinely sensible and low-risk starting point. The CR-Scan Otter is flagged separately as the best beginner experience specifically, at around $350, with particular strength on dark and shiny surfaces relative to its price bracket.
Best for small, detailed objects: Revopoint MINI 2
For anything under roughly 150mm — small mechanical parts, jewellery, fine detail work, or the kind of compact accessories and connectors that come up regularly in functional printing projects — the Revopoint MINI 2 is the specific recommendation, with no other consumer scanner in its price bracket matching its 0.02mm accuracy at that scale. This is a genuinely different use case from the general-purpose scanners above: trying to scan a small, detailed object with a scanner tuned for medium or large subjects produces poor results regardless of the scanner’s overall reputation, because small-object capture is fundamentally about working distance and point density rather than raw accuracy specification alone.
Best for reverse engineering to genuine CAD tolerances: Revopoint MetroX / MetroX Pro
This is the category for anyone whose actual goal is precise mechanical reverse engineering rather than general digitisation — replicating a broken gear accurately enough to function as a genuine replacement, or capturing a part precisely enough to import cleanly into Fusion 360 or SolidWorks for further design work. The Revopoint MetroX, at 0.025mm accuracy with a blue laser array and four scanning modes around $999, is named repeatedly as the best value in this specific tier. The MetroX Pro pushes to 0.01mm with a 30+15 laser line array specifically for capturing fine edges and small features that matter for CAD-quality reverse engineering. Worth noting honestly: reverse engineering to genuine CAD tolerances also needs scan-to-CAD software on top of the scanner hardware itself — commercial packages in this space range from around $200 a year up to several thousand for the most capable professional tools, and that additional cost is a real part of the total budget for this specific use case rather than something the scanner hardware alone solves.
Best for large objects: Revopoint MIRACO Plus
At the top of the consumer range, the Revopoint MIRACO Plus (around $1,799) is named consistently as the strongest all-rounder and specifically the best choice for large subjects — people, vehicles, room-scale objects — where smaller scanners struggle with the tracking and coverage demands of a much bigger capture volume. This sits well beyond what a hobbyist workshop typically needs, but it is worth knowing the category exists for anyone whose interest extends toward full-body scanning or genuinely large-scale digitisation rather than tabletop objects and functional parts.
The hardware requirement that catches people out
This is worth flagging clearly because it is the kind of detail that turns up in the small print rather than the headline spec sheet. Higher-end scanners, particularly ones doing complex mesh fusion from many captured frames, have real computer hardware requirements behind the scenes — one source specifically notes that a scanner’s recommended specification of 16GB of RAM and a dedicated GPU is not optional for serious use, and running below that produces long processing times and occasional crashes during the mesh fusion step. If the computer that will process scans is an older laptop or a machine without a genuine graphics card, that is worth checking against the specific scanner’s requirements before assuming any scanner in this list will work smoothly on whatever hardware happens to be available.
Where a scan actually goes once it is captured
This connects directly to workflows already covered on this site. A cleaned-up scan exports as an STL or OBJ mesh, which behaves in Bambu Studio or OrcaSlicer exactly like any other downloaded model — the same mesh-repair checks, the same orientation considerations from the orientation for strength post, and the same support settings covered in the support settings post all apply identically whether the file came from a scanner or from Meshy, covered in the AI tools post. A scan that needs precision editing before printing — scaling a specific feature, adding a connector, cleaning up noise from a difficult surface — moves into the same CAD or mesh-editing pipeline as any other imported model. The scanner is simply a different starting point for the same downstream printing process this site already covers in depth.
The quick reference
| Need | Pick | Approx. price |
|---|---|---|
| Best all-rounder for scan-to-print workflows | Revopoint POP 3 Plus | $450-699 |
| Best genuine budget entry point | Creality CR-Scan Ferret SE / Otter | $300-350 |
| Best for small, detailed objects (under 150mm) | Revopoint MINI 2 | Check current pricing |
| Best value for genuine reverse engineering | Revopoint MetroX | ~$999 |
| Best under $1,000 for higher accuracy | Revopoint POP 4 / Creality CR-Scan Raptor | $872-879 |
| Best for large objects and full-body scanning | Revopoint MIRACO Plus | ~$1,799 |
| Best for dark/shiny surfaces without spray | Creality CR-Scan Raptor Pro (blue laser) | Higher tier — check current pricing |