
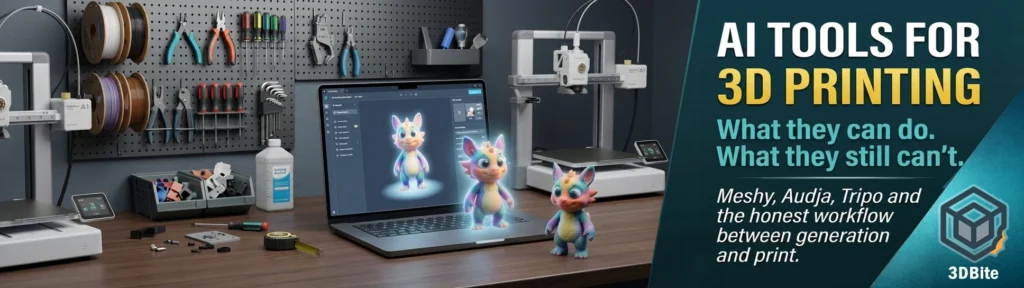
The conversation around AI and 3D printing has been loud and often vague. AI will replace modellers, AI will transform maker workflows, AI-generated models are already printable. Most of these claims are partially true, partially overstated, and nearly all of them miss the important nuance: there is not one category of AI tool for 3D printing, there are several, and they serve genuinely different purposes. Lumping Meshy and Audja together — as many roundups do — is like comparing Bambu Studio to MakerWorld and treating them as the same thing because both involve 3D models. Both are tools in the broader ecosystem. They are not the same tool.
I am currently testing both Meshy and Audja and this post is the result of the research I have done before, during, and alongside those tests. The aim is an honest picture of what each category of tool actually delivers in 2026, which tools are worth your time across the range of what is available, and where the honest limits sit — because the limits are real and most review coverage skips past them.
The two distinct categories
Before any specific tool, the categorisation matters. There are two meaningfully different types of AI tool in the 3D printing space, and understanding which category a tool belongs to changes how you assess it entirely.
AI 3D model generators take a text prompt or a reference image and produce a 3D mesh. They are doing creative generation — building geometry that did not previously exist based on a description or visual reference. Meshy, Tripo, Rodin, Hitem3D, and the open-source options like Hunyuan3D and Microsoft’s TRELLIS are all in this category. The output is a model you can potentially print if it passes mesh validation.
AI-assisted 3D printing workflow tools do not generate models. They take models that already exist and help you prepare them for printing — multi-colour painting, model splitting, mesh repair, overhang analysis, mold generation, slicer connectivity. Audja is firmly in this category. It is not a model generator. It is a pre-print preparation studio with AI-assisted tools for things that traditionally required skilled manual work in Blender or Meshmixer. The distinction matters because “AI 3D printing tool” could mean either of these and the expectations are completely different.
Meshy: the current benchmark for AI model generation
Meshy is the tool most people encounter first when looking for AI-powered 3D model generation, and in 2026 that reputation is justified by genuine quality improvements rather than just marketing. Meshy-6, released in January 2026, crossed what independent reviewers consistently describe as a real quality threshold. The version difference from Meshy-5 is unusually dramatic — Meshy-5 produced non-manifold meshes that needed Blender repair before any slicer would touch them; Meshy-6 ships watertight outputs with cleaner topology, sharper hard-surface edges, and a new Low Poly Mode for game-ready output. In an independent benchmark by 1,331 senior 3D artists from NetEase and Tencent, Meshy-6 was preferred over Tripo 3.1 by 63.8%. Those are the numbers. Here is what they mean in practice.
How Meshy works
Meshy operates on two primary input modes. Text-to-3D converts a written prompt into a fully textured 3D model in approximately 30 seconds for the preview mesh and under two minutes for the fully textured production version. Image-to-3D takes a single reference image or multiple images of the same subject from different angles and reconstructs a 3D model from them. The image-to-3D pipeline generally produces more accurate geometry for physical printing purposes, because the model is being reconstructed from something that actually exists rather than being interpreted from a text description through an intermediate image generation step.
The output quality in 2026 on a good generation is genuinely impressive. Meshy generates true PBR (Physically Based Rendering) texture maps — Diffuse, Roughness, Metallic, Normal, and Ambient Occlusion — rather than baking fake lighting onto the surface, which means the model reacts correctly to lighting in a render and can be used properly in game engines. For 3D printing, the textures become less relevant since you are printing in your filament’s colour, but the geometry quality and the mesh integrity are what matter, and both have improved substantially in the current generation.
The slicer integration for 3D printing is the feature most relevant to this audience. Meshy exports directly to STL, 3MF, OBJ, FBX, GLB, and BLEND. More specifically, it has direct plugin integration with Bambu Studio, OrcaSlicer, PrusaSlicer, Creality Print, Elegoo Slicer, and Lychee Slicer — a generated model can be sent to Bambu Studio with one click. In independent testing of 75 figurine and character models, Meshy’s outputs achieved a 97% slicer pass rate in Bambu Studio. That headline number needs its context: 55% of models were fully watertight out of the generator, and the remaining 42% of the passing models required minor automatic repair before slicing. The 97% pass rate applies after that repair pass, not before.
The pricing reality
Meshy’s credit system is where the practical cost lives and most reviews skip past it. The free tier provides approximately 200 credits per month — enough for around 10 textured models at 20 credits each, or 20 preview meshes at 10 credits each. Credits do not roll over between months. The Pro plan at approximately $20 per month provides 1,000 credits — around 50 fully textured models. For a hobbyist exploring the capability with moderate ambitions, the free tier is a reasonable starting point. For active use as a regular part of the printing workflow, the Pro plan is where it becomes genuinely practical.
Commercial licensing matters if you sell printed models. Free plan outputs are licensed under CC BY 4.0, which requires attribution and allows commercial use with credit. Paid plan outputs carry a private commercial licence with no attribution required. If you are selling prints, know which tier your generation came from before putting it in a store.
Meshy’s genuine strengths
Organic character models, animal figures, fantasy creatures, decorative props, and tabletop terrain are where Meshy genuinely excels. The AI has been trained on an enormous corpus of 3D model data and produces character and creature geometry that would take a human modeller hours from a prompt that takes seconds to write. The retopology and smart remesh features within the platform allow you to reduce polygon count for the specific demands of FDM printing without leaving the browser. The community size — 10 million users, 100 million models generated — means there is a substantial knowledge base of prompts, techniques, and workflows that the community has developed and shared.
Meshy’s honest limitations
Geometric shapes that require precision — cubes, cylinders, mechanical components, functional parts with tight tolerances — are not Meshy’s territory. AI generators are trained primarily on organic forms. Regular geometric objects may exhibit softened edges or slight deformation. For CAD-quality geometric models requiring tight tolerances, traditional parametric modelling tools like Fusion 360 remain the better choice, and no amount of prompt engineering changes the fundamental architecture. Meshy generates; it does not engineer.
Thin features are fragile or missing. Hair strands, fine antenna, thin fingers, small text detail below a certain feature size — these either fail to generate or generate as geometry that is not structurally printable at FDM resolution. Character faces and hands remain the most inconsistent area, with multiple verified user reports of distorted faces, extra fingers, and broken proportions that require manual repair in Blender before printing.
Dimensional accuracy is not possible from a prompt. An AI-generated model does not know it should be exactly 80mm tall unless you tell it, and even with scaling, the proportions within the model are determined by what the AI thinks looks right, not by your dimensional requirements. You will always need to scale in the slicer, and for assemblies where parts need to fit together, dimensional accuracy requires either post-generation manual adjustment or using a tool that was designed for dimensional precision.
Audja: the print preparation tool that does something genuinely different
Audja is currently in public beta and free during this period. Understanding what it actually is is the first step, because it is regularly listed alongside Meshy in “AI 3D printing tools” roundups and it does something completely different from model generation.
Audja is described by its developers as “the studio for multi-filament 3D printing” and the framing is accurate. It takes a model you already have — from MakerWorld, Printables, your own Meshy generation, or any other source — and provides AI-assisted tools for the preparation tasks that currently require either manual work in Blender or tolerance of the limited tools in the standard slicer interface.
What Audja actually does
The multi-colour painting and filament assignment system is Audja’s headline feature. Region detection runs automatically on local geometry when you import a model, proposing colour region boundaries based on the model’s own surface characteristics. You can then correct and refine these regions using a range of brush tools — circle, sphere, triangle, and pen curve brushes alongside smart fill, curvature-based segmentation, height-based painting, mirror, gap fill, and box or lasso selection. The result is assigned filament regions that you can export as separate parts or as a colour-painted model for an AMS workflow. The automatic region detection is doing in seconds what would otherwise take meaningful time in a manual painting workflow.
Smart Key-Cut is Audja’s model splitting tool for prints that exceed your build plate. Place the cut, choose a connector style, tune the clearance for your specific printer, and generate parts that fit together more cleanly during assembly than a simple geometric cut would produce. The connector styles add alignment features at the cut plane — similar to what experienced multi-part designers build into their releases, as covered in the multi-part printing post, but automated rather than designed manually. For scaling up existing models beyond your printer’s plate size, this is a practical time-saver.
Mold Studio generates printable mould geometry around your model — box moulds, silhouette moulds, and inflated voxel moulds, with the current development focus on a practical mother mould workflow. The mould builder adds railed bases, adjustable silicone and shell thickness, frame walls, pour tubes, vent holes, and air connectors. For anyone working with casting — resin casting from printed moulds, food moulds, or any application where a printed mould produces a finished object in another material — this is a significant time-saver over building mould geometry manually.
Auto mesh repair addresses the perennial problem of models downloaded from the internet with mesh defects — non-manifold edges, holes, flipped normals, and self-intersections. Repair can run automatically on import or be triggered manually. The inspection report shows what was fixed and what still needs attention. For anyone who regularly encounters slicer errors on downloaded models and wants a fix that does not require opening Blender, this is directly useful.
Print analysis tools — wall thickness analysis, overhang detection, and a mesh inspection report — round out the preparation toolkit. These are the checks that experienced users run before committing to a long print, now surfaced in a dedicated interface rather than scattered across separate tools or absent entirely from the standard slicer view.
Who Audja is for
Audja is for people who already have models and want better tools for preparing them for printing than their slicer’s built-in options provide. It is particularly compelling for anyone doing regular multi-colour work who finds manual painting in Bambu Studio or OrcaSlicer time-consuming, anyone scaling up models past the build plate who wants better split geometry than a simple flat cut, and anyone regularly dealing with mesh repair issues on downloaded models. The free beta period is the time to evaluate it — the pricing model post-beta has not been announced and the current access cost is zero.
What Audja is not: a replacement for a slicer, a CAD tool, or a model generator. Its value is in the preparation layer between the model and the print, not in creating models or producing G-code.
The other tools worth knowing
Tripo AI
Tripo AI is Meshy’s primary competitor in the AI generation category. Its headline advantage is speed — Tripo’s Turbo mode generates a usable mesh in approximately 8–10 seconds, compared to Meshy’s 30-second preview time. For rapid ideation where you want to see what a prompt produces across multiple iterations quickly, Tripo’s speed is a genuine advantage. The quality comparison in the 1,331-vote NetEase/Tencent benchmark found Meshy preferred 63.8% of the time, but “preferred” reflects the totality of quality factors; in specific scenarios — clean topology on simple shapes, very fast iteration — Tripo wins. Its pricing is generally cheaper than Meshy’s Pro tier, making it a reasonable choice for budget-conscious regular generators. The free tier is more limited than Meshy’s. For 3D printing specifically, Tripo generates watertight meshes that require minimal adjustment, though at lower detail resolution than Meshy on comparable complex organic forms.
Hyper3D Rodin
Rodin is the premium quality play — widely cited as producing the best raw texture quality in the category, with PBR materials that outperform Meshy’s in specific scenarios. The trade-off is cost and print readiness. Rodin’s meshes require more repair work before slicing than Meshy’s or Tripo’s, and the pricing is higher. For creators who are generating models for digital use — game assets, rendering, visualisation — where texture quality is the primary requirement and print readiness is secondary, Rodin is a serious option. For 3D printing as the primary use case, the mesh repair overhead and higher cost make it a less practical choice than Meshy for most hobbyist workflows.
Hunyuan3D and open-source alternatives
If you have a capable GPU and are generating at any meaningful volume, the open-source route deserves serious consideration. Tencent’s Hunyuan3D 2.1, released in mid-2025, was the first open-source generator with PBR materials and produces quality close to the commercial tools. Microsoft’s TRELLIS and Stability AI’s Stable Fast 3D are two other strong open-source alternatives. The trade-off is setup — these run locally through Gradio, ComfyUI, or direct Python installation, requiring GPU VRAM above a minimum threshold and some technical comfort. The benefit: unlimited generation with no credits, no monthly fee, and no data leaving your machine. For anyone generating frequently, the break-even against a paid Meshy plan is fast. For anyone who values data privacy or just resents subscription models, the local option is the correct choice.
PrintPal
PrintPal is a simpler, more accessible entry point into AI-generated 3D printing models specifically. It markets directly to makers and claims 220,000+ users. Text or image input produces STL, OBJ, and GLB exports. The interface is designed for people without any 3D modelling background and the workflow is correspondingly simpler — fewer configuration options, more guided experience. For a beginner who wants to generate a simple character or object without learning any platform depth, PrintPal is a lower-friction starting point than Meshy. For anyone who wants full control over art style, polygon count, texturing, and refinement, the simpler interface becomes limiting.
Sloyd
Sloyd takes a different approach from diffusion-based generators — it uses procedural generation combined with AI, producing game-ready assets with optimised topology, automatic UVs, and levels of detail. The results are structurally cleaner than diffusion-generated models because the underlying geometry is procedurally constructed rather than estimated from training data. For assets with regular geometric character — buildings, furniture, props with defined forms — Sloyd produces cleaner printable geometry than Meshy. For organic characters, it is less capable. Worth knowing about as an alternative for specific model types even though it is less frequently mentioned in 3D printing contexts.
The workflow: what you still have to do after generation
Almost no AI 3D tool in 2026 produces a model you can print without a cleanup pass first. This is the honest statement that the tool makers tend to skip. Here is the actual workflow that turns an AI generation into a reliable print.
Step one is mesh validation. Import the model into Bambu Studio or OrcaSlicer and let the slicer’s mesh checker run. Look for the red warning triangles that indicate mesh errors — non-manifold edges, holes, inverted normals. If the slicer passes the model without warnings, you can proceed. If warnings appear, the model needs repair before it will print reliably.
Step two is mesh repair if needed. Bambu Studio has a built-in repair function that handles the majority of common mesh errors automatically. For more complex repairs, Autodesk Meshmixer (free, though no longer actively developed) has powerful repair tools. Audja’s auto repair is the newest option and handles the common print-breaking errors well. For serious mesh reconstruction, Microsoft’s free 3D Builder app on Windows applies a robust repair algorithm that catches problems the others miss.
Step three is geometry assessment. Even a watertight mesh can have features that will not print well — walls thinner than your nozzle diameter, overhangs steeper than your printer handles without support, internal geometry that the slicer will interpret as solid rather than hollow. Audja’s wall thickness and overhang analysis tools are designed specifically for this check. A quick scan before slicing catches the problems that would only become visible halfway through a three-hour print.
Step four is scaling. AI generators do not produce models at a defined physical size. The model you import may be 10mm or 10 metres in the slicer’s interpretation of its units. Scale to your intended size in the slicer before anything else — and check that proportions look correct at that scale before committing.
Step five is slicing and printing as normal. At this point the AI-generated model should behave like any other model in your slicer workflow. Apply your material profile, choose support settings appropriate for the geometry, and print.
When AI generation makes sense and when it does not
The clearest use case for AI generation in a 3D printing context is organic models where you have a creative concept but no CAD file or design skills to produce it from scratch. A character, a creature, a decorative prop, a personalised figure — all of these are categories where Meshy in 2026 can produce a starting point that would have taken hours of work in Blender or Sculpt mode. The key word is starting point. AI generation accelerates the ideation and rough geometry phase. Post-processing, repair, and refinement are still part of the workflow. The work that used to take a 3D artist a day from photo reference to print-ready file now takes ten minutes if the first generation lands — and then perhaps another hour of cleanup rather than eight.
Where AI generation does not make sense: functional parts with dimensional requirements, mechanical components, anything that needs to mate with another object at a specific tolerance, and assemblies that depend on precise geometry. For these, Fusion 360, FreeCAD, or any parametric CAD tool remains the correct approach. The AI tools are optimised for how a model looks when rendered, not for how it prints with precision — and those two requirements are not the same thing.
The clearest case for Audja specifically: you have a model that needs multi-colour preparation, splitting, or repair — and you want those jobs done with more intelligent tools than Bambu Studio’s built-in options provide without opening Blender. The beta is free. The tools are specifically designed for the printing workflow rather than adapted from game development or rendering pipelines. If any of the preparation tasks it handles are currently taking you significant manual time, it is worth testing before the free beta period ends and pricing is introduced.
Summary: which tool for which job
| Need | Best tool | Notes |
|---|---|---|
| Generate a character, creature, or organic prop from a prompt or photo | Meshy (Meshy-6) | 97% slicer pass rate, direct Bambu Studio integration, free tier available |
| Fastest possible iteration on multiple AI-generated concepts | Tripo AI (Turbo mode) | 8–10 second generation, slightly lower quality than Meshy, cheaper |
| Maximum texture quality for digital rendering use | Hyper3D Rodin | Best textures, but more mesh repair needed before printing |
| Unlimited generation without subscription cost | Hunyuan3D / TRELLIS (open source) | Requires capable GPU and setup — free once running |
| Multi-colour region painting and filament assignment on existing models | Audja | Free during public beta — not a model generator |
| Model splitting for over-size prints with connector geometry | Audja (Smart Key-Cut) | Better results than slicer flat cuts |
| Mold generation for casting workflows | Audja (Mold Studio) | Specific capability not widely available elsewhere |
| Mesh repair on downloaded models | Audja auto-repair / Bambu Studio repair / Microsoft 3D Builder | All free. 3D Builder is the most powerful for complex repairs |
| Functional parts with dimensional precision | Fusion 360 / FreeCAD | No AI generator does this reliably. Use parametric CAD |
The honest conclusion about AI in 3D printing is the same one that applies to AI tools generally in 2026: they are genuinely useful for the tasks they are good at, genuinely not useful for the tasks they are not, and the crucial skill is correctly identifying which category your specific task falls into before choosing your tool. Meshy for organic generation, Audja for printing preparation, parametric CAD for anything that needs to fit, and a repair pass in between all of them. That is the workflow, and once it is internalised, the AI tools in it are genuinely time-saving rather than speculative.
Really appreciate the “what they can’t” half of this — that’s the part most AI 3D posts skip. The honest limit you named (you get a mesh, not something you can hold) is exactly the gap I’m working on. I’m building Luphra (luphra.com): prompt/sketch/image → editable 3D in the browser → manufacturability check before you commit to a print. Generation is basically solved; fixing wall thickness, tolerances and “will this actually survive the plate” is where the real work still is.