Annealing gets talked about in this hobby as a kind of free upgrade — toss a finished print in the oven, and it comes out stronger and more heat resistant than it went in. The honest answer, once you actually look at the test data rather than the general online consensus, is that this is true in a genuinely specific and narrow sense, and false in a way that matters more for most people’s actual reason for wanting it. Annealing does meaningfully improve heat resistance. It does not fix weak layer bonds, and it does not make a print more impact resistant. Understanding exactly why requires understanding what is physically happening inside the plastic, because the answer changes completely depending on which specific kind of “stronger” you are actually after.
What annealing actually is
Annealing is a heat treatment process: reheating a finished part to a temperature below its melting point, holding it there for a set time, then cooling it slowly. What actually happens at the molecular level depends on which of two genuinely different mechanisms is doing the work, and conflating them is the source of most of the confusion around this topic.
Crystallinity annealing is the one most people mean when they talk about annealing PLA. PLA, PETG, and nylon are all semi-crystalline polymers — as printed, their polymer chains sit in a largely disordered, amorphous arrangement, because rapid cooling during printing does not give the chains time to organise into anything more structured. Reheating the part gives those chains enough mobility to rearrange into a denser, more ordered crystalline structure before the material is cooled again. More crystallinity means higher stiffness and, critically, a genuinely higher temperature the part can tolerate before it softens — the mechanism is directly reshaping the material’s own thermal ceiling, not just tidying up the surface.
Stress-relief annealing is a different and often overlooked process that works on any material, crystalline or not, including ABS. During printing, uneven cooling locks residual internal stress into the part — different sections of plastic cooled and contracted at different rates, and that mismatch stays frozen into the finished object as tension it never fully released. A gentler reheat, well below the temperature needed to drive crystallisation, lets that locked-in stress relax without requiring any change to the material’s crystal structure at all. This is a genuinely different process from crystallinity annealing, done at a lower temperature, and it is the one CNC Kitchen’s own testing specifically flagged as more broadly useful precisely because it works on materials that crystallinity annealing cannot touch.
The number everyone wants: what the actual test data shows
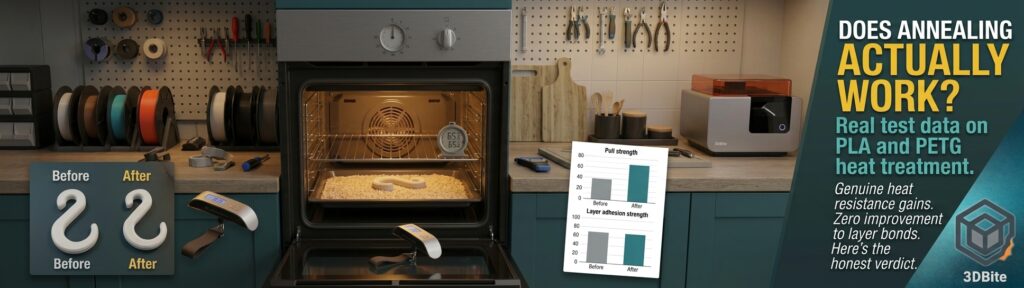
CNC Kitchen’s controlled annealing tests on PLA give the clearest, most honestly reported numbers publicly available on this exact question, and they are worth quoting directly because they cut through a lot of the vague online consensus. Parts annealed at 100°C for 45 minutes, then allowed to cool slowly to room temperature, showed a hanging-hook pull test result that went from 75kg to 87kg — a genuine 16.2% strength gain in that specific load orientation, though the shrinkage that came with the treatment slightly reduced the bending moment involved, which takes a little of the shine off that headline figure.
The number that matters more for most people’s actual reason for wanting stronger prints did not move at all. Layer adhesion strength — the force needed to pull layers apart from each other — measured 42kg before annealing and 42kg after, with every single sample still cracking exactly at the layer line regardless of the heat treatment. Annealing does not fuse layers. It cannot, because the mechanism driving it — crystallisation within the existing polymer, in place — has nothing to do with the weld between two separately printed layers, which is a fundamentally different physical interface covered in the orientation post. Impact resistance also stayed essentially unchanged in the same testing, which runs counter to a common online assumption that annealed parts become more brittle — they simply did not.
A peer-reviewed study testing layer height and annealing parameters together across PLA, PETG, and PETG-CF found something similar in spirit: annealing time and temperature had a measurable effect on tensile strength, but layer height had a significantly bigger influence on the outcome than the annealing parameters did. In other words, getting the print settings right in the first place moves the needle more than any post-print heat treatment applied afterward.
Where annealing genuinely delivers: heat resistance
This is the application where the physics and the testing agree completely, and it is worth explaining exactly why. Standard PLA’s glass transition temperature — the point covered in detail in the PLA materials post where the material shifts from rigid to soft — sits at roughly 55-65°C. Annealed PLA can tolerate meaningfully more heat before that same softening begins, because the increased crystallinity raises the effective thermal ceiling the material can withstand before it starts to deform.
A patented industrial experiment demonstrates this dramatically. A printed PLA strip loaded with a weight and placed in an oven at 80°C for just 30 minutes bent 38mm — nearly failing under its own softened weight. The same PLA strip, annealed unloaded at 80°C for two hours first, then subjected to the identical loaded bending test, bent only 5mm and largely returned to its original shape once the weight was removed. The stability of the unannealed sample was governed by its 60°C glass transition; the stability of the annealed sample was governed by its far higher melting point instead. That is the entire practical case for annealing in one demonstration — a part destined to sit somewhere genuinely warm, near a heat source, or in direct summer sun, where standard PLA’s glass transition ceiling covered in the hot weather post is the actual limiting factor.
The genuine cost: shrinkage and warping
This is the trade-off that makes annealing a considered decision rather than a free upgrade, and it needs to be taken seriously before committing a finished print to an oven. Standard PLA typically shrinks 1-3% during the crystallisation process, with the exact figure depending on the specific filament’s formulation, print geometry, and the annealing conditions used. PETG generally shrinks somewhat less, in the region of 1-2%, but requires meaningfully higher temperatures to anneal effectively in the first place, which introduces its own additional warping risk.
The shrinkage is not always uniform, which is the genuinely tricky part. Parts with uneven wall thickness or complex geometry are considerably more prone to warping during heat treatment than a simple, uniform shape, because different sections of the part are shrinking at different local rates simultaneously, exactly the same underlying mismatch-in-contraction mechanism covered for PLA warping generally in the first layer troubleshooting post, just happening throughout the whole part volume this time rather than only at the plate interface. A press-fit hole that was in tolerance before annealing can drift undersize. A flat face can bow. Fine surface detail can soften and lose crispness during the heat cycle.
Two practical mitigations are worth using together rather than separately. Scale the model up by roughly 2-3% before printing specifically to compensate for the expected PLA shrinkage, so the annealed part lands closer to the intended final dimension rather than needing to be reprinted after the fact. And physically support the part during the heat cycle — burying it in sand or uncooked rice inside the oven is the commonly cited method, giving the softening plastic something to rest against and resist gravity-driven sagging while it is at its most vulnerable, though there is genuine debate in the community about how effective this actually is for anything beyond preventing the most obvious sagging.
Annealing temperatures and times by material
| Material | Annealing temperature | Time | Expected shrinkage | Notes |
|---|---|---|---|---|
| Standard PLA | 60-100°C | 30-60 minutes at the lower end; up to 45 min at 100°C in controlled testing | 1-3% | Higher temperatures within this range drive more complete crystallisation but increase warping risk correspondingly |
| PETG | 95-115°C | 45-90 minutes | 1-2%, but higher risk of sagging if the part is unsupported | Requires meaningfully more heat than PLA; layer bonding can improve slightly but warping risk is genuinely higher |
| PCTG | 80-90°C typical; some report up to 120°C for heavier crystallisation over several hours | 30-90 minutes typical | Substantial at the higher end of the temperature range — treat cautiously | Less commonly annealed; results are less standardised across the community |
| PETG-CF | Similar to PETG | Up to 90 minutes for optimal tensile strength per peer-reviewed testing | Smallest dimensional change of the materials tested in controlled studies | The carbon fibre reinforcement appears to genuinely stabilise the part against the shrinkage that plagues unfilled PETG and PLA |
Always verify the specific filament manufacturer’s own guidance where it exists, since formulation differences between brands genuinely shift the ideal window — this is the same brand-to-brand variance covered in the filament brands post, and annealing behaviour is one more property that is not perfectly uniform across every spool labelled with the same material name. A dedicated oven thermometer, checked independently of whatever temperature dial the oven itself displays, is worth using every time — built-in oven thermostats are frequently inaccurate enough to matter at these relatively low, precise temperature windows, and an oven running 10°C hotter than its dial suggests can be the difference between a successful anneal and a part that has visibly slumped.
Method: oven versus water bath
An oven is the most common and most controllable method — a standard kitchen oven with a genuinely accurate independent thermometer, a slow ramp to temperature, and a slow cool-down afterward rather than opening the door and exposing the part to a sudden temperature drop, which reintroduces exactly the kind of thermal shock and stress this whole process is meant to relieve. A hot water bath is the alternative some community sources recommend specifically for PLA, since water’s more even heat transfer around the part’s whole surface can produce more uniform crystallisation than dry air in an oven, at the cost of needing to fully seal the part against water ingress first if it has any internal cavities.
The verdict: does it actually make prints stronger?
It depends entirely on what “stronger” means for the specific part in question, and being precise about that is the whole point of this post. If the goal is heat resistance — a part that needs to hold its shape somewhere genuinely warm, near a heat source, in a car, on a sunny sill — annealing delivers a real and substantial improvement, backed by both controlled testing and basic polymer physics. If the goal is impact resistance or interlayer strength — a part that keeps snapping along its layer lines, or shattering when dropped — annealing will not fix it, because the mechanism driving annealing has nothing to do with the weld between layers that is actually causing that failure. That specific problem is solved by the orientation and material choices covered in the orientation for strength post, not by a heat treatment applied after the fact.
Given the genuine shrinkage and warping risk, and the modest, use-case-specific nature of the actual gain, annealing is worth doing deliberately for a specific part with a specific heat-resistance requirement — not as a routine finishing step applied to everything that comes off the plate. Scale the model to compensate for shrinkage before printing, use a genuinely accurate independent thermometer, support the part physically during the heat cycle, and cool it slowly at the end. Done with that level of care, on the right part for the right reason, it is a real and useful technique. Applied indiscriminately in the hope of a general strength upgrade, it is more likely to produce a warped, slightly undersized part with the exact same layer-adhesion weakness it started with.