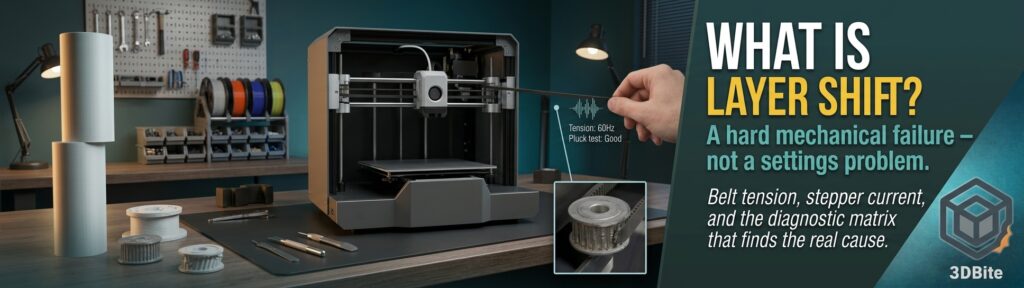
Pull a print off the plate and somewhere partway up, everything above a certain layer has shifted bodily to one side relative to everything below it — a clean, hard step rather than a gradual wobble. That is layer shift, and it is a genuine mechanical failure rather than a settings-tunable cosmetic defect, which puts it in a different category from most of the other entries in this troubleshooting series. The ghosting and ringing post explicitly distinguished the two: ghosting is a fading surface ripple that follows the print’s intended geometry, while layer shift is a hard, permanent offset where the geometry itself has moved. This post covers layer shift on its own terms, since the causes and the fix are genuinely different from vibration-based ringing.
What is actually happening
Every stepper motor in a 3D printer moves in precise, discrete increments, and the printer’s firmware tracks position by counting exactly how many of those increments each motor has executed since the last known reference point. Layer shift happens when a motor’s actual physical movement stops matching what the firmware believes has happened — the motor either fails to transmit its rotation into real head movement, or it genuinely skips a step and spins without the head keeping pace. Once that mismatch occurs, the firmware’s internal position tracking is now wrong, and every subsequent move is calculated from that incorrect reference point. The print does not gradually drift back into alignment, because nothing in the system knows an error has occurred at all — the offset is permanent for the remainder of the job unless something intervenes.
Telling it apart from ghosting
This distinction matters because the two defects look superficially similar on a casual glance but demand completely different fixes. Ghosting produces a fading series of ripples that follow a corner or notch’s shape, decaying in amplitude as they move away from the trigger point — the underlying intended geometry is still correctly positioned, just with a vibration artefact layered on top of it. Layer shift produces a single, hard, clean step where everything above a specific height has moved to a new position and stayed there — there is no fading, no ripple pattern, just a sudden discontinuity. If the defect looks like an echo that fades, it is ghosting, covered in the dedicated post. If it looks like someone picked up the top half of the print and set it back down slightly offset, it is layer shift, and the fixes below apply.
Belt tension: the cause behind the overwhelming majority of cases
Every source researched for this post converges on the same figure: belt tension is responsible for somewhere around nine out of ten layer shift cases, and it is also the cheapest and fastest thing to check. A loose belt has genuine mechanical slack in it — when the stepper motor rotates, that slack has to be taken up before the belt actually starts transmitting motion to the toolhead, which means the motor can complete a rotation without the head moving the full corresponding distance. Over months or years of use, GT2 belts — the standard 6mm synchronous belts used in nearly every consumer printer including the A1 and A2L — genuinely stretch and lose tension gradually, which is exactly why a printer that worked reliably for a long time can develop layer shift seemingly out of nowhere with no other change to the setup.
The correct tension test, consistent across every source: pluck the belt like a guitar string, and it should produce a low bass note, typically described as falling somewhere in the 50-90Hz range, rather than a slack thud or a high, over-strained twang. This is the same pluck test already covered in the belt tension section of the maintenance guide and the ghosting post, and it is worth checking first for layer shift for exactly the same reason it is worth checking first for ringing — both defects trace back to the same mechanical component behaving the same way.
The mistake worth avoiding explicitly: over-tightening a belt in an attempt to “fix” skipping makes the problem worse rather than better. An over-tightened belt increases friction and bearing load enough that the stepper motor can struggle to overcome that extra resistance, which produces exactly the same skipped-step symptom the loose belt was causing in the first place, just through a different mechanism. The goal is correct tension, not maximum tension — a belt should have slight give when pressed, not be guitar-string rigid.
On a CoreXY machine specifically — which is what the A1 and A2L both use — both belts need to be at genuinely equal tension, not just individually “tight enough.” A tension mismatch between the two belts on a CoreXY gantry introduces uneven torque across the frame, which can cause binding and layer shift even when each belt individually plucks to a reasonable-sounding tone in isolation.
Stepper driver current and overheating
This is the cause worth suspecting specifically when layer shift appears consistently after the printer has been running for a while rather than from the very start of a job. Stepper driver current — sometimes referred to by the technical term VREF — determines how much torque the motor actually has available. If that current is set too low, the motor simply does not have enough force to reliably move the axis at the speed and acceleration the print is demanding, and it skips steps under load rather than keeping pace. Overheating produces a related but distinct failure: a stepper driver running hot enough can temporarily reduce its own output or briefly shut down protectively, producing exactly the same skipped-step symptom from a thermal cause rather than a configuration one. A genuine temperature check with an IR thermometer on the driver or motor body, if the shift reliably appears after 30 minutes or more of printing, is worth doing before assuming the problem is purely mechanical.
Mechanical obstruction
This is the cause behind a genuinely sudden, isolated shift partway through an otherwise normal print rather than a recurring pattern across multiple jobs. Anything that physically blocks the toolhead or bed’s travel for even a moment — a loose cable clip catching, a spool snagging, a printed feature on the model itself that the toolhead brushes against, or a genuinely external interference like a pet or a person bumping the machine — forces the stepper to either stall briefly or skip steps trying to push through the obstruction. This is the one layer shift cause that is not really a maintenance issue at all; it is worth checking the specific height at which the shift occurred against the model’s own geometry, since a shift that lines up exactly with a point where the toolhead’s travel path crosses close to a tall feature on the print itself points directly at a physical collision rather than anything mechanical needing adjustment.
Printing too fast for the machine’s actual mechanical state
Speed and acceleration settings that exceed what the printer’s current mechanical condition can reliably handle are a genuine contributing cause, and this connects directly to the motion-settings diagnostic order covered in the ghosting post. A machine with slightly worn bearings, a marginally under-tensioned belt, or stepper current set conservatively can often handle moderate speeds without issue but start skipping specifically at the higher accelerations a print profile demands. If layer shift appears specifically on faster, more aggressive print profiles and disappears when the same model is reprinted at a more conservative speed, that is a strong signal the underlying mechanical tolerance is genuinely marginal rather than the speed setting itself being the root cause — the correct long-term fix is addressing the belt tension or stepper current rather than simply printing everything slower indefinitely.
The diagnostic matrix
| Symptom | Most likely cause | What to check |
|---|---|---|
| Shift on X or Y, random height, recurring across multiple prints | Belt tension too loose, or stepper current too low | Pluck test both belts; check stepper driver current/VREF |
| Shift always happens in the same direction consistently | Belt tension asymmetric (CoreXY), or frame squareness | Check both belts are tensioned equally; check frame diagonals for squareness |
| Shift appears only on Y axis (bed-slinger machines) | Bed belt tension, or Y acceleration too high for bed mass | Check bed belt specifically; reduce Y-axis acceleration as a test |
| Shift accompanied by an audible grinding or clicking noise | Belt teeth skipping on a worn pulley, or debris in the pulley | Inspect pulley teeth closely with a torch for wear |
| Shift appears only after 30+ minutes of continuous printing | Stepper driver overheating | IR thermometer on the driver/motor body; check cooling airflow |
| Shift happens once, at a specific height matching a feature on the model | Mechanical obstruction / physical collision | Check the model’s geometry at that exact height for anything the toolhead could have struck |
| Shift appears specifically on fast or aggressive profiles, not on conservative ones | Marginal mechanical tolerance exposed by speed | Fix the underlying belt tension or stepper current rather than just slowing down permanently |
The correct order to work through this in
Check belt tension on both axes first, given how overwhelmingly common this specific cause is — pluck test both belts and confirm equal tension on a CoreXY machine specifically. Print a test square or a simple calibration shape at a moderate speed to confirm whether the shift reproduces; a clean 150mm test square with no shift at a sensible speed is a good sign the mechanical fundamentals are sound. If belts check out, verify stepper current is adequate and that drivers are not overheating, particularly if the shift correlates with longer print duration. Rule out a mechanical obstruction by checking the shift height against the model’s own geometry for anything the toolhead could physically have struck. And finally, if the shift only appears on faster profiles, treat that as a signal to address the underlying mechanical margin rather than simply accepting slower print speeds indefinitely as the only fix.
The summary
Layer shift is a genuine mechanical failure where the printer’s tracked position has permanently diverged from its actual physical position, and unlike most defects covered in this troubleshooting series, it is not something a slicer setting alone can resolve — the fix lives in the machine’s mechanical and electrical state rather than in the sliced G-code. Belt tension accounts for the large majority of cases and is also the fastest thing to check, which makes it the sensible first stop regardless of how the specific symptom presents. Work through the diagnostic matrix above methodically rather than guessing, and this is a problem that, once correctly diagnosed, usually stays fixed rather than recurring.