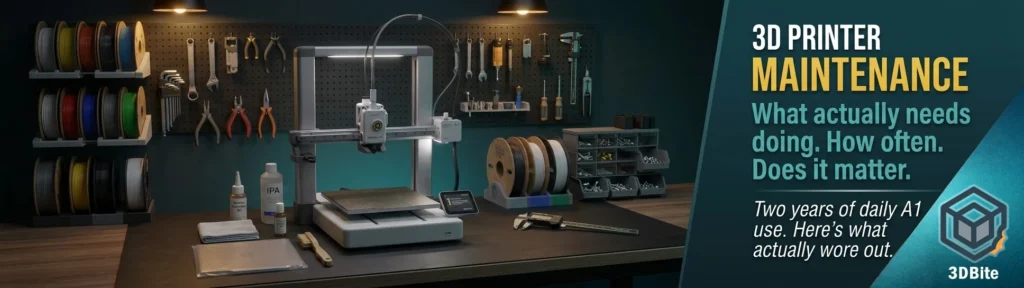
Most 3D printer maintenance guides open with some version of the same claim: neglect maintenance and your printer will fail, your prints will suffer, and the machine will die young. This is technically true. It is also not the full story. Two years of running the A1 almost daily, and several months now with the A2L alongside it, has produced a more nuanced picture of what maintenance actually matters, what can slide without consequence, and what looks like maintenance advice but is really just habit-building that makes no measurable difference in practice. This post tries to be honest about all three.
What maintenance actually is on a modern FDM printer
Strip away the specifics and every FDM printer maintenance routine is the same four things: keep the surfaces clean, keep the motion system lubricated, keep the filament path clear, and replace consumables before they fail rather than after. The proportions and intervals vary by machine and usage, but that is the whole job. Everything else is a variation on one of those four.
Modern machines like the A1 have changed the calculus compared to the open-source FDM printers of the early 2010s. On a RepRap — covered in the first printer post — maintenance was constant and often reactive. Belts needed adjustment because the tensioning system was manual and imprecise. Rails needed regular attention because the print quality was so sensitive to small deviations. Bed levelling was a regular task because nothing was automated. On an A1 or A2L, the machine handles a significant proportion of this itself. The HMS health monitoring system watches for belt tension issues and tells you when to act. Auto bed levelling runs before every print. The printer prompts you when lubrication is due. You are not figuring out what needs doing and when — the machine is telling you, and you are carrying out the task. That changes maintenance from a vigilance exercise into more of a follow-the-prompts exercise, which suits how most people actually use these machines.
That said, the HMS prompts do not cover everything. Some things the machine cannot detect. And there is a difference between maintenance that prevents a failure and maintenance that just makes the machine run slightly better. Worth knowing which is which before deciding how religiously to follow a schedule.
The build plate: the one thing that genuinely needs doing every session
The build plate is the most high-contact consumable in the whole printer, and it is the one area where regular maintenance has the most direct effect on day-to-day print quality. IPA wipe before every print session, or at minimum between every print if you are running multiple jobs. Not 70% IPA from the pharmacy — 99% isopropyl alcohol, which leaves no residue. A paper towel rather than a cloth if you can help it, since a cloth picks up oils and redeposits them.
Why this is the one non-negotiable: skin oils transfer to the plate every time you handle it, and a print started on a plate with oil contamination in the first-layer zone is much more likely to pop off mid-print than one started on a clean surface. This is not a sophisticated maintenance task. Thirty seconds of wiping prevents the most common category of print failure. The ratio of effort to outcome makes it the best-value thing in this entire post.
The plate itself wears out over time. The textured PEI coating that ships with both the A1 and A2L is good for several hundred print cycles under normal conditions, but it does degrade. The texture slowly smooths in the areas you print most, and when a zone has gone smooth enough that PLA no longer grips it reliably, the plate needs replacing rather than cleaning harder. This is covered in the long-term ownership post from a user perspective: build plates are the actual consumable that eats your maintenance budget, not nozzles. Budget for a replacement plate every few months at heavy usage. Keep a spare so a degraded plate does not stop a session.
The motion system: lubrication, not improvisation
This is where the single most important rule in Bambu printer maintenance applies, and breaking it causes real problems. There are two lubricants in the A1 and A2L accessory kit: lubricant oil (a thin light oil) and lubricant grease (a thick semi-solid). They go in different places and they are not interchangeable. Specifically: the X-axis linear rail on both the A1 and A2L takes oil, never grease. Bambu’s own documentation is explicit — it is strictly forbidden to use lubricant grease on the X-axis linear rail. Grease on the linear rail attracts dust, builds up, and makes the motion system worse rather than better.
The Y-axis on the A1 originally shipped with grease in the recommendation but Bambu updated this after user feedback showed the grease attracted dust and debris. The current guidance for the A1 Y-axis is lubricant oil. If you have previously used grease on the Y-axis of an A1, wipe it off and switch to oil. The Z-axis lead screws get grease, not oil — the thicker lubricant is appropriate there because of the slower speed and higher load of the vertical axis.
On the A2L the same logic applies: oil for the X-axis linear rail, oil for the Y-axis guide rail, grease for the Z-axis lead screws. The A2L’s Bambu wiki specifies Y-axis maintenance at initial setup after unboxing and then every 200 print hours, with HMS reminders at the relevant interval. X-axis monthly. These are not aggressive intervals — monthly on a machine running several jobs a week is about ten to fifteen minutes of actual work, done properly, that prevents the gradual degradation in motion quality that shows up eventually as ghost lines and ringing artefacts in your prints.
The A2L has more Y-axis to maintain than the A1 — the bed travels much further on the larger machine. This matters more than it might seem. The Y-axis on the A2L is the axis most likely to pick up debris and uneven lubrication coverage simply because of the travel distance involved. The print bed cable also lives in this area, which is why the 250mm rear clearance requirement covered in the A2L first impressions post matters: a cable that gets caught mid-travel is a maintenance problem that turns into a failure, and adequate clearance prevents it from ever becoming a problem.
Belts: let the machine tell you
Belt tension is the maintenance task that causes the most anxiety on internet forums and, in my experience with both machines, requires the least manual intervention. Both the A1 and the A2L check belt tension automatically through vibration frequency calibration and surface the result as an HMS notification when tension has drifted low enough to matter. Follow the prompt, use the auto-tensioner, done.
The manual check — pressing the belt with a finger to feel whether it is taut — is a useful sanity check during monthly lubrication sessions, but it is not a substitute for the automatic calibration and it is worth being honest about the fact that human sense of “correct belt tension” is imprecise. Taut but not tight, with no slack visible when the axis is at rest, is approximately right. What you are looking for manually is obvious looseness or visible fraying, not a specific frequency. The machine handles the specific frequency.
Belts themselves last a very long time under normal PLA printing conditions. The community evidence from A1 owners approaching 5,000 hours on original belts without measurable quality loss suggests belt replacement is not something most hobbyist users will ever actually do. The HMS will tell you if something changes.
The extruder gears and hotend: the 5-spool rule
Bambu’s guidance for the extruder gear is specific and based on filament type: clean every 5 spools for PLA and PETG, every 2 spools for carbon fibre and other abrasive materials. The A1 has hardened steel extruder gears from the factory, which is an advantage over the P1 series’ standard stainless steel gears. Even so, filament dust accumulates in the gear teeth over time. Visible powder around the extruder, or a clicking sound during printing that was not there before, are the practical signs that cleaning is overdue.
The hotend exterior — the heater block and the area around the nozzle — picks up burnt filament residue that does not affect print quality but does eventually become a cleaning job. The same 5-spool interval applies for a basic clean. Heat the nozzle to printing temperature and use a brass brush (never steel — steel scratches the nozzle tip and damages the threads) to clear the exterior. If there is a significant blob, heat it to 80°C, let the outer residue soften slightly, then remove it. The filament sensor board on the A1 also accumulates debris and occasionally causes false alarms as a result; a soft brush once every few months clears it.
The AMS Lite and purge wiper: the multi-colour maintenance
If you run the AMS Lite for multi-colour work — which is the primary reason the A1 is on the desk — the purge system adds its own maintenance category. The purge wiper, which cleans the nozzle before each filament change, accumulates burnt material and debris. On the A1 this wiper needs periodic inspection and clearing, and eventually replacement when it is visibly deformed or damaged enough that it is no longer making proper contact with the nozzle tip. A damaged wiper that is not fully cleaning the nozzle between colour changes causes the kind of subtle colour bleed that looks like a purge volume issue but is actually a wiper issue.
The waste chute beneath the purge wiper accumulates poop. Clear it before long multi-colour jobs — an overflowing waste area eventually starts depositing material in places it should not go, and on a long job this can interrupt the purge cycle. Two minutes of clearing before a six-hour multi-colour print is worth the time. The A2L has the same wiper and chute system on a larger scale, with the Bambu wiki specifying that a brush and tweezers are the appropriate tools for clearing debris, followed by a hair dryer or air blower for any remaining fine particles.
PTFE tubes in the AMS carry filament from the spool to the printer. Bambu’s official guidance for daily users is replacement every 2 months; for hobbyist use quarterly is fine. A worn PTFE tube — yellowed, kinked, or with visible crazing on the inner surface — causes feed errors that look like spool tangles or sensor problems and are frustrating to diagnose. Inspect the tubes at the same time as monthly lubrication and replace them if they look questionable. They cost almost nothing individually and replacement takes ten minutes.
Fans: boring but worth doing
The A2L has two fans on the toolhead: the hotend cooling fan and the part cooling fan. Dust and filament particles accumulate in fan blades over time. A clogged fan runs hotter, makes more noise, and eventually fails. A partial blockage in the part cooling fan produces subtle cooling inconsistencies that show up as surface quality variations you will try to fix in the slicer without success. Once every few months, with the printer powered off, hold the fan blades still and blow out any accumulated debris with compressed air or a bulb blower. Never let the blades spin freely under compressed air — spinning an unpowered motor generates current and can damage the motor driver.
How this plays out in practice
For two years with the A1, the maintenance pattern that actually developed is close to what Bambu describes but simpler in execution. IPA wipe before every session — always. Follow HMS prompts for lubrication — always. Check the purge wiper before any multi-colour job. Clean the extruder gears when the five-spool interval comes round, or when I notice clicking. Replace the build plate when adhesion becomes inconsistent and cleaning does not fix it.
The A2L has added one wrinkle that the A1 did not have: the Y-axis maintenance interval is printed-hours-dependent rather than calendar-dependent, and the A2L runs longer individual jobs than the A1 because of the larger print volume. A 12-hour large Grinch print on the A2L accumulates print hours much faster per session than four quick figurine parts on the A1. The Y-axis 200-hour interval will come round faster on the A2L than I initially expected. Worth tracking print hours rather than assuming monthly is enough.
The maintenance tasks I have never actually needed to do after two years of daily A1 use: belt replacement, lead screw replacement, motor maintenance, any form of electrical connector work. These components are more robust than the maintenance anxiety around them suggests. The things I have replaced: build plates (multiple), nozzle (once, probably prematurely), purge wiper (once).
The lubricant warning that is worth repeating
Because it comes up in community threads regularly enough that it is apparently not obvious: do not spray any kind of general-purpose lubricant inside the printer. WD-40 is not a lubricant — it is a water displacer that leaves a residue that actually increases friction on precision rails over time. Silicone sprays, general-purpose aerosol lubes, or anything you would use on a squeaky hinge are wrong for this application. Use the lubricants Bambu provides or specifies: lubricant oil for rails and idler pulleys, lubricant grease for lead screws. Apply sparingly. Excess lubricant attracts dust and makes the problem worse than under-lubrication would have.
The actual minimum viable routine
If you want a single reference checklist:
- Every print session: IPA wipe the build plate. 30 seconds.
- Every 5 spools (PLA/PETG): clean extruder gears and nozzle exterior. 10 minutes.
- Every 2 spools (abrasive filaments): same as above, plus inspect nozzle tip for enlargement. 15 minutes.
- Monthly: X-axis lubrication with oil. Belt tension sanity check. Fan inspection. Clear the waste chute. 15–20 minutes total.
- When HMS prompts: Y-axis lubrication. Belt tensioning. Whatever the system flags. Follow the link in the prompt to the wiki, do the task.
- Every 2–3 months: inspect PTFE tubes in AMS, replace if discoloured or kinked. Inspect purge wiper, replace if deformed.
- When adhesion starts failing despite clean plate: replace the build plate.
That is genuinely all of it for typical hobbyist use on the A1 and A2L. The machines are designed to run reliably without constant intervention. Do the basics consistently, follow the HMS, and the printer will tell you if anything else needs attention.