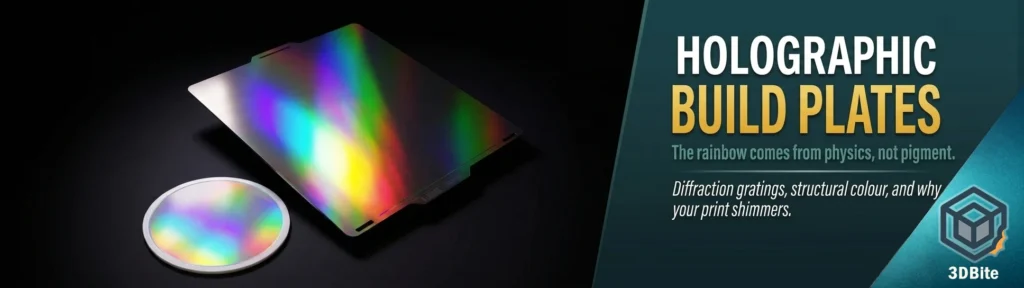
If you have not seen one of these in person, the first time is genuinely surprising. You pull a print off the plate, flip it over to check the base, and the underside shimmers — a full rainbow shifting and rolling across the surface as you tilt it in the light. The natural assumption is that something was added during printing. A coating, a special filament, a post-processing step. None of those are involved. The colour comes from the plate’s surface geometry, transferred directly to the plastic during the first layer, and it works on ordinary PLA. Understanding exactly why it works requires a quick trip into the physics of light, which turns out to be more interesting than the usual 3D printing hardware conversation.
First: this is not actually holography
The name is slightly misleading and worth addressing upfront. True holography records the interference pattern of laser light to reconstruct a three-dimensional image. That is not what is happening here. What holographic build plates produce is structural colour through a mechanism called diffraction — the same phenomenon responsible for the rainbow on a CD, the iridescence of a soap bubble, and the shifting blue-green of a peacock feather. None of those objects contain pigment in the areas that produce colour. The colour is generated entirely by the physical structure of the surface interacting with light.
Calling these plates “holographic” is a commercial convention that has stuck because the visual result looks similar to what most people picture when they hear the word. The accurate term for the underlying phenomenon is diffraction grating. That distinction matters if you want to understand why the effect works, why it appears differently on different filaments, and why it eventually fades with plate wear.
What a diffraction grating actually does
Ordinary light — whether sunlight or a room’s LED — contains all visible wavelengths simultaneously, from violet at around 380 nanometres through to red at around 700 nanometres. When that mixed light hits a flat, smooth surface, it all bounces off in the same direction. You see white or the colour of the object. Nothing separates the wavelengths from each other.
A diffraction grating changes this by introducing a repeating physical structure — grooves, ridges, or pits spaced at intervals comparable to the wavelength of visible light. When light hits these grooves, each groove acts as a new point source, and the waves from adjacent grooves interfere with each other. Constructive interference — where wave peaks align — occurs at different angles for different wavelengths. Violet light hits the point of constructive interference at a steeper angle than red light. The result is that the spectrum of colours physically separates across viewing angle: tilt the surface and you move through the rainbow as each wavelength’s constructive interference angle sweeps past your eye.
The same mechanism explains the CD. Press your thumb against a CD surface and you do not see the same rainbow from your thumbprint — because the smooth skin has disrupted the groove pattern in that area and replaced it with a fingerprint ridge pattern at completely different and irregular spacing. The diffraction only works where the groove spacing is consistent and precise.
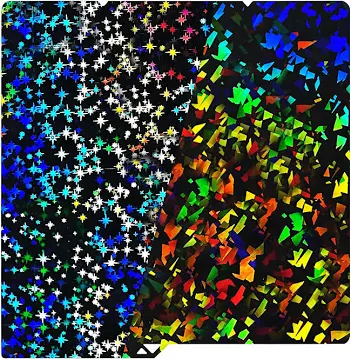
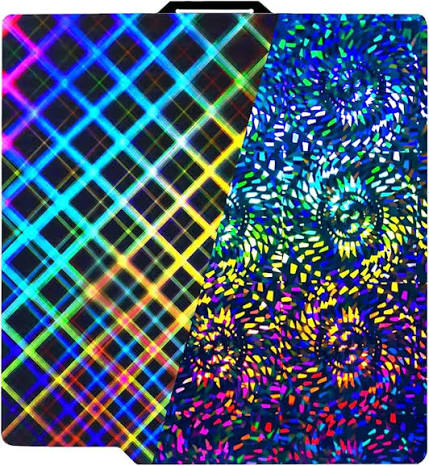
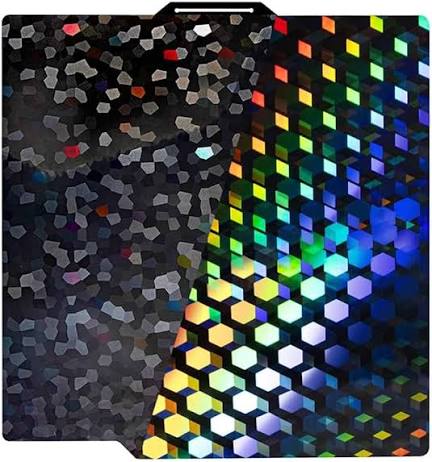
How the plate transfers this to plastic
The plate’s surface is etched or embossed with that same diffraction grating pattern — microscopic grooves at precise intervals, typically in the range of 500–1500 nanometres spacing depending on the plate manufacturer and the specific colour effect they are targeting. The groove pattern may be arranged in a single direction (producing colour that shifts as you rotate the viewing angle on one axis) or in a two-dimensional pattern (producing a more complex, multidirectional shimmer).
When you print the first layer, hot filament is pressed against this surface under the Z-offset pressure that squishes the first layer for adhesion. That pressure is doing exactly what you want for a normal print — maximising contact between plastic and plate. It is also doing something else: pushing the soft filament into every groove and ridge of the diffraction pattern, like pressing clay into a mould. As the filament cools and solidifies, it retains that micro-geometry. The plastic’s first layer now has the same diffraction grating embossed into its surface.
Pick the print up, flip it over, and the underside has inherited the plate’s optical properties. Light hitting that surface now diffracts by wavelength exactly as it would on the plate itself. The rainbow is in the surface geometry of the plastic — not in any coating, not in the filament chemistry, not in any step that happened after printing.
Why the effect looks different on different filaments
Diffraction colour depends on light being able to bounce off a reflective surface. The more reflective the plastic, the more pronounced the effect. Transparent and semi-translucent filaments — natural PLA, clear PETG — produce the strongest holographic effect because light can interact with the surface geometry cleanly without being scattered by pigment particles throughout the material. The structural colour effect from diffraction relies on specular (mirror-like) reflection; anything that disrupts that — heavy pigment loading, matte finishes, rough surfaces — reduces the visibility of the colour shifts.
That said, the effect still appears on opaque filaments. White PLA produces a clear holographic shimmer because white reflects a broad spectrum efficiently. Black PLA produces a subtler version because black absorbs most wavelengths. Silk and metallic filaments — because of the mica or metallic flake content that makes them reflective — can produce particularly vivid holographic effects, since those flakes provide the reflective surface that the diffraction pattern needs. Some of the most striking results shared in the community are metallic gold or copper filaments on holographic plates, where the base metallic reflectivity amplifies the diffraction colour shifts.
The plate construction: what is actually there
Most holographic build plates on the market are spring steel sheets with a surface coating or treatment that carries the diffraction pattern. The spring steel substrate is the same material used in standard PEI magnetic build plates — it flexes for print removal and holds a magnet against the printer bed. The holographic surface is either an embossed PEI layer with the pattern pressed into it during manufacture, or a separate holographic film laminated over a PEI adhesion layer.
The adhesion side — the surface your print sticks to — still needs to do its actual job. A holographic plate that produces beautiful effects but lets prints pop off mid-print or fuse permanently to the surface is not usable regardless of how it looks. The better plates balance the diffraction pattern geometry with adhesion characteristics that behave like a standard smooth PEI plate: good grip on the heated bed, clean release once cooled. Some manufacturers combine the holographic surface with PEY (polyethylene) or PEO coatings rather than standard PEI, which changes the adhesion and release behaviour for specific filament types.
Settings on a Bambu machine
The holographic plates compatible with the A1, A2L, and P-series machines are magnetic spring steel, same as the standard Bambu build plates. They drop straight in without modification. The Bambu Studio plate type selection matters for first-layer temperature and cooling behaviour: most holographic plate users run them under the Smooth PEI or Cool Plate preset depending on the filament, since the holographic surface has similar adhesion characteristics to a smooth rather than textured PEI plate.
The first-layer Z offset deserves attention because it directly affects how much of the diffraction pattern transfers. Too high and the first layer barely contacts the plate, leaving an underpressed surface that picks up the pattern weakly. Too low and you over-squish the first layer, which can crush fine groove detail and produce a flatter, less vivid effect. The correct Z offset is roughly the same as for a standard smooth plate — the goal is a first layer that is clearly adhering and slightly compressed but not so flattened it has lost definition. If your first layer normally looks correct on the smooth PEI plate, use the same Z offset as your starting point.
Glue stick on the plate changes the effect noticeably and usually for the worse. A thin glue layer between the plate surface and the filament puts a layer of dried adhesive between the diffraction grating and the plastic, which softens and obscures the micro-detail that produces the colour. On holographic plates, glue stick is to be avoided unless adhesion is failing without it — and if adhesion is failing without it, the plate temperature or Z offset is probably the cause worth addressing first.
Longevity: these wear faster than plain PEI
The diffraction pattern is a surface treatment, and it is a finer one than the coarser texture of a standard textured PEI plate. Repeated printing, cleaning with IPA, scraping with the spatula, and the thermal cycling of repeated heat-and-cool cycles all gradually degrade the groove definition. Plain PEI plates lose their texture over time too — the familiar story of the glossy, over-smoothed zones that appear after hundreds of prints on heavily used areas — but the holographic plate’s fine groove pattern is more vulnerable to this than the deeper, more robust texture of a standard textured plate.
How fast depends heavily on how carefully the plate is maintained. IPA wipe between prints keeps filament residue from building up in the grooves. A soft cloth rather than a rough sponge reduces abrasion. No scraping with metal — a flexible plastic scraper does the print removal job without scratching the plate surface. With that care, community users report the holographic effect remaining vivid across fifty to a hundred print cycles. Treat the plate like a standard textured PEI — rough tools, aggressive cleaning, careless scraping — and the pattern degrades faster. Budget for replacement on a shorter cycle than a plain PEI plate, and store the plate flat when not in use rather than leaning it against a surface that could flex it or scratch it.
What it is and is not good for
The holographic effect only appears on the bottom surface of the print — the face that was in contact with the plate. Every other surface of the print looks exactly as it would on any other build plate. This makes holographic plates a deliberate design choice for prints where the bottom is visible and part of the aesthetic: coasters, tiles, display bases, jewellery, keychains, flat ornaments, and any decorative piece that will be displayed with the base upward or visible. For functional parts where the bottom face lives against a surface and is never seen — brackets, enclosures, tool holders — the holographic plate adds nothing to the finished result.
The effect also does not photograph particularly well in flat, undirected light. The shimmer is visible and striking in person because your eye angle changes as you handle the print and move around it, which is exactly what reveals the colour shifts. A flat overhead photo of a holographic-base print often looks like a slightly shiny surface rather than the moving rainbow it is in hand. This is not a limitation of the plates — it is the nature of diffraction colour, which is an angular phenomenon. If the goal is photography or social media content, raking side lighting or moving the print during filming shows the effect properly.
The same physics elsewhere
It is worth staying a moment longer on what makes this physics satisfying rather than just technically correct. The peacock feather does not contain blue or green pigment in its iridescent plumage. The blue colour is entirely structural — produced by arrays of melanin rods in the feather barbules that are spaced to cause constructive interference for blue wavelengths at the most common viewing angles. The soap bubble’s rainbow arises from interference between light reflected off the bubble’s outer surface and light reflected off its inner surface, path-length difference between the two producing different interference colours across the bubble’s varying thickness. The CD achieves its rainbow through pits embossed in a spiral track at 1.6 micrometre spacing, originally there for audio data, incidentally perfect for visible light diffraction.
The holographic build plate adds 3D printing to this list of accidental optical instruments. The primary job of the groove pattern is to transfer structural colour to plastic. What makes it interesting is that it works through the same mechanism evolution has found independently in dozens of organisms, that industrial engineers use for security features and decorative films, and that you can reproduce at home on an A1 for the cost of a £15 plate. The physics is not new. The application is a genuinely clever use of an old idea.