Z Anti-Aliasing landed in OrcaSlicer’s 2.4.0 Alpha release in late May 2026, and the story behind it is genuinely more interesting than most slicer feature announcements — a community developer’s idea, picked up and covered by CNC Kitchen, that Bambu Lab explicitly declined to merge into Bambu Studio before OrcaSlicer’s own team folded it into their mainline release a few months later as what their own announcement called “the sleeper hit” of the update. Given how directly this connects to the OrcaSlicer versus Bambu Studio post‘s discussion of OrcaSlicer’s faster community feature cadence, it is worth covering properly — what it actually does, where to find it, and whether it genuinely lives up to the excitement.
The problem it is actually solving
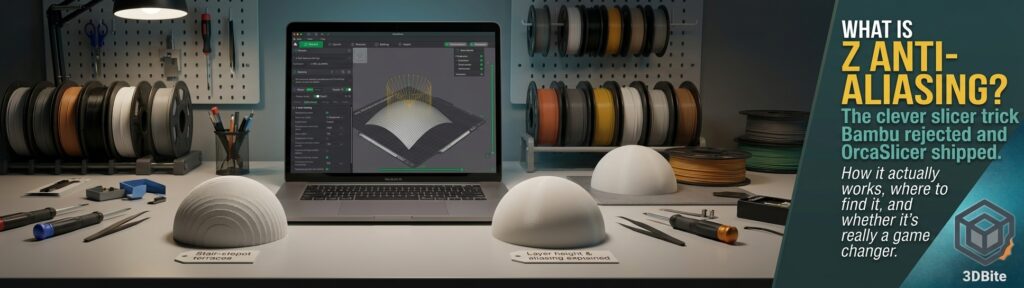
Every FDM slicer works by cutting a 3D model into a stack of perfectly flat horizontal layers — it is, after all, why the software is called a slicer. This is mathematically simple and avoids any risk of the nozzle colliding with the model, because the toolhead always moves above the highest point reached so far. The cost of that simplicity shows up on any surface that is not perfectly horizontal or vertical: a shallow dome, a gentle chamfer, a sloped curve. Because the model is being approximated by flat, stacked slices rather than its actual continuous geometry, these surfaces show a visible “stair-stepping” effect — a jagged, terraced appearance where the flat layer edges protrude past the model’s true, smooth surface line. This is the same underlying geometric approximation problem covered from a different angle in the pillowing post and the general layer-height discussion throughout this site — a slicer is always working with an approximation, and stair-stepping is one of the more visually obvious places that approximation shows up.
How it actually works
The name borrows deliberately from video game graphics, and the analogy holds up better than most borrowed terminology does. In video games, anti-aliasing smooths jagged diagonal lines by blending pixel colours at the edge between two zones rather than leaving a hard, stepped transition. Z Anti-Aliasing applies the identical concept to 3D printing, but in the Z axis rather than across a 2D image — instead of keeping the toolhead locked to one flat, uniform height across an entire layer, ZAA makes tiny, controlled height adjustments within that same layer to follow the model’s actual curved or sloped surface more closely.
Mechanically, the algorithm raycasts each individual extrusion point back against the original 3D mesh and micro-adjusts the Z height at that specific point so the toolpath genuinely follows the real geometry rather than the flat approximation a conventional layer would use. Because these adjustments happen only on surfaces that are eligible for it — shallow-sloped, curved, or domed top-facing geometry specifically — and because the height changes are deliberately kept small, the technique avoids the collision risk that has historically made full non-planar printing difficult to implement safely. This is why one of the developer’s own community write-ups describes it as “a specialised, computationally efficient form of non-planar 3D printing” rather than genuine freeform non-planar printing — it achieves a meaningful chunk of non-planar printing’s visual benefit on the specific surfaces where stair-stepping is worst, without needing the considerably more complex collision-avoidance and toolpath planning that full non-planar printing requires.
The headline result
This is the specific claim that generated the real excitement, and it is worth stating precisely: a part printed at 0.2mm layer height with ZAA enabled comes out just as smooth, on the eligible sloped surfaces, as the same part printed conventionally at 0.1mm. Push further and the result gets genuinely more interesting — increase the layer height to 0.3mm with ZAA still enabled, and the surface roughness on those surfaces stays almost exactly the same as it was at 0.2mm. The practical implication is real: you can potentially print at up to three times the layer height while maintaining the smooth top-surface quality that would normally require printing the whole model considerably slower and finer, which translates directly into meaningfully faster print times without the usual trade-off in surface finish on the specific geometry ZAA is designed to help.
Where to find it
ZAA is available in OrcaSlicer from version 2.4.0 Alpha onward, found under Process → Quality, visible once Expert mode is enabled — this is deliberately gated behind Expert mode rather than shown by default, which is worth noting as a signal about how the OrcaSlicer team themselves regard its current maturity. Five distinct settings are exposed: zaa_enabled (the master toggle), zaa_min_z, zaa_minimize_perimeter_height, zaa_dont_alternate_fill_direction, and zaa_region_disable, giving a genuinely granular level of control over exactly how and where the technique applies, rather than a single blunt on/off switch.
It is explicitly not available in official Bambu Studio, and this is worth explaining properly because it is the more interesting part of the story. The feature originated as an independent community fork of Bambu Studio by a developer working under the handle adob (Aleksandr Dobkin), and a formal pull request was submitted directly to Bambu Lab’s own Bambu Studio repository to merge it into the official release. Bambu Lab’s own maintainer response, visible directly on the GitHub pull request, explains the decision plainly: “this feature requires specific conditions (model slope angle, print speed, etc.) and its complexity for end users is too big,” and the PR was not merged. OrcaSlicer’s own team subsequently integrated the same underlying work directly, crediting adob by name, with additional refinement from several other contributors before it shipped in the 2.4.0 Alpha as a mainline feature. This is a genuinely concrete, specific example of exactly the divergence in feature philosophy covered in the OrcaSlicer versus Bambu Studio post — Bambu erring toward simplicity and a smaller, more curated setting surface for the average user, OrcaSlicer’s community-led model willing to ship a more complex, more powerful tool behind an Expert-mode gate for users who want it.
The genuine limitations
This is worth being honest about before calling the feature a game-changer outright. CNC Kitchen’s own coverage, which first brought this technique wide attention, flags a specific and genuinely important caveat: while ZAA works well for simple parts with isolated sloped regions, complex geometries almost always contain at least one shallow-angled section somewhere on every single layer — and because the slicer’s overall layer height still has to be chosen for the model as a whole, a complex part with a shallow slope buried somewhere in its geometry effectively forces the entire print back toward a lower layer height regardless of ZAA being enabled, undermining the headline speed benefit for exactly the kind of genuinely complex model where a speed win would matter most.
Collision handling is the other limitation worth knowing about directly. The original developer’s own documentation states plainly that collisions are not currently handled by the implementation, though a method for addressing this is described in the underlying technical paper the work is based on. In practice this means ZAA’s height micro-adjustments are deliberately conservative enough to avoid most real-world collision scenarios, but it is not yet a fully solved, formally guaranteed-safe system the way standard flat-layer slicing is by construction. And the algorithm itself is computationally more demanding than conventional slicing — it performs a large number of ray intersection tests per layer, which the developer’s own notes acknowledge could likely be optimised further with a purpose-built data structure rather than the current general-purpose approach, meaning slicing time with ZAA enabled is measurably longer than without it.
Is it a genuine game changer?
For the specific, narrow category of models it is actually built for — relatively simple parts with isolated domes, chamfers, or shallow curved surfaces, where the goal is a smooth top finish without printing everything at a punishingly fine layer height — this is a genuinely clever and effective piece of engineering, and the up-to-3x layer height headroom while maintaining surface quality is a real, measurable win rather than a marketing exaggeration. For genuinely complex models with shallow-angled geometry distributed throughout, the practical benefit shrinks considerably, since the slicer still has to accommodate the worst-case shallow section somewhere on the model regardless of ZAA’s presence.
Whether it is a “game changer” depends entirely on what proportion of your actual printing falls into that first, favourable category. For the seasonal figures, functional brackets, and multi-part builds that make up most of what gets printed on this site, the specific geometry ZAA targets — a clean, isolated dome or chamfer — is not the dominant feature of most of those models, which makes this more of a genuinely useful specialised tool than a universal upgrade worth switching slicers over on its own. For anyone whose printing leans heavily toward smooth, curved, display-quality surfaces specifically — vases, organic sculptural pieces, anything where a shallow dome or curve is the whole point of the model — it is a considerably more compelling reason to have OrcaSlicer’s Expert mode in the toolkit, and a genuinely interesting example of the kind of feature that a vendor-neutral, community-driven slicer can ship faster than a manufacturer-controlled one is willing to.