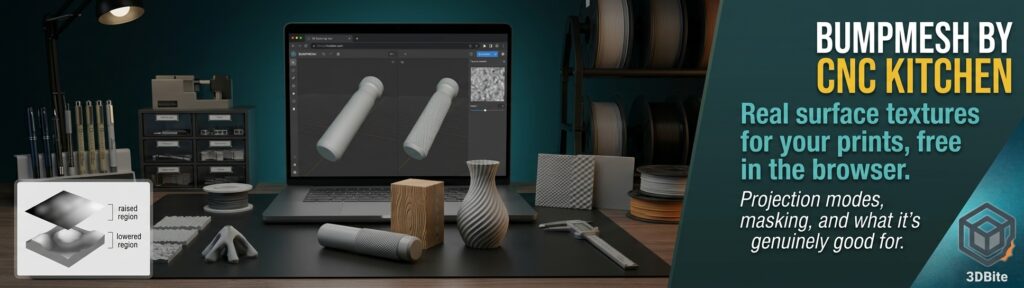
The texturing guide on this site ended with an honest limitation: slicer-based texturing, like fuzzy skin and embossing, lives in the slicer’s settings rather than in the model itself, and the most convincing method, converting a photo into a displacement map, needed a trip through Blender or Fusion 360. Stefan Hermann of CNC Kitchen has now released a tool that closes much of that gap. It is called BumpMesh, it runs entirely in your browser, and it is free. This post is built from the tool’s own documentation and independent coverage from 3DPrint.com-style trade press, All3DP and 3Druck, rather than a long-term hands-on test, and it focuses on what the tool actually does and where its limits sit.
What BumpMesh actually is
BumpMesh is a free, open-source, browser-based tool for applying displacement textures to 3D models. You load a model, choose or upload a texture, adjust how it is projected and how deep it goes, and export a new mesh with the texture physically built into the geometry. The key word is physically. Unlike a slicer setting that perturbs the toolpath at print time, BumpMesh changes the mesh itself. The texture travels with the file, which solves the portability weakness from the texturing guide: a textured STL behaves identically in Bambu Studio, OrcaSlicer, or any other slicer, whatever settings the person printing it has configured.
It accepts STL, OBJ, 3MF, and STEP files, the last added in a later update through CNC Kitchen’s meshStep component. Everything runs locally in the browser, so your files never leave your machine. There is no account, no install, and no licence fee, and the licence terms explicitly allow commercial use. Attribution is appreciated but not required. The author is upfront that the tool is provided as-is with no support obligation, though bug reports and feature requests are welcome.
How it works: greyscale in, geometry out
The principle is the same height-map idea behind the photo-to-displacement method in the texturing guide. A greyscale image acts as a displacement map: black areas cause no displacement, white areas cause maximum displacement, and every shade between them pushes the surface out by a proportional amount. Wood grain, knurling, leather, and fabric weave all work this way, and you can upload any greyscale image of your own to use as a custom texture.
Getting a flat image to wrap sensibly onto a 3D object is the hard part, and BumpMesh offers several projection modes to handle it. Triplanar projection suits most geometries because it projects seamlessly along all three axes. Cylindrical mode handles buttons, bottles, and similar round objects better. Planar projection suits flat surfaces. The failure of a single wrapped image on a curved surface was the exact limitation of the SVG emboss method in the texturing guide, so having these modes built in is a real step forward.
The technical step that makes texturing possible happens at export. A displacement texture needs far more geometric resolution than a typical clean CAD mesh provides, so BumpMesh subdivides the mesh into much smaller triangles first, then runs a decimation pass to bring the file size back down, similar to the simplification function in OrcaSlicer and Bambu Studio. By default the output lands at around 750,000 triangles, which most slicers can still process without trouble. That figure is worth remembering, because it is the practical cost of the technique.
The feature set
| Feature | What it does | Why it matters |
|---|---|---|
| Built-in textures plus custom uploads | Predefined library (wood grain, knurling, leather and more), plus any greyscale image you supply | Covers common surfaces instantly, with no limit on custom patterns |
| Projection modes | Triplanar, cylindrical, and planar | Handles curved and flat surfaces without the stretching a single flat projection causes |
| Scale, depth and amplitude controls | Adjusts texture size and how far the surface is displaced | Lets you dial from a subtle grip finish to a pronounced tactile texture |
| Masking | Choose which surfaces receive the texture, with smooth borders and selectable transition curves (linear, S-curve, ease-in) | Keeps functional faces, mating surfaces, and the bottom plate clean while texturing visible areas |
| Texture smoothing | Configurable blur applied to the displacement map before use | Softens harsh detail that would be too fine for the nozzle to resolve |
| Bake Textures | Flattens layers, paint, and textures into the mesh | Produces a finished mesh when you are ready to export |
| Project save and load | Saves layers, paint, and textures in .bumpmesh project files | Lets you return to a texturing session and adjust it later |
| Undo and redo, rotation gizmo, mesh diagnostics | Standard editing conveniences plus a mesh health check | Makes the tool feel like proper software rather than a one-shot converter |
| Export formats | Displaced STL, with 3MF export added later | Drops straight into any slicer |
| Multilingual interface | Italian, Spanish, Portuguese, Japanese, French, Finnish, Dutch and more, via community translators | Accessible well beyond English-speaking users |
What it is actually good for
The tool’s own description names three practical uses beyond simply making parts look good, and each connects to something already covered on this site.
Hiding Z-seams. The Z-seam guide covers the slicer-side options for hiding the vertical seam line. A real surface texture offers a different approach: a seam sitting inside an irregular, high-frequency texture is effectively camouflaged, because the eye has no clean smooth surface to notice a flaw against. This is the same logic by which fuzzy skin hides layer lines, but with an intentional, designed pattern rather than random jitter.
Adding grip. Knurling and similar textures on handles, knobs, and tool grips are a functional use that no purely cosmetic finish matches. A displaced knurl pattern built into the geometry gives a genuinely tactile surface that a glossy printed handle simply does not have.
Stiffening vase mode prints. This is the most interesting claim, and it connects directly to the vase mode guide. A vase-mode print is a single thin wall, and a flat single wall flexes easily. Adding a displacement texture gives that wall a rippled or corrugated cross-section, and a corrugated sheet is stiffer than a flat one of the same thickness, for the same reason corrugated cardboard and roofing sheet are. For anyone printing decorative single-wall pieces like the Christmas tree project, that is a way to gain rigidity without switching out of vase mode.
How it compares to the other texturing routes on this site
| Method | Where the texture lives | Shareable with the file? | Effort | Best for |
|---|---|---|---|---|
| Fuzzy skin | Slicer toolpath | No, depends on the recipient’s slicer settings | One tickbox | Quick all-over matte, grippy finish |
| SVG emboss or engrave | Slicer-generated geometry | Partly, tied to the project file | Low to medium | Logos and text on flat faces |
| Exposed infill pattern | Slicer infill settings | No | Medium | Geometric decorative panels |
| Photo-to-displacement in Blender or Fusion | Baked into the mesh | Yes | High, needs CAD skills | Convincing leather, stone, wood |
| BumpMesh | Baked into the mesh | Yes | Low, runs in the browser | Custom surface textures on any model without CAD |
BumpMesh sits in an unusually useful spot on that table: it delivers the durability and portability of the heavyweight CAD route at roughly the effort level of the slicer-native shortcuts. It also complements SolidVents rather than competing with it. SolidVents generates vent and grille geometry as cut-through patterns, while BumpMesh pushes a continuous surface in and out without removing material.
The honest limitations
Resolution is bounded by the nozzle. A displacement texture can describe features finer than a 0.4mm nozzle can physically reproduce. Very fine detail in a texture will be smoothed away or mushy in the finished print, which is why the texture smoothing control exists. Matching texture scale to what your nozzle and layer height can resolve matters more than choosing the most detailed texture available, and the principle mirrors the nozzle and layer height discussion in the nozzle size guide.
The triangle count is heavy. A default export of around 750,000 triangles is fine for most slicers on a modern computer, but it is far heavier than the clean mesh you started with. Opening and slicing it takes longer than a plain model, and a very large or very detailed object pushes that further. Treat texturing as one of the last steps before slicing, not something to apply early and carry through multiple rounds of editing.
It interacts with other slicer features. A heavily textured surface changes how overhangs, bridging, and support contact points behave, since the surface is no longer smooth. The support interface settings in the support settings guide become more relevant, because supports touching a textured face can grip unpredictably. Z Anti-Aliasing, covered in the ZAA post, is aimed at smoothing shallow slopes, which is close to the opposite goal from deliberate texturing. The two are not meant to be combined on the same surface.
It is a one-person, as-is project. The licence is explicit that there is no support obligation and no warranty. The project has clearly been actively developed, with new languages, STEP import, project saving, and speed improvements arriving steadily, but it is still a free tool from one author rather than a commercial product with a support team behind it.
The wider toolkit it belongs to
BumpMesh is the featured entry on a small CNC Kitchen apps page, all browser-based, free, and open source. The others include filaSim for finite element analysis of printed parts, ScanRuler for analysing 3D scans against a reference model, meshStep for opening STEP files and converting them to print-ready STL, a retraction tuner, and a Gridfinity label tool. The scan analysis tool sits naturally alongside the 3D scanners post, and the retraction tuner is a natural companion to the retraction settings guide. They share a philosophy: build a focused tool for a real problem, run it locally so your files stay private, and release the source.
Who should try it
It is worth ten minutes of anyone’s time who has looked at a smooth, slightly plasticky print and wished it looked or felt like something else. Hide a stubborn seam on a handle, add a knurled grip to a knob, give a vase-mode piece a stiffening ripple, or finish a display model with a convincing wood or leather surface without ever opening Blender. The sensible way to start is on a small test piece before committing a long print: choose a texture whose scale suits your nozzle, mask off any surfaces that need to mate with another part, and check the exported file in a slicer preview before sending it to the printer. For a tool that costs nothing, runs privately, and needs no account, there is very little reason not to try it.
BumpMesh is at bumpmesh.com, with the source on GitHub at github.com/CNCKitchen/stlTexturizer. Full credit to Stefan Hermann of CNC Kitchen for building it and releasing it freely.