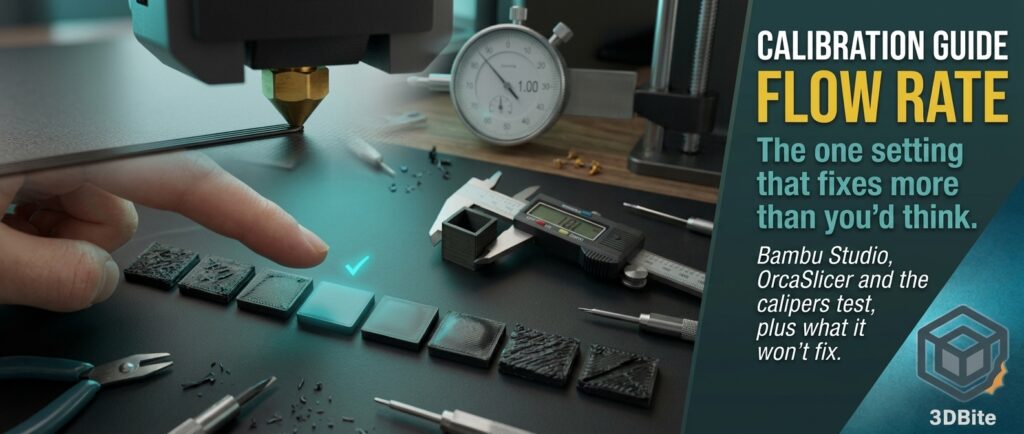
There is a number in your filament profile that quietly shapes half the problems people ask about. Rough top surfaces, gaps in the roof, blobby corners, walls that look fine but come out a fraction too thick, parts that feel weak, an elephant’s foot that no first-layer tweak will cure. People change temperature, swap nozzles, buy new filament and tweak six other settings, when the real culprit is often the flow ratio, a single multiplier that tells the printer how much plastic to push for every millimetre it moves. Calibrating it takes about fifteen minutes and one small test print. This guide explains what it does, how to run the test in Bambu Studio and OrcaSlicer, how to read the results, and just as importantly, which problems it will not fix.
The steps below come from Bambu’s and OrcaSlicer’s documentation and community guides. The example numbers are illustrations, and your results will differ. I have not included my own test results for this post.
What flow ratio actually is
Flow ratio, also called flow rate or the extrusion multiplier, is a single number applied to every extrusion move in a print. A ratio of 1.00 means “extrude exactly what the geometry maths says”. Below 1.00 tells the printer to extrude less, above 1.00 to extrude more. Real filaments rarely behave exactly as the maths assumes, because diameter varies slightly, materials compress and melt differently, and additives change how they flow, so each filament usually needs its own small correction. For most filaments the right value sits close to 1.0, which is why large swings usually point to something other than flow.
The confusion starts because several different settings sound alike. Here is how they differ.
| Setting | What it controls | Problems it fixes |
|---|---|---|
| Flow ratio (flow rate) | How much plastic comes out overall, in steady-state printing | Rough or gappy top surfaces, bulging or thin walls, parts slightly too big or small, weak walls |
| Flow dynamics (pressure advance, K value) | The timing of extrusion when the toolhead speeds up and slows down | Blobs and bulges at corners, gaps after sharp turns, ragged line starts and ends |
| Max volumetric speed | The fastest the hotend can melt filament before it starts under-extruding | Under-extrusion on fast, thick prints |
| Nozzle temperature | How easily the plastic melts and flows | Layer adhesion, stringing, gloss, and some apparent under-extrusion |
| Extruder calibration (e-steps, rotation distance) | How far the filament moves per motor step | A printer-level error that flow ratio can mask but not truly fix. Bambu printers do not expose this |
One of the guides I read puts the difference neatly: if your walls bulge or your infill is sparse, that is a flow-rate problem, and if only your corners are messy, calibrate flow dynamics instead.
How it shows up on a print
| Too much flow (over-extrusion) | Too little flow (under-extrusion) |
|---|---|
| Rough, bumpy or ridged top surfaces, often shiny and rough at once | Visible gaps between lines on the roof, or a wispy, holey top |
| Blobs, zits and bulging walls | Thin, matte walls with tiny regular gaps |
| Elephant’s foot, where the first layers bulge outwards | Weak parts that snap easily and weak layer bonding |
| Outer dimensions consistently a fraction too large, one guide suggests about 0.1 to 0.3 mm | Holes that are too large and fits that are too loose |
| A bulging seam | Sparse-looking infill |
Be careful with that table. Several of these symptoms have other causes. A bulging seam and blobby corners also come from pressure advance. Under-extrusion can be a partial clog, damp filament or too-low temperature. Elephant’s foot can be a first-layer problem, covered in the first layer rippling guide. Flow calibration is a strong candidate when several symptoms appear together, but it is not a universal cure.
Before you calibrate
A flow test only measures what you feed it, so eliminate the obvious variables first. Otherwise you will bake a different fault into your flow ratio and it will fail the moment you change filament.
- Dry the filament. Damp filament pops, strings and prints rough, and it can fake under-extrusion.
- Check the diameter setting. Make sure the profile says 1.75 mm, not 2.85 mm.
- Use a sensible temperature. Use the spool’s recommended range, not an extreme, because temperature changes how the plastic flows.
- Check for a partial clog or a worn nozzle. If the filament path is struggling, flow ratio cannot save it. The maintenance routine covers what to check.
- Get the first layer right. A bad first layer muddies everything above it.
- Select the right filament profile first. The slicer saves the result into the profile you have selected, so a wrong choice writes the number to the wrong place.
Which filaments need it
Bambu’s own RFID-tagged filament loads a factory-calibrated profile, and several guides say Bambu PLA Basic usually needs no extra pass. The strongest case for calibrating is any filament that is not a first-party Bambu spool: third-party PLA, PETG and TPU, budget spools, silk and glitter filaments, and anything with an unusual additive. That includes the eSUN PLA+ I use on my own printers, which is a third-party material and therefore a candidate. If you want a deeper walk-through of the whole sequence, my calibration routine post puts flow in context.
Method 1: Bambu Studio’s two-pass test
Bambu Studio has a built-in flow rate calibration in its Calibration tab. The exact options depend on your printer, and sources report that A1-series printers have no LiDAR and rely on a visual test, so check what your own Calibration menu offers.
- Open the Calibration tab and choose Flow Rate.
- Select your printer, nozzle and the filament profile you will actually use.
- Run Pass 1. It prints a set of small tiles, each at a different flow modifier. This is the coarse pass.
- Pick the tile with the smoothest, most uniform top surface. Studio records your choice and writes the new flow ratio into the selected filament profile.
- Run Pass 2, which repeats the idea in finer steps around the Pass 1 winner.
- Pick the best tile again, then check that the flow ratio field in your filament profile really changed, and save the profile.
Roughly ten minutes of printing is typical. If the winner lands at the edge of the range, repeat the process, because the true value may lie beyond it.
Method 2: OrcaSlicer, YOLO or two-pass
OrcaSlicer offers two ways, both under Calibration, then Flow Rate. If you print on a Bambu machine through Orca, its wiki specifically warns you not to select the “Flow calibration” option when starting the test.
| YOLO (recommended) | Two-pass (legacy) | |
|---|---|---|
| Passes | One | Two |
| Blocks | Eleven blocks across a modifier range of -0.05 to +0.05 in steps of 0.01. A “perfectionist” setting uses finer steps | Pass 1 prints nine blocks. Pass 2 prints ten, with modifiers from -9 to 0 |
| How to apply the result | New ratio = old ratio plus the modifier | New ratio = old ratio x (100 + modifier) / 100 |
| Example | Old 0.98, best block +0.01, new 0.99 | Old 0.98, best block +5, new 0.98 x 10⁵ / 100 = 1.029 |
Notice that the two methods apply the modifier differently: one adds it, the other multiplies by it. Mixing the formulae up is a common mistake, so write down which method you ran. Whichever you choose, remember to save the filament profile afterwards.
Method 3: the single-wall calipers test
If you do not trust your eyes, or the visual tests give odd results, you can measure. Print a simple cube with a single wall, no top or bottom layers and no infill, using the print speed and settings you normally use. Measure the wall thickness with calipers at several points and take the average. Then calculate:
New flow ratio = current flow ratio x (target wall width / measured wall width)
One guide gives a quick illustration: a nominal 0.4 mm wall that measures 0.44 mm is over-extruded, and one that measures 0.37 mm is under-extruded. Use the line width your profile actually specifies as the target. Calipers only resolve about a hundredth of a millimetre and plastic is slightly squishy, so treat the result as a cross-check on the visual test, not a replacement.
How to read the test
- Choose the smoothest, not the shiniest. A glossy surface with visible ridges is not smooth.
- Use your fingertip, and let the plate cool to room temperature first. Heat softens plastic and fools your eyes.
- Look at the middle of each tile. The start and end of lines can show slight bulging that is normal.
- If two tiles look equal, take the higher flow, according to one OrcaSlicer guide, but avoid any tile with even slight gaps. A tiny under-extrusion on a test tile can grow into obvious gaps on a larger print.
- Do not trust one noisy result. If runs give wildly different values, look for an underlying cause such as damp filament or a partial clog before accepting a number.
What a normal result looks like
Most guides expect results close to 1.0. One example profile for generic PLA starts at 0.98, one troubleshooting guide says rigid filaments typically land somewhere around 0.92 to 1.02, and another suggests adjusting in small steps of 0.01 to 0.02. If you land far outside that window, the guidance is to suspect something else: a wrong filament diameter, a partial clog, or genuinely unusual filament. Large corrections are a warning, not a victory.
A note on Bambu Studio’s “object flow ratio”
According to a community post about YOLO-style calibration in Bambu Studio, since version 2.2.0 there are two flow settings: the flow ratio in the filament profile, and an “object flow ratio” in the Quality section of process settings, visible only with Developer Mode on. They multiply together. A filament ratio of 0.98 and an object ratio of 1.05 gives an effective 1.029 for that object. The practical lesson is to avoid correcting the same error twice. If you have changed the object value, remember it when you calibrate the filament. Check this in your own version of the slicer, because I am relying on a community description here.
Flow ratio or flow dynamics first?
Here the sources genuinely disagree, and it is worth knowing why. Several Bambu-focused guides say to calibrate flow rate first, because the pressure advance value depends on how much plastic is flowing, so calibrating dynamics on a wrong flow ratio just bakes the error in. Other guides, including ones based on OrcaSlicer’s workflow, put pressure advance earlier, arguing that it affects how extrusion lines form and should be settled before fine-tuning the multiplier. Both camps agree that the two interact, and that getting the order wrong is rarely catastrophic. I follow the flow-first order in my own calibration routine post, and if you want certainty, repeat the quick flow test after your dynamics run to see whether the answer moved.
How often to do it
| Situation | Recalibrate flow? |
|---|---|
| A new brand or material you have not printed before | Yes |
| Another colour of a filament you already calibrated | Usually close, but check if you see problems or need tight tolerances, since pigments and additives can shift behaviour |
| A new batch of the same filament | Check if prints change |
| A new nozzle or nozzle size | Yes for flow dynamics, and flow ratio usually survives, according to one guide, but verify |
| A big temperature change | Re-test |
| Everything printing well | No. Leave it alone |
Keep a simple record: brand, material, colour, flow ratio, temperature and date. A spreadsheet is enough. It saves you from repeating the test and makes it obvious when a spool does not behave like the last one.
What flow calibration will not fix
- Corner blobs and ragged line starts. That is pressure advance.
- Stringing and oozing. Usually temperature, dryness and retraction, though over-extrusion can make it worse.
- Warping and lifting. Bed adhesion, enclosure and design, covered in the warping guide.
- A worn or clogged nozzle, or a feed path that grinds or slips.
- Damp filament. Calibrating wet plastic bakes in the wrong answer.
- Dimensional errors from shrinkage, which is a material property and not a flow problem.
A short checklist
- Dry the filament and check the profile’s diameter and temperature.
- Select the exact filament profile you will use.
- Run the flow test: Studio’s Pass 1 and Pass 2, or Orca’s YOLO.
- Judge by feel and sight on a cooled plate: smoothest, with no gaps.
- Apply the right formula and save the profile.
- Print a real part and confirm the top surface, walls and fit.
- Record the result.
My take
Flow ratio is the cheapest, quickest calibration there is, and it matters most with the filaments Bambu’s profiles know least about. It will not rescue a badly set-up printer, and it is no substitute for dry filament and a clean nozzle, but when your top surfaces are rough or your parts are slightly wrong and nothing else explains it, it is the first thing I would check. Run it once per filament, write the number down and leave it alone, and you will save yourself a surprising amount of tinkering.
Sources and further reading
- OrcaSlicer wiki: Flow ratio calibration (YOLO and two-pass) and the OrcaSlicer wiki: Calibration
- MakerWorld: YOLO flow ratio calibration for Bambu Studio, describing the object flow ratio setting
- 3D Profile Fix: custom filament and calibration in Bambu Studio and its flow ratio guide
- FilamentPicks: adding third-party filament to Bambu Studio
- ADP Industries: Bambu Lab flow rate calibration
- UNBC SparkLab: extrusion calibration for the A1
- Ask The Nozzle: flow rate calibration in OrcaSlicer
- FDM Desk: Orca Slicer calibration order
- 3D Printing Space: over-extrusion vs under-extrusion