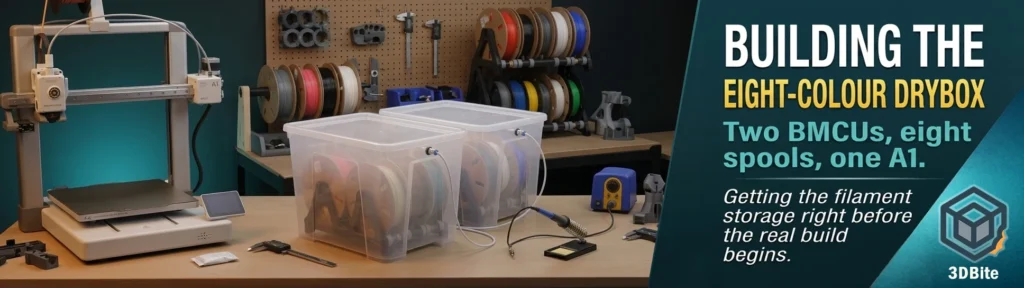
Two BMCU units arrived this week and the printer reshuffle they are triggering is bigger than I expected when I first mentioned trying them. The plan, now firmed up: the new A2L keeps the existing AMS Lite for its multi-colour duties, and the A1 becomes the dedicated eight-colour machine, running two BMCU units side by side. Eight colours from a printer that originally shipped with four is exactly the kind of expansion that the closed Bambu AMS architecture cannot offer and the open BMCU ecosystem makes possible, as covered in the BMCU vs AMS post. Before any of that multi-colour capability gets tested properly, there is a more basic problem to solve first: eight spools of filament need somewhere dry, organised, and tangle-free to live, feeding cleanly into two separate BMCU units without crossing paths or absorbing moisture sitting in the open. That is what this build addresses.
The model: Ezystorage Drybox System with Auto-Rewind
The model is the Ezystorage Drybox System with Auto-Rewind on MakerWorld, designed by fbish. It is a remix of an earlier design — Jerrari’s Auto-Rewinder for Reprack — with a completely redesigned base built specifically to fit the Ezystorage 18L IP67-rated storage container rather than the cereal-box-sized containers that dominate most filament drybox designs online. The original rewind mechanism with its coil and clutch system carries over unchanged; what fbish redesigned is the base, with a reduced coil count and shortened rollers to fit the new container footprint without losing any of the rewind functionality.
The designer’s reasoning for choosing the Ezystorage container specifically is worth repeating because it solves a problem that comes up constantly in filament storage discussions: most drybox designs are built around cereal-box-style containers that are either too narrow for wider spools or priced unreasonably for what they are. The 18L Ezystorage box fits four spools with room to spare, is properly IP67 rated rather than just loosely sealed, and according to the designer’s own testing with a basic hygrometer, maintains around 10% relative humidity for two-plus weeks using activated alumina desiccant — with no need to recharge the desiccant over a month of testing even with occasional opening and closing. That is a genuinely strong result for passive moisture control and the kind of practical data point that the filament drying discussion in the dryer guide doesn’t always have hard numbers behind.
The auto-rewind mechanism is the feature that makes this specific design worth the extra build complexity over a plain spool box. When an AMS-style system retracts filament — whether that is the AMS Lite or a BMCU performing the same retraction during a colour change — the loose filament occasionally bulges outward off the spool or flips to the side, creating the kind of slack loop that leads directly to a tangle on the next feed. The coil-and-clutch rewind system keeps tension on the spool as filament is pulled back, winding it neatly rather than letting it spill. It is an entirely optional part of the build — the base, rods, and rollers function as a standard spool holder without it — but for a build specifically intended to feed two independent BMCU units reliably, the tangle prevention is worth the extra printed parts and assembly time.
What gets printed and what gets bought
The printed components are the base, the rods, and the rollers — described by the designer as relatively self-explanatory once you have the non-printed hardware in hand. The non-printed parts list is short: an Ezystorage 18L IP67-rated storage container (around £15 equivalent), four PC4 M10 pneumatic connectors for the filament feed-through points, and sixteen 608 bearings for the rollers — the same standard skateboard-bearing size that turns up across a huge range of 3D printing accessory designs, including spool holders, fidget toys, and roller mechanisms generally.
The coil and clutch assembly for the rewind mechanism follows the original instructions from Jerrari’s design, which the remix author links to directly rather than duplicating — worth reading through before starting that part of the build, since the clutch arms need to be pushed until they audibly snap into the bent position that lets the coil seat correctly, and the remaining coil segments assemble like interlocking puzzle pieces with a specific semi-circle-holed piece that needs to go at the end of the sequence.
One specific material warning from the designer is worth flagging clearly: avoid PETG for the rollers. PETG’s lower friction surface compared to PLA can let the spool slip rather than rewind properly, which defeats the purpose of the auto-rewind mechanism entirely. This mirrors reports from users of the original Jerrari design experiencing the same slipping issue. PLA or PLA+ is the recommended material for the rollers specifically — the designer printed the original in JAYO PLA+, though any standard PLA+ including eSun should perform equivalently. The base and structural components are less sensitive to this and most materials should work fine there.
The pneumatic connector installation
Getting the PC4 M10 pneumatic connectors fitted to the container wall is the one step in this build that requires a tool most people would not automatically reach for. The designer’s recommended method is a soldering iron: mark the hole positions evenly, push the heated iron straight through the container wall, and the melted plastic forms a clean circular opening sized for the connector thread. Some additional sanding may be needed afterward depending on the specific soldering iron tip size, since the PC4 M10 connectors are on the larger end of the common pneumatic fitting range. The “Nut + Filament Funnel” accessory by IDV, also on MakerWorld, is used to secure each connector from the inside of the container — effectively sandwiching the container wall between the connector’s external thread and the printed nut on the inside.
There is one genuinely useful piece of after-the-fact advice buried in the designer’s own notes that is worth following from the start rather than discovering the hard way: install the pneumatic connectors toward the top of the container wall, not the bottom. The designer’s own build had them positioned low, which resulted in filament sliding and rubbing against the rollers on its way out — not damaging in any serious way, but an avoidable friction point in an otherwise well-thought-out design. The container’s wall geometry also tapers slightly toward the corners, meaning the available internal clearance reduces as you go higher — another reason to plan connector height carefully rather than just centring them by eye.
Why this build matters for the eight-colour BMCU plan specifically
Two independent BMCU units feeding eight separate filament paths into a single A1 toolhead is a meaningfully more complex spool management situation than the standard four-spool AMS Lite setup. With the AMS Lite, all four spools sit inside a single contained unit with its own basic humidity buffering. With two BMCU units running side by side, the eight spools need to live somewhere external, organised, and properly sealed — the BMCU’s open architecture does not include any equivalent humidity management of its own. As covered in the BMCU vs AMS comparison, the trade-off of going the open-source route is exactly this: you gain colour count and save significant money, but the conveniences that Bambu builds into the AMS Lite as standard — including basic moisture protection — become your own responsibility to solve.
An 18L Ezystorage box comfortably holding four spools, with a clean rewind mechanism that prevents the exact kind of tangling that two simultaneous BMCU retraction events could otherwise cause, is the right building block for this. The plan is two of these dryboxes running in parallel — one feeding each BMCU — giving the full eight-colour setup proper humidity control across the board rather than leaving half the spool collection sitting in the open while only the AMS Lite spools on the A2L get the benefit of sealed storage. Given how much attention filament storage already gets in the regular workshop routine, as covered in the long-term ownership post, extending that same discipline to the BMCU side of the operation rather than treating it as a lesser concern felt like the obviously correct call before the BMCU units themselves go anywhere near a live print.
Print settings and plan
Two complete drybox builds means printing the base, rods, and rollers twice over, plus the full coil and clutch set for both rewind mechanisms if both boxes get the auto-rewind feature fitted — which they will, given that both BMCU units will be retracting filament regularly during colour changes and the tangle risk applies equally to each. Standard PLA+ at the usual A1 profile settings for the base and structural components, switching specifically to PLA or PLA+ rather than anything more slippery for the rollers per the designer’s explicit warning above.
Given that none of these parts need to look impressive — they live inside a desiccant box, not on a shelf — this is also a sensible candidate for the larger nozzle and faster print settings covered in the nozzle size guide. The base and rollers are functional geometry without fine surface detail requirements, which makes them a good fit for a 0.6mm nozzle if it is loaded on the A1 already, cutting meaningful time off what is otherwise a fairly large multi-part print run across two complete drybox kits.
The desiccant box update the designer released more recently — a dedicated printable desiccant container to sit inside the main box rather than loose desiccant packets rattling around — is also worth printing alongside the main build. Loose activated alumina or silica packets work, but a properly contained, easily swappable desiccant box keeps the whole system tidier and makes checking and recharging the desiccant a much faster job than fishing packets out from around the spools.
What comes next
Once both dryboxes are built and the pneumatic connectors are correctly positioned this time — top of the container wall, lesson learned from the designer’s own writeup before I even start — the next stage is getting both BMCU units physically mounted and wired alongside the A1, followed by the genuinely interesting part: working out whether eight-colour printing through two independent BMCU units actually behaves as cleanly in practice as it does on paper. That installation, the firmware configuration, and the first real eight-colour test print will be a dedicated post once there is something worth showing rather than just describing. For now, this is the unglamorous but necessary first step — get the filament storage right before anything else has a chance to go wrong downstream of it.