If you have read the how to convince your spouse you need another 3D printer post, you will understand exactly why this project exists. My spouse is Christmas-obsessed. Not casually festive — properly, thoroughly, all-in Christmas-obsessed. The decorations come out early, they go up properly, and anything that adds to the seasonal atmosphere is welcomed without question. This makes the pre-Christmas months an excellent window for printing, and I have been using it productively.
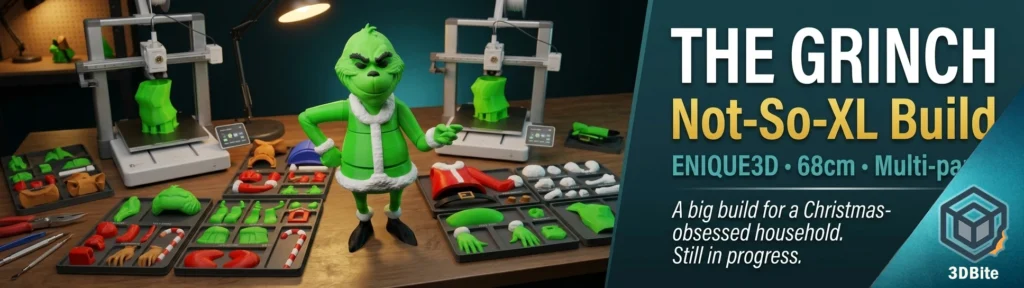
The Not-So-XL Grinch by ENIQUE3D is the latest build on the plate — and at approximately 68 cm tall when assembled, it is the largest single seasonal figure I have attempted. I am still in the middle of it as this post goes up. Multiple print sessions in, multiple colour jobs down, and a substantial amount of eSun PLA+ invested. It is not finished yet. But I know ENIQUE3D’s work well enough at this point — Rudolph will be standing next to the Christmas tree, the lampposts will be up in the hallway — to be confident this one will be worth the effort when it is done. This post will be updated when the build is complete.
The model
The Not-So-XL Grinch is a paid model available on Thangs, designed by ENIQUE3D. The “Not-So-XL” designation is the same naming convention used for the Rudolph — it is the version scaled for build plates below 300 × 300 × 300 mm, making it directly compatible with the Bambu A1 without any scaling adjustment. If you have a larger build plate — above 320 × 320 × 320 mm — there is a full XL version that stands at a remarkable 91 cm tall. At the A1’s 256 mm build volume, the Not-So-XL at 68 cm assembled is already a commanding display piece. The XL would require a different machine entirely.
The figure depicts the Grinch in his classic festive pose, holding a candy cane. The assembled model stands approximately 27 inches (68 cm) tall and prints in multiple separate parts. It is, by some margin, the most complex ENIQUE3D build I have attempted — more parts, more colours, more plates, and more assembly stages than either the Rudolph or the lamppost. The designer’s own notes flag the scale of the job clearly: this is a multi-day project that rewards patience and a methodical approach.
ENIQUE3D’s Patreon is worth supporting if you find yourself reaching for their models regularly. The quality of design is consistently high and the assembly documentation for each build is detailed and practical — something that makes a real difference when you are halfway through a complex multi-part figure and trying to work out which section goes where.
Filament
- Green (body, face, hands, feet) — eSun PLA Basic
- Black (eyes, hair, eyebrows, suit details) — eSun PLA+
- White (eyes, fur trim, teeth) — eSun PLA+
- Yellow (eyes) — eSun PLA+
- Red (candy cane stripes, suit) — eSun PLA+
- Gold (belt buckle) — GEEETECHPLA Silk
The green is the dominant colour by a significant margin — the Grinch is a large figure and the body mass is predominantly green. I am running eSun PLA throughout as usual. At a model this size, consistency across the colour jobs matters — switching brands mid-build risks subtle differences in shrinkage and surface finish that are visible at the joins. Using the same brand and material type across every job is worth the discipline.
Print settings
| Setting | Value used | Notes |
|---|---|---|
| Filament | eSun PLA throughout save for a small amount of GEEETECHPLA Silk | Same brand and material across all colour jobs |
| Layer height | 0.2 mm | Standard. Adequate for the scale of the model |
| Infill | 15% | Display piece. No structural load beyond self-support |
| Supports | Tree supports on specific parts | Required on face, arm, and overhanging body sections |
| Support top Z distance | 0.275 mm | ENIQUE3D recommendation — cleaner release on contact surfaces |
| Nozzle temp | 220°C | Standard eSun PLA+ |
| Bed temp | 55°C | Textured PEI plate throughout |
| Bed surface | Textured PEI | No adhesion issues on any colour job so far |
The connector system
The model uses 6 different types of connectors. Spares of the main connectors are included. This is ENIQUE3D’s established approach — the same connector logic used on Rudolph and the lamppost, scaled and varied for the complexity of this build. Six connector types sounds more intimidating than it is in practice. Each type has a specific purpose and the assembly guide makes the mapping clear. The inclusion of spare connectors is a thoughtful practical touch — losing a small connector mid-assembly is exactly the kind of thing that derails a build.
It is highly recommended to perform a test dry build first. Assemble the parts without glue to ensure everything fits and you understand the placement of all components. I will be doing a full dry assembly before any glue goes anywhere near this figure. With a model of this complexity, the dry build is not optional — it is the step that prevents discovering a placement error after a joint has already set.
Glue is necessary for elements that fight gravity, such as the left arm and hat tail, to ensure stability. The arms are split into two sections each. Organise your parts, especially the arm components, before starting to make assembly easier. Organising parts before starting is advice that applies to every multi-part build but becomes especially important here. With this many parts across multiple colours and multiple print sessions, keeping everything sorted and labelled saves significant time and confusion at the assembly stage.
The candy cane
The candy cane is a specific sub-assembly worth calling out. Slide each candy cane part in sequence (Red, White, Red, etc.) down the square connecting rod. Use the smaller connectors at the bend of the cane. Slide the assembled candy cane into the Grinch’s hand. Glue is required for the candy cane. This is the kind of assembly detail that the designer’s documentation makes simple but that would be easy to get wrong without guidance. The sequence matters — getting the colour alternation wrong on a striped candy cane is visible. Follow the guide precisely here.
Scale of the project
This is a multi-day build. At the time of writing I am several sessions in and still printing. The number of distinct colour jobs, combined with the physical size of the parts, means the plate occupies the A1 across multiple mornings and evenings. This is not a weekend print — it is a project that runs across a week or more if you are fitting it around a normal schedule.
Filament consumption is substantial. The body sections alone account for a significant amount of green PLA+. Budget for more than two spools of the dominant colour before you start. Running out of the primary colour partway through a major body section and trying to match a second spool exactly is a problem worth preventing.
On the positive side, the print jobs themselves are straightforward once the settings are established. Each colour is a single-material job with no AMS complexity, no multi-material purge waste, and no mid-print colour change. The complexity is in the number of jobs and the assembly after — not in the printing itself. Each plate that comes off the A1 is clean and consistent. The challenge is the volume, not the difficulty.
Result — build in progress
Not there yet. The parts are accumulating and the assembly is being planned. What I can say at this stage is that the individual printed sections look exactly as they should — clean surfaces, good colour separation, no support scarring on the visible faces where the 0.275 mm Z distance recommendation has been followed. ENIQUE3D’s geometry is well designed for the no-AMS multi-part approach: the colour splits are sensible, the supported surfaces are the ones that matter less aesthetically, and every connector socket so far has been clean and consistent.
This post will be updated when the Grinch is assembled and standing. Somewhere in the house that my spouse will walk past frequently and approve of loudly. That is the goal. Given the track record of ENIQUE3D builds in this household — Rudolph is still standing next to the tree, the lamppost is still in the hallway — the confidence level is high.
Why ENIQUE3D keeps getting the print queue
This is the third significant ENIQUE3D build on this machine and it will not be the last. The reason is consistent: the designs are well-engineered for the non-AMS multi-part workflow, the connector systems work, the assembly documentation is detailed and honest, and the results are proportionate to the effort. These are builds you put on display because they look like something worth displaying, not because they happened to come out acceptably.
The Patreon catalogue is growing and the quality across it is consistently high. If seasonal and decorative large-format prints are your thing — and in a Christmas-obsessed household they clearly are mine — it is worth supporting.
Model and designer
- Not-So-XL Grinch — Thangs (paid model)
- ENIQUE3D on Patreon — full catalogue, subscriber extras
If you print this one, give ENIQUE3D a boost on Thangs. The scale and quality of the design work across their seasonal range is worth supporting. And do the dry build before you reach for the glue.