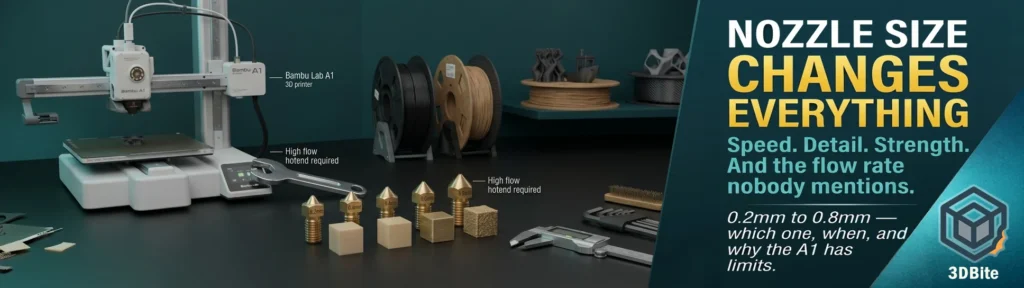
Most people who own a 3D printer have never changed the nozzle size. They accept the 0.4mm that came in the box, tune everything around it, and never consider that swapping a £10 piece of metal could fundamentally change what their machine is capable of. This post is about why that matters — the difference nozzle diameter makes to speed, detail, and strength; when each size genuinely earns its place; and the important caveat about volumetric flow rate that means a larger nozzle will not automatically deliver the speed gains you might expect unless your hotend can keep up. That last point applies directly to the A1 with a 0.8mm nozzle, and it is worth understanding properly before buying a nozzle and wondering why the improvement is less dramatic than the numbers suggest.
The physics in one paragraph
The nozzle diameter controls how much plastic exits per unit of time at a given print speed. Double the diameter and you quadruple the cross-sectional area of the orifice — a 0.8mm nozzle pushes four times the volume of a 0.4mm nozzle at the same toolhead speed. That is why a 0.8mm nozzle can cut a twelve-hour print to under three hours in theory. But volume is not free. The hotend must melt plastic fast enough to sustain the flow rate you are demanding. If you push more volume per second than the hotend can melt, the filament exits incompletely melted, extrusion pressure spikes, the extruder skips, and the print fails. The theoretical speed gain from nozzle diameter and the practical speed gain you can achieve are not the same number, and the gap between them is determined by your hotend’s volumetric flow rate ceiling.
Understanding volumetric flow rate
Volumetric flow rate is the volume of filament extruded per second, measured in mm³/s. The formula is:
Volumetric speed (mm³/s) = print speed (mm/s) × nozzle diameter (mm) × layer height (mm)
Some examples to make this concrete:
| Nozzle | Layer height | Print speed | Volumetric flow required |
|---|---|---|---|
| 0.4mm | 0.2mm | 60mm/s | 4.8 mm³/s — well within any hotend |
| 0.4mm | 0.2mm | 500mm/s | 40 mm³/s — at the ceiling of even the E3D ObXidian on an A1 |
| 0.6mm | 0.3mm | 60mm/s | 10.8 mm³/s — manageable on a standard hotend |
| 0.6mm | 0.3mm | 100mm/s | 18 mm³/s — approaching or exceeding a standard hotend limit |
| 0.8mm | 0.4mm | 60mm/s | 19.2 mm³/s — at or above a standard hotend limit |
| 0.8mm | 0.4mm | 100mm/s | 32 mm³/s — requires a high-flow hotend |
| 0.8mm | 0.6mm | 100mm/s | 48 mm³/s — beyond any standard hotend |
The slicer handles this through the Maximum Volumetric Speed setting — a ceiling value in the filament profile that caps the speed at which the machine will print regardless of what you set elsewhere, specifically to prevent under-extrusion. As Bambu Lab’s own wiki explains, if the calculated volumetric speed would exceed the maximum allowed value, the slicer automatically adjusts by reducing the speed. This is why, if your printed times seem slower than expected, checking Maximum Volumetric Speed in Bambu Studio’s Flow menu often explains it. The machine is already being reined in by this limit and you may not have realised.
The four nozzle sizes and what each actually does
0.2mm — maximum detail, maximum patience required
A 0.2mm nozzle produces the finest surface finish achievable in FDM printing. Layer heights of 0.05–0.12mm become usable, producing layer lines that are near-invisible at normal viewing distance. Fine text, intricate surface embossing, miniature figures with facial detail, jewellery masters — all of these benefit from the resolution that a 0.2mm nozzle enables and that a 0.4mm nozzle rounds off or fills in entirely.
The costs are real. Bambu’s own profile database caps the maximum volumetric speed on the 0.2mm nozzle at just 2 mm³/s for PLA — compared to 21 mm³/s for larger nozzle sizes. The stated reason is clog risk: the tiny orifice traps debris that larger nozzles pass through without incident, and the slow speed reduces the pressure that could otherwise force a clog through. A model that takes two hours at 0.4mm may take eight or more at 0.2mm. Filament quality matters far more at 0.2mm — diameter variation that is irrelevant through a 0.4mm nozzle can jam a 0.2mm nozzle reliably. Reserve it for specific applications that genuinely justify it, not as an upgrade to everyday printing.
0.4mm — the standard, for good reason
The 0.4mm nozzle is the industry standard because it balances everything adequately. It works with every slicer profile, every filament type, and every printer from entry-level to high-end. Layer heights of 0.08–0.28mm are usable within the 25–75% of nozzle diameter rule. Detail resolution is sufficient for the overwhelming majority of hobbyist prints — the decorative models, functional parts, figurines, and seasonal builds that make up most print queues. If you are not sure which nozzle to use, the 0.4mm handles 90% of use cases without compromise.
On the A1 with a standard hotend, the practical maximum volumetric flow at 0.4mm is approximately 21 mm³/s — enough to print at meaningful speeds for PLA and PETG. The E3D ObXidian High Flow HotEnd, officially approved for the A1 and A2L, extends this to 45 mm³/s at the 0.4mm size, which represents the ceiling that the A1’s motion system allows at maximum speed and standard layer parameters. For anyone regularly hitting the volumetric ceiling at 0.4mm, the E3D hotend upgrade is the correct response before considering a larger nozzle — it extends the standard nozzle’s capability significantly before you start losing detail resolution.
0.6mm — the most underrated upgrade in the market
The 0.6mm nozzle is the size that experienced makers switch to and frequently do not go back from. The trade-offs are real but they fall in the right place for functional printing. At 0.3mm layer height, a 0.6mm nozzle prints a Benchy in approximately 30 minutes versus 55 minutes on a 0.4mm nozzle. For a 12-hour functional print, the equivalent saving scales proportionally. Print time reductions of 30–50% are realistic and confirmed by independent controlled testing across multiple sources.
The strength argument for the 0.6mm is the one that deserves more attention than speed. Wider extrusion lines create stronger layer bonds because each layer has more contact area with the layer below. The strength increase compared to 0.4mm at equivalent print settings is documented consistently across independent testing — wider extrusion lines mean fewer perimeters for the same wall thickness, and each perimeter bond is stronger than the infill bonds between them. For functional brackets, tool holders, mechanical parts, and anything that carries load or handles stress, the 0.6mm is frequently the better engineering choice over the 0.4mm default.
Detail resolution is reduced relative to 0.4mm but remains sufficient for most non-miniature applications. Text above 6mm tall renders cleanly. Features above 2mm read correctly. For the category of everyday functional printing — the organiser, the bracket, the jig, the tool holder, the replacement clip — the 0.6mm is harder to argue against once you have used it. The 0.6mm High Flow nozzle is an official Bambu option for the A1, and it is the nozzle size I would consider most seriously for any print that does not specifically need the 0.4mm’s detail resolution.
0.8mm — maximum speed and strength, with a significant caveat for the A1
The 0.8mm nozzle is where the speed and strength benefits peak and the practical constraints of the hotend become the most important conversation. In ideal conditions — the right hotend, the right settings — a 0.8mm nozzle finishes large prints in a fraction of the equivalent 0.4mm time. One controlled test recorded a 0.8mm nozzle requiring 51 Newtons to break a test part against 29 Newtons for the 0.4mm equivalent — significantly stronger. Large-format prints that would take twelve hours at 0.4mm complete in under three at 0.8mm with the settings configured correctly.
The caveat for the A1 specifically is where the honest discussion must go. The A1’s standard hotend is a competent unit for the 0.4mm and 0.6mm nozzle sizes it was designed around. At 0.8mm, the volumetric flow demand becomes the limiting factor very quickly. At 0.8mm, 0.4mm layer height, and a modest 60mm/s print speed, the required flow is already 19.2 mm³/s — at or approaching the standard hotend’s ceiling with PLA, and likely above it with PETG and other materials that melt more slowly. To print at 60mm/s with a 0.8mm nozzle on PLA, you are already working at the hotend’s limit. Push to 100mm/s and you are demanding 32 mm³/s — a flow rate that requires a genuine high-flow hotend upgrade to achieve reliably.
What this means in practice: fitting a 0.8mm nozzle to an A1 with a standard hotend and expecting to print fast will result in under-extrusion, skipping, and delaminated layers, because the hotend cannot melt material fast enough at the speed you are trying to run. The slicer’s Maximum Volumetric Speed setting will cap your speed to what the hotend can actually deliver, which means you may end up printing at 0.8mm nozzle width but at a speed that is not much faster than the 0.4mm was — because the flow ceiling has not changed, only the nozzle diameter. You get the strength improvement. You do not necessarily get the speed improvement.
The correct solution for anyone who wants to genuinely unlock 0.8mm printing at meaningful speeds on the A1 is the E3D ObXidian High Flow HotEnd. This is an officially approved collaboration product for the A1 and A2L that increases volumetric flow by up to 70% over the standard hotend, allowing the motion system’s speed capability to be used rather than being throttled by the melt rate ceiling. Without it, a 0.8mm nozzle on a stock A1 hotend is printing at a fraction of its theoretical capability. With it, the 0.8mm nozzle becomes genuinely useful for large-format printing where both the speed and the strength advantages matter.
What you lose as nozzles get larger
The progression from 0.4mm to 0.8mm involves specific sacrifices that are worth stating precisely rather than vaguely.
Fine text becomes illegible below a threshold. At 0.8mm, text under approximately 6mm tall loses definition because the extrusion width rounds corners that the narrower 0.4mm bead would have preserved. Small holes close up — a 1mm screw hole in a 0.8mm nozzle print will be undersized by 0.3–0.5mm from the wide extrusion path. Tight-tolerance features, precision fits, and snap-fit connectors that rely on dimensional accuracy become progressively less reliable above 0.4mm and are a specific risk at 0.8mm. For parts where a 0.1mm dimensional variance matters — the mechanical coupling, the precision bracket, the threaded component — the 0.4mm nozzle is the correct choice regardless of what speed a larger nozzle might offer.
Surface finish degrades visibly. Layer lines at 0.8mm layer height are tactile — you can feel them with a fingernail. This is irrelevant for a structural bracket inside an enclosure. It is relevant for anything that will be displayed, handled as a decorative object, or given as a gift. A 0.8mm nozzle is a production tool, not a presentation tool.
Slicer settings that must change with nozzle size
This is the section most people skip and then wonder why the nozzle swap did not work as expected.
Tell the slicer you changed the nozzle. This is the single most common error after a nozzle swap. Physically changing the nozzle and not updating the nozzle diameter in the slicer profile means the slicer calculates extrusion for the old diameter — a 0.4mm slicer setting on a 0.6mm nozzle causes massive under-extrusion because the extrusion width is too narrow to bond properly. In Bambu Studio, check the filament and process profiles after a nozzle change. In OrcaSlicer, update Printer Settings → Extruder → Nozzle Diameter.
Layer height rule: 25–75% of nozzle diameter. For a 0.6mm nozzle: 0.15–0.45mm layer height. For 0.8mm: 0.2–0.6mm. Below the 25% floor the extruded plastic cools before adhering properly. Above 75% the inter-layer bond weakens because the bead is too round to squish into the previous layer. 0.4mm layer height on a 0.4mm nozzle is 100% of nozzle diameter — above the recommended ceiling and the reason many users see weaker parts than expected at maximum layer height.
Extrusion width: 100–120% of nozzle diameter. Setting extrusion width to 120% of nozzle diameter increases inter-layer contact area and improves Z-axis strength by 15–25% over the default. For strength parts: go to 120–150%. For detail parts: stay at 100–110% to preserve feature resolution.
Pressure advance recalibration is mandatory after any nozzle change. Larger nozzles create larger melt zones that store more elastic energy. The pressure advance value that produced clean corners on a 0.4mm nozzle will produce over-extrusion artefacts at corners on a 0.6mm or 0.8mm nozzle. Do not reuse pressure advance values across different nozzle sizes. Run OrcaSlicer’s PA calibration model after every nozzle size change.
Retraction increases with nozzle size. Larger melt zones ooze more during travel moves because there is more molten plastic volume in the system. Increase retraction distance when moving from 0.4mm to larger nozzles and expect to re-tune for stringing on the first few prints after a change.
Which nozzle for which job: a practical summary
| Use case | Best nozzle | Why |
|---|---|---|
| D&D miniatures, fine facial detail, small text | 0.2mm or 0.25mm | Resolution that 0.4mm cannot match. Accept slow print time |
| Everyday general printing — figures, gifts, functional parts | 0.4mm | Best all-round compromise. Suitable for 90% of print queue |
| Functional parts, brackets, enclosures, tool holders | 0.6mm | 30–40% speed improvement and meaningful strength gain over 0.4mm with adequate detail for most applications |
| Abrasive filaments (CF, GF, metal-fill) | 0.6mm hardened steel as minimum | Larger orifice reduces clogging risk; hardened steel resists wear. A 0.4mm brass on abrasive filament wears within hours |
| TPU, flexible filaments | 0.6mm | Larger bore reduces the jamming and pressure build-up that TPU causes in tighter nozzles |
| Large structural prints, rapid prototyping, vase mode | 0.8mm with upgraded hotend | Maximum speed and strength but requires high-flow hotend to realise the speed benefit. Without hotend upgrade, speed advantage is significantly limited on stock A1 |
| Cosplay armour sections, large plain prints, display bases | 0.8mm | Surface finish is coarse but strength and speed for large plain geometry is unmatched |
My own position
I have been a 0.4mm user for two years on the A1 and have not changed nozzle size, partly because the projects I print most frequently are multi-colour AMS jobs where the 0.4mm’s detail resolution matters for figurine quality, and partly because switching nozzle sizes requires the recalibration commitment that adds friction to a workflow that currently runs well. But the research for this post has genuinely made me reconsider the 0.6mm as a default for the non-AMS single-colour functional work that the A2L is now handling — large-format structural prints where shaving 30–40% off the print time and gaining meaningful strength improvement both matter and where the loss of fine detail resolution is irrelevant to the job. The A2L’s large-format bed and predominantly functional use case is a better match for 0.6mm than the A1’s detail-forward multi-colour role, and that is a distinction I had not fully thought through before writing this post.
The 0.8mm remains interesting but lower priority for now. The E3D ObXidian upgrade would be required to make it genuinely useful at speed on either the A1 or A2L, and the upgrade cost, while entirely reasonable for what it delivers, represents a commitment to the 0.8mm workflow that I want to validate through 0.6mm use first. The sensible order is: establish whether 0.6mm genuinely serves the A2L’s use case better, prove the benefit in practice, then consider whether the 0.8mm case holds up for the largest and most structurally demanding prints in the queue.