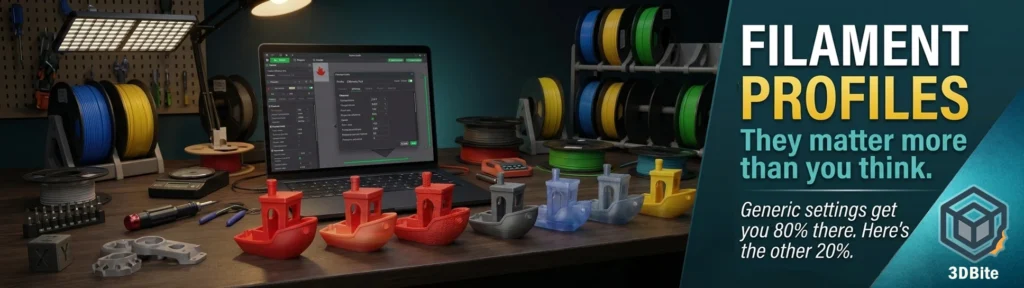
Modern 3D printers have done something impressive and slightly deceptive at the same time: they have made the printing process feel simple enough that the settings beneath it become invisible. Load filament, hit print, watch the result. The automation has improved enough that this workflow produces good results often enough that it is easy to conclude the profiles are sorted and you can stop thinking about them. That conclusion is wrong, and the consequences of it show up in ways that are hard to diagnose because the failure mode is not obvious failure — it is good-enough results that could be noticeably better, or intermittent quality inconsistency that you blame on the machine when the actual cause is a profile that was never quite right for the specific filament in the slot.
Filament profiles are the bridge between the hardware and the material. Get them right and the printer performs as well as it is capable of. Use a generic approximation and you are asking the printer to apply average settings to a specific material — and average settings produce average results. This post covers what profiles actually do, why the gap between Bambu’s native profiles and third-party filament reality is wider than most people assume, and what happens in practice when you do and do not tune them properly.
What a filament profile actually contains
A filament profile is a collection of settings that tell the printer and slicer how to treat a specific material. The major parameters fall into a few categories.
Temperature settings — nozzle temperature and bed temperature — define the melt behaviour of the filament. Too cold and the material does not flow freely, producing under-extrusion, rough layer adhesion, and poor bridging performance. Too hot and the material flows too easily, producing stringing, oozing, surface blobs, and in some cases colour changes. The optimal temperature is not a fixed value — it varies between filament brands, between colours within the same brand, and even between batches of the same product.
Flow rate and pressure advance define how much material is extruded and how the printer compensates for the delay between the extruder commanding extrusion and material actually appearing at the nozzle tip. An incorrect flow rate produces either over-extrusion (blobs, rough surface, poor first layer) or under-extrusion (gaps, weak parts, visible voids). Incorrect pressure advance shows up as rounded corners and blobs at direction changes. Both vary between filament formulations because different materials have different viscosity and compressibility in the melt zone.
Cooling settings determine how quickly the deposited material is solidified by the part cooling fan. PLA needs aggressive cooling. PETG needs reduced cooling to maintain layer adhesion. TPU needs careful cooling balance to prevent crystallisation issues. The fan speed and minimum layer time in the profile directly affect surface finish, overhang quality, and layer bond strength.
Retraction settings control how much filament is pulled back before a travel move to prevent stringing. Too little and you get strings between features. Too much and you get grinding or jamming, particularly with flexible or soft filaments. The correct retraction distance and speed varies by material stiffness and melt viscosity.
Bambu’s own profiles: what they actually do well
When you load a Bambu Lab spool into the AMS and the RFID tag is read, the printer automatically applies a profile that has been specifically calibrated for that exact filament formulation. Bambu Lab PLA Basic is tuned for Bambu Lab’s speed profiles. You can push 300mm/s+ without quality degradation, and the RFID tagging means Bambu Studio automatically loads the correct temperature, flow rate, and retraction settings. The preset profiles eliminate almost all calibration work.
For Bambu’s own materials this is the best possible outcome: a profile that has been developed alongside the filament formulation, tested on Bambu hardware, and refined over time with community feedback. The “just works” experience that Bambu markets is real in this specific context. Bambu’s own filament is engineered specifically for their hardware — but the degree to which it just works is genuinely impressive.
Two years with the A1 has made this automation deeply comfortable. I have become accustomed to the profiles in Bambu Studio just working with little or no tweaking. That comfort becomes apparent the moment you step outside the Bambu filament ecosystem — or the moment you try a different slicer that does not have the same depth of profiling.
There is, however, an important caveat to Bambu’s own profile reliability that the community has documented. A major issue with Bambu’s filament ecosystem is that when they changed the formulation of their Basic PLA, they never properly tested or updated the factory profiles. This has led to unpredictable results, even for users who stick to Bambu’s own filaments. Instead of refining their profiles, they left users to figure it out, which defeats the entire point of a plug-and-play system. Profile maintenance is an ongoing responsibility, not a one-time task, and even Bambu has not been perfect at it.
The generic profile gap
When you load a third-party filament without an RFID tag — which is the situation with every eSun, Polymaker, Sunlu, or Overture spool — Bambu Studio offers a generic profile: Generic PLA, Generic PETG, Generic ABS. These profiles are conservative defaults designed to work adequately across a broad range of materials rather than optimally for any specific one. When you load third-party filament and just select “Generic PLA” in Bambu Studio, you’re using a one-size-fits-all profile that’s designed to be safe, not optimal.
Safe means: temperatures on the lower-to-middle end of the acceptable range. Flow rates at a conservative setting. Pressure advance calibrated for an average material viscosity. Cooling at a level that works across most PLA formulations. This produces acceptable results most of the time. It does not produce the best results that a specific filament is capable of, and it actively produces poor results when the specific filament’s requirements diverge significantly from the generic average.
Bambu Studio does contain some named third-party profiles — Overture, Polymaker, and a handful of others appear in the filament database. Yes — Overture filament works in the Bambu AMS, and Bambu Studio has a built-in Overture profile. But the coverage is patchy. eSun PLA+ — the filament I use for the majority of my printing — does not have a dedicated named profile in Bambu Studio at the time of writing. I use the Generic PLA+ profile and apply manual tweaks from there. The generic profile gets me to approximately 80% of the optimal result. The remaining 20% comes from tuning.
The AnycubicSlicerNext situation for the Kobra X makes this gap even more stark. AnycubicSlicerNext has virtually no named third-party filament profiles. eSun does not appear. Polymaker does not appear. The profile library is thin enough that almost every third-party filament defaults to a generic setting, and the generic settings in AnycubicSlicerNext are less refined than Bambu Studio’s equivalents. After two years of Bambu Studio’s profile depth, the AnycubicSlicerNext experience feels like a significant step backwards in this specific area.
The colour sensitivity problem: a real-world example
One of the most instructive real-world examples of profile sensitivity is something that is almost never mentioned in profile guides but comes up repeatedly in practical experience: colour shift under heat. Different pigments behave differently at elevated temperatures, and some colour-temperature combinations produce visible quality problems that are directly addressable through profile adjustment.
Sunlu red and green PLA are specific examples I have encountered directly. Both colours change noticeably when printed at temperatures higher than their optimum — the red shifts toward orange, and the green shifts toward yellow. The colour weakening is most visible in the first few layers, where the heated print bed contributes additional heat from below on top of the nozzle temperature from above. A first layer printed at the generic PLA profile temperature on a 55°C bed can produce a noticeably different colour to the layers above it that the bed is no longer directly heating.
The fix is profile-level: reduce the nozzle temperature by 5°C from the generic default, and use the bed temperature adjustment available in the filament profile to moderate the first-layer heat contribution. This is not a setting that Bambu Studio surfaces prominently. It requires understanding that colour shift is a temperature symptom, knowing which setting to change, and being willing to run test prints to find the correct temperature floor for the specific colour. A generic profile applied without this knowledge produces consistent colour shift that you might attribute to the filament or the printer rather than identifying it as a solvable temperature calibration problem.
This pattern — where a specific property of a specific filament colour requires profile adjustment that the generic default does not account for — is more common than most print guides acknowledge. Pigment chemistry affects viscosity, optimal temperature, and even cooling behaviour in ways that vary between colours within the same product range. Bambu printers are built for speed, surface quality, and automation. Because of this, they behave differently from typical Cartesian printers — and they’re more sensitive to filament quality, moisture, and spool geometry. That sensitivity extends to pigment effects on optimal printing temperature.
The four comparison areas: where profiles make the biggest difference
First layer reliability
The first layer is the most profile-sensitive layer of any print. Bed temperature, first layer flow rate, first layer print speed, and the transition between first layer and subsequent layers are all controlled by the profile and all affect whether the first layer adheres correctly, spreads to the right width, and provides a stable foundation for the rest of the print.
With a well-tuned profile for a specific filament, the first layer is consistent, slightly wider than subsequent layers, and adheres cleanly. With a generic profile on the same filament, the first layer may be over- or under-squeezed, inconsistent in width, or prone to lifting at corners. The generic profile’s bed temperature setting may be too high or too low for the specific filament’s adhesion profile on a specific plate surface. First layer problems are frequently blamed on bed levelling when they are actually profile problems — specifically, bed temperature and first layer flow settings that do not match the filament’s actual requirements.
On the Kobra X specifically, the relative lack of named third-party profiles in AnycubicSlicerNext means every third-party filament starts from a generic baseline on first layer settings. This is one of the reasons first layer consistency has been less reliable on the Kobra X than on the A1 for the same filaments in my first week of use — not because the hardware is incapable, but because the starting profile is less well-matched to the specific material.
Dimensional accuracy
Flow rate calibration is the primary profile parameter for dimensional accuracy. An over-extruding profile deposits more material than the model specifies, producing walls slightly thicker than designed and holes slightly smaller than intended. An under-extruding profile does the reverse. The key requirements are consistent dimensional accuracy (ideally ±0.02mm) and neatly wound spools to prevent tangles.
The generic PLA profile in Bambu Studio is calibrated for an average PLA melt flow index. eSun PLA+ has a specific melt flow index that may be higher or lower than this average, producing a systematic dimensional offset that runs through every print on that profile. The offset is small — often fractions of a millimetre on a standard geometry — but it accumulates on functional parts where fit matters. A shaft that should be 8mm and prints at 8.2mm because the flow rate is too high will not fit through a hole printed at 8mm on a correctly calibrated profile. Profile tuning the flow rate removes this offset at source.
Colour consistency
Beyond the temperature-driven colour shift described above, profile settings affect colour consistency in subtler ways. Surface texture — which is affected by temperature, cooling, and speed settings — changes how light interacts with the printed surface, which changes how the colour reads visually. A rough surface scatters light. A smooth surface reflects it. The same red filament on the same printer with the same bed produces visually different colour results at different surface finish levels, and surface finish is controlled by the profile.
Multi-colour AMS prints add another dimension to this. When the profile for each of the four loaded colours is not individually calibrated, the transition layer between colours may show colour inconsistency — not because of cross-contamination from inadequate purging, but because different colours have slightly different optimal temperatures and the AMS is running all four at the same profile settings. A red that prints optimally at 218°C and a white that prints optimally at 222°C, both running at 220°C on a generic profile, will both produce slightly suboptimal results throughout the print. Individual colour-specific profiles address this but require the effort of creating separate profiles per colour rather than using a single generic profile for all.
Support removal
Support interface settings are the most practically consequential profile area for anyone who regularly prints models requiring support. The interface layer — the top and bottom surfaces of the support structure that contact the model — must be close enough to the model to provide adequate support, but separated by enough distance that the support releases cleanly without damaging the supported surface.
The default interface settings in generic profiles are conservative. They produce supports that are stable and reliable but often bond more aggressively to the model surface than necessary, requiring scraping, sanding, or cutting that leaves a rough finish on the supported area. A profile tuned for a specific filament’s adhesion characteristics — specifically the z-distance and xy-distance settings for the interface layer — can produce supports that peel away cleanly, leaving a smooth surface that requires minimal post-processing. The difference between a generic profile’s support removal experience and a tuned profile’s support removal experience is one of the most visible practical improvements that profile work delivers.
Bambu’s support material in particular separates cleaner than any third-party alternative tested across six Bambu Lab printers. This is the Bambu-filament-plus-Bambu-profile combination at its best. The support PLA profile is calibrated for the specific adhesion characteristics of Bambu’s support filament on Bambu’s model filament. Reproducing this performance with third-party support or interface materials requires profile tuning to match the interface behaviour — and generic profiles rarely achieve it.
Bambu profiles vs generic vs manually tuned: the practical comparison
| Profile type | First layer reliability | Dimensional accuracy | Colour consistency | Support removal | Effort required |
|---|---|---|---|---|---|
| Bambu native (RFID) — Bambu filament | Excellent — calibrated specifically | Excellent — flow tuned for the material | Excellent — temperature and surface optimised | Excellent — interface settings dialled in | None — automatic |
| Generic PLA / PETG profile — third party filament | Good — conservative settings work adequately | Moderate — systematic offset likely | Moderate — temperature may not suit all pigments | Moderate — interface settings are a rough average | Minimal — select and go |
| Named third-party profile (where available) — e.g. Overture in Bambu Studio | Good to very good — better than generic | Good — some manufacturer-specific tuning applied | Good | Good | Minimal — but verify the profile is current |
| Manually tuned custom profile — temperature tower, flow calibration, pressure advance | Excellent — tuned for the specific spool and environment | Excellent — flow calibrated precisely | Excellent — temperature found for specific colour | Very good — interface distances refined | Significant — hours of calibration prints per filament |
How to actually tune a profile: the practical workflow
Full manual calibration for every filament in a 40+ spool collection is not realistic. The pragmatic approach is a tiered system: use named profiles where they exist, use generic profiles as a starting point for bulk filaments, and invest in full manual tuning only for the materials you use most frequently or where quality is most critical.
The calibration sequence for a new third-party filament on a Bambu machine follows a logical order. Each step builds on the previous one, which is why the sequence matters:
- Temperature tower first — print the temperature tower calibration model (available on MakerWorld) to find the optimal nozzle temperature for the specific filament. Look for the best combination of clean bridging, minimal stringing, and good surface finish. Note the winning temperature and update the filament profile
- Pressure advance second — use Bambu Studio’s built-in pressure advance calibration or the MakerWorld calibration card to find the correct pressure advance value for the material at its optimal temperature. This directly affects corner quality and stringing
- Flow rate third — print a single-wall box or use the flow rate calibration model to verify that the extruded wall thickness matches the expected value. Adjust the flow rate percentage until it does. This is the fix for dimensional accuracy offset
- Support interface settings last — print a small model with overhangs and supports, remove the supports, and assess the interface surface. Adjust the z-distance incrementally until the interface releases cleanly without bonding
Don’t start from scratch. Bambu Studio has built-in generic profiles that get you 80% of the way there. This is the right framing. The generic profile is not worthless — it is a sensible starting point. The calibration workflow closes the gap between the generic 80% and the optimised result.
The automation paradox
Here is the tension at the heart of this topic. Printers are becoming more automated. The Bambu A1’s appeal is substantially built on the degree to which it removes decisions from the user. RFID profiles, automatic calibration, AI failure detection — all of these reduce the cognitive load of printing. That is a feature. The problem is that automation optimised for one set of conditions — Bambu filament on Bambu hardware with Bambu profiles — creates a specific kind of blind spot: the assumption that the automation extends to all conditions equally. It does not.
As printers become more automated and the out-of-box experience improves, the population of users who have never engaged with their printer’s profile settings grows. These users get good results within the native filament ecosystem and do not have a reference point for what properly tuned results look like. They also have less of the profile knowledge that the previous generation of FDM users developed by necessity — because older, less automated printers required you to understand settings in order to print anything at all.
The practical consequence is a growing gap between users who understand profiles and users who do not, at a time when the profile knowledge matters more rather than less — because the range of filaments available is broader, the multi-material workflows are more complex, and the quality ceiling of the hardware is high enough that profile optimisation is now the primary lever for improving results rather than hardware capability.
Summary
A filament profile is not a minor setting. It is the document that defines how your printer treats every spool that goes through it. Bambu’s native profiles for their own filament are genuinely excellent and the automation around them is one of the best things about the Bambu ecosystem. The generic profiles for third-party filament are adequate starting points, not finished solutions. The gap between a generic profile and a tuned profile shows up in first layer consistency, dimensional accuracy, colour rendering under temperature, and support removal behaviour — all areas where the difference between good-enough and genuinely good is driven by whether the profile actually matches the material.
The AnycubicSlicerNext experience on the Kobra X has been a useful reminder of what the Bambu profile ecosystem is worth. Starting from near-generic settings for every third-party filament is not impossible — it is where I was with the Bambu A1 two years ago — but it is a calibration burden that the Bambu ecosystem has largely removed for anyone using named profiles or Bambu’s own materials. That removal has value. Understanding what it is removing is what allows you to replace it when you step outside the system.