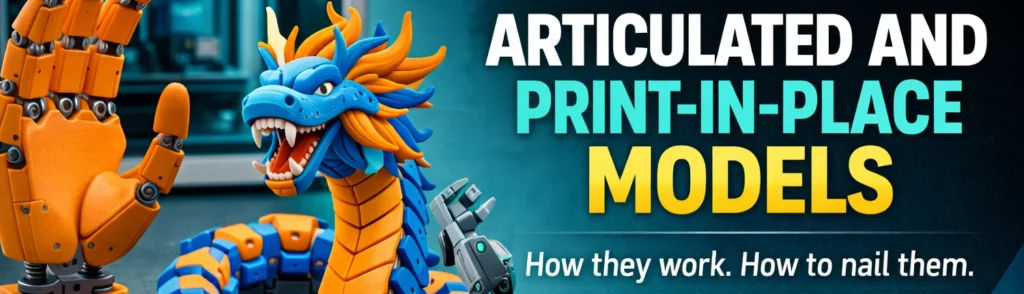
Few categories of 3D print stop people in their tracks quite like an articulated model. A dragon that flexes in your hand straight off the build plate. A snake with thirty linked segments, fully poseable, printed as a single object. A mechanical toy with working gears, pulled off the plate and spinning before you’ve even cleaned the nozzle. These are the prints that go viral, and for good reason.
Print-in-place is one of the most technically demanding techniques in FDM printing — and also one of the most satisfying when it works. This guide covers how it actually functions, what makes it fail, and how to dial in your settings on the A1 to get consistent results.
What print-in-place actually means
A print-in-place (PIP) model is printed as a single file but contains moving parts that function immediately after the print completes, with no assembly required. The printer builds the object layer by layer, depositing material around and between moving parts simultaneously. The joints are never fused — they are separated by a precisely calculated air gap that the printer bridges over rather than fills.
Think of a chain. Each link is printed independently. The printer lays down the bottom of link two while bridging over the top of link one. That bridge becomes the closed top of link two, which is now physically interlocked with link one but never bonded to it. Once the print cools and you work the joints free, you have a fully connected, flexible chain — printed in one go.
This is distinct from assembly-required models, where parts are printed separately and joined by hand. PIP is harder to design, more demanding to print, and offers no recovery path if a joint fuses or a segment fails mid-print. The whole object is one job. That’s the trade-off.
Joint types
Most articulated models use one of three joint types, or a combination of them. Understanding the mechanics helps you recognise why certain models behave differently and what settings they need.
Chain link / segment joint
The most common type. Each segment wraps partially around the next, with a gap ensuring they stay separate. This is the mechanism behind most articulated dragons, snakes, and fish — anywhere you need smooth, directional flexibility along a body. The printer bridges across the previous segment to close the loop of the next one.
Ball and socket joint
A sphere printed inside a cavity. The cavity is designed slightly larger than the sphere so it can rotate freely in multiple axes. This gives you poseable limbs and more expressive movement. It’s more sensitive to tolerances than chain joints because the geometry is more enclosed — any overextrusion or elephant foot will cause it to fuse.
Hinge joint
A pin or axle printed through a hole. Typically used for wings, jaws, or mechanical linkages. Hinge joints tend to be the least forgiving because the pin must be printed inside the hole in a single operation. The clearance needs to be sufficient to survive the thermal expansion during printing without bonding, but tight enough to hold together structurally.
Tolerance: the one thing that determines success or failure
Tolerance is the planned gap between any two parts that need to move independently. It is the single most important variable in print-in-place design, and getting it wrong in either direction ruins the print.
Too small and the parts fuse during printing. The molten filament deposited next to the gap radiates heat outward. If the gap is narrower than the heat-affected zone of your nozzle, the two surfaces bond. Too large and the joint is loose, sloppy, or structurally weak.
The standard starting point for most FDM printers is 0.3 mm to 0.5 mm per side. On a well-calibrated Bambu A1 with a 0.4 mm nozzle, 0.3 mm is usually achievable for chain joints. Ball and socket joints typically need 0.4–0.5 mm because the enclosed geometry traps heat more effectively.
These are starting points, not fixed values. Every printer, nozzle, and filament combination behaves slightly differently. The correct approach is to print a tolerance test before committing to a multi-hour articulated print. Several calibration models exist specifically for this — they print a series of gaps at 0.1 mm increments so you can identify the minimum clearance your setup can reliably produce.
Filament choice
PLA is the default for print-in-place models and the right choice for most situations. It has low shrinkage, predictable behaviour, and responds well to cooling — all of which matter when you are printing tight tolerances between moving parts. The Bambu Lab PLA and eSun PLA+ profiles both work reliably for this.
PETG is more challenging. Its higher printing temperature and tendency to string between features means joints are more likely to fuse or accumulate wisps of plastic that prevent free movement. It is not impossible, but you need to run retraction and cooling tuned specifically for articulated work, and you will need slightly larger tolerances to compensate.
TPU opens up a different category entirely — flexible models that bend rather than articulate at discrete joints. Octopus tentacles, snake bodies, and wearable chainmail are common examples. The flexibility of the material replaces the need for engineered joints, but TPU on a Bowden-style feeder path is more difficult to push reliably. The A1 handles TPU well with the right profile, but TPU print-in-place requires its own approach — reduced speed, no retraction or minimal retraction, and a clean dry spool.
Silk and rainbow filaments are popular for articulated dragons because the colour shift across the body reads well on the segment-by-segment geometry. They print similarly to standard PLA but can be slightly more prone to stringing. Worth the trade-off for the visual result on display pieces.
Slicer settings on the Bambu A1
The A1’s motion system and bed levelling make it well suited to print-in-place work. The main variables to adjust are layer height, speed, cooling, and retraction. Below are the settings that consistently produce good results on my machine.
| Setting | Recommended value | Why |
|---|---|---|
| Layer height | 0.12–0.16 mm | Lower layers improve joint geometry accuracy and reduce the chance of bridging errors collapsing into the gap |
| Print speed (outer wall) | 40–60 mm/s | Slower outer walls reduce vibration artefacts that can smear into joint gaps |
| Print speed (overall) | 80–100 mm/s | Moderate — fast enough to be practical, slow enough to keep joint geometry clean |
| Cooling fan | 100% from layer 3 | Maximum cooling solidifies bridging material before it sags into the joint gap |
| Minimum layer time | 8–12 seconds | Prevents the nozzle revisiting a section before it has cooled — critical for small joint sections |
| Retraction | Standard PLA profile | Reduces stringing across joint gaps. Do not reduce retraction to speed things up on this type of print |
| Elephant foot compensation | 0.2–0.3 mm | The first layer spread can close joint gaps near the base of the model. Compensating for this is important |
| Supports | Off (usually) | Well-designed PIP models are self-supporting. Supports inside joints will ruin them |
A note on minimum layer time
This setting is more important for articulated models than almost anything else. When the model has many small separated sections — such as individual dragon scales or segment edges — each layer prints very quickly. Without a minimum layer time enforced, the nozzle returns to a section before the previous pass has cooled, depositing hot material onto soft material and collapsing the joint geometry. Setting a floor of 8–12 seconds per layer forces the printer to slow down or wait, giving the joint time to solidify before the next layer lands.
Bed adhesion
Bed adhesion is a more critical concern for articulated models than for solid prints. The reason is geometry: an articulated model has many small, separated sections in contact with the build plate. Each segment or toe or joint connection is a small independent island. If any of them lifts, it will likely hit the nozzle on the next pass and drag the whole print off the plate.
On the A1, the textured PEI plate is the right choice for PLA-based articulated prints. Make sure it is clean — wipe with IPA before every print. For models with complex bases or many small contact points, a light coat of glue stick gives meaningful insurance. A brim is a useful option for models where the designer has left insufficient base area. Add a 3–5 mm brim if the base geometry looks borderline.
Do not print articulated models over a plate surface that has accumulated residue from previous prints. The adhesion inconsistency across the plate will cause some segments to stick and others to release, which almost always means a failed print.
What to print first
Start with a chain-link joint model rather than a ball-and-socket or hinge design. Chain joints are the most forgiving because the geometry is simpler and the gap is easier to maintain through the print. An articulated snake or worm — essentially a single chain of segments — is the ideal first attempt. They print in under two hours, use minimal filament, and immediately tell you whether your tolerance and cooling settings are dialled in.
Once you can reliably produce a clean chain, move to articulated fish or simple dragons. These add more complexity — wider bodies, varied segment shapes, tail geometry — but the core joint mechanism is the same. Full articulated dragons with wings, open jaws, and multi-axis joints are an advanced print. They work well on the A1, but they reward experience with the simpler variants first.
Models worth trying
MakerWorld has the best concentration of tested articulated models for Bambu printers, with many designers providing A1-specific gcode. The Crystal Dragon by Maty505 is the most downloaded articulated dragon on the platform and has extensive community documentation behind it. The Floppy Dragon by the same platform is a simpler starting point — fewer joints, no wings, prints reliably as a first articulated attempt. For something beyond dragons, articulated sharks and fish have become consistently popular and are a good midpoint in complexity. Articulated Minecraft characters have a large community presence if that appeals. For mechanical rather than organic interest, herringbone planetary gears are a classic print-in-place challenge — working gears that rotate correctly, off the plate with no post-processing.
Breaking joints free after printing
Even with correct settings, joints often need to be worked free after the print. This is normal. The process of breaking them loose is not a sign of failure — it means the tolerance was right at the edge, which is where you want to be. Too loose and the joints feel cheap; right at the margin and they feel tight and satisfying.
Work methodically. Start at one end and flex each joint individually. Apply firm, controlled pressure in the direction the joint is designed to move. Do not twist or apply lateral force — that stresses the geometry rather than the joint interface. For stubborn ball and socket joints, a gentle tap from the side can break the light surface bond without cracking the surrounding structure.
If joints will not move despite working them carefully, the tolerance was too small. Note the joint size and add 0.1–0.15 mm to your minimum clearance for the next attempt. If joints feel sloppy and loose, the tolerance was too large — reduce by the same increment.
Why these prints still dominate engagement
Articulated models remain among the most shared and downloaded categories in 3D printing because they demonstrate something that is genuinely difficult to replicate with any other manufacturing process. You cannot injection mould a fully assembled, moving chain with no tooling. You cannot machine a linked mechanism with no assembly. The fact that an FDM printer at home can produce a working articulated object in a single job, using a spool of PLA worth a few pence per gram, is still remarkable when you think about it clearly.
The engagement around these prints also reflects a broader truth: technically demanding prints that look impossible are the ones people share. A useful hook, a cable clip, a phone stand — these have real value but they do not travel. A dragon with forty articulated segments that flexes smoothly in your hand does. If your goal is to grow an audience, or simply to have something genuinely impressive to give as a gift, articulated models are hard to beat.
Summary
Print-in-place is a technique where moving parts are printed simultaneously in a single job, separated by engineered gaps rather than assembled after the fact. Success depends on three things: correct tolerance (0.3–0.5 mm per side as a starting point), maximum cooling to solidify bridging material before it collapses into joint gaps, and a calibrated, clean bed to hold all the small contact sections throughout the print. Start with chain-link joints, use PLA, enforce a minimum layer time, and work joints free methodically after printing. Once the settings are dialled in, articulated models are one of the most repeatable and rewarding categories in FDM printing.