Adding custom text or a logo to a 3D model has always been more work than it should be. The traditional route — open Blender or Fusion 360, import the mesh, project your image onto the surface, export, repair, re-import into Bambu Studio — takes anywhere from twenty minutes to an hour, assumes a working knowledge of a full CAD or 3D modelling package, and frequently ends with a mesh that needs fixing before it will slice correctly. For a name on a gift, a logo on a custom part, or a design wrapped around a cylinder, it is a disproportionate amount of work.
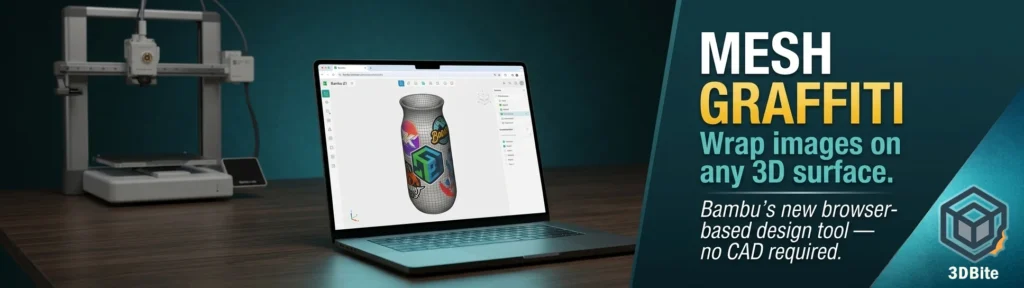
Mesh Graffiti is Bambu Lab’s answer to that. It is a web-based tool inside MakerLab — the browser-based tool hub at makerworld.com — that lets you paint colour, text, and images directly onto the surface of an STL or 3MF file, with full support for curved and complex surfaces. No CAD software. No Blender. No mesh repair. You upload your model, apply your customisation in the browser, and export a print-ready 3MF that carries the colour assignments as AMS-compatible filament zones directly into Bambu Studio.
It launched in beta in April 2026 and is already drawing significant community attention. This post covers what it does, how it works, where it fits relative to Bambu Studio’s existing colour tools, and a step-by-step walkthrough of the full workflow from upload to sliced print.
What Mesh Graffiti actually does
Mesh Graffiti is a surface colour and decoration tool. It operates on existing 3D model files — you are not generating geometry, you are modifying how colour is assigned to the surface of a mesh that already exists. The three core capabilities are colour painting, image stamping, and text application, and all three work on curved and complex surfaces, not just flat faces.
The colour brush lets you paint directly onto any area of the model surface, with a choice of smooth or faceted edges. Smooth edges blend the painted area into the surrounding surface using anti-aliasing, which reads well on organic shapes and curved geometry. Faceted edges follow the polygon structure of the mesh, giving a harder, more technical look that suits mechanical or geometric models. Brush size, opacity, and shape are all adjustable.
Image stamping is the headline feature. You import any image — a PNG, SVG, or JPEG — position it on the model surface, scale and rotate it, and apply it. The tool wraps the image around the mesh, conforming to the curvature of the surface beneath it. A logo applied to a cylindrical bottle wraps around the cylinder. A design applied to a sphere conforms to the sphere’s curvature. This is what CAD and mesh software can do but requires meaningful skill and setup time to achieve manually. Mesh Graffiti does it directly in a browser window.
Text works the same way. Type your text, choose a font, position it on the surface, and it conforms to the underlying geometry. For names on gifts, labels on containers, or callouts on functional parts, this alone removes a significant amount of friction from the personalisation workflow.
The output is a 3MF file with all colour zones defined as discrete filament assignments, compatible directly with Bambu Studio and the AMS. The tool is not generating new geometry — it is producing a colour-painted mesh where the paint maps to filament slots, the same outcome you would get from hours of work in Bambu Studio’s colour painting tools, but produced in minutes from a browser tab.
Where it sits in the MakerLab ecosystem
MakerLab is Bambu’s browser-based tooling hub within MakerWorld, accessible at makerworld.com. It currently hosts several distinct tools, and Mesh Graffiti is one of them — worth separating clearly from the others to avoid confusion.
The Image-to-3D tool (powered by Meshy-6, Hunyuan 3.1, or Tripo AI 3.0) generates a 3D mesh from a photo using AI. It creates geometry from nothing. Mesh Graffiti does not generate geometry — it modifies the surface appearance of a mesh you already have. These are complementary tools serving different purposes. Image-to-3D is for when you have no model and want to create one. Mesh Graffiti is for when you have a model and want to customise its colour or add decoration to its surface.
Bambu Studio also has its own colour painting tools — the colour brush in the slicer that lets you assign filament zones to faces and regions of an imported model. Mesh Graffiti covers similar ground but in a browser, with a more intuitive interface for image wrapping and text, and without requiring Bambu Studio to be open. For straightforward single-colour filament zone assignment on flat faces, the Studio tools are often faster. For image wrapping, text conforming to curved surfaces, and anything that requires the image to follow the mesh geometry, Mesh Graffiti is the better tool.
What it needs: requirements at a glance
| Requirement | Detail |
|---|---|
| Account | Bambu Lab / MakerWorld account (free) |
| Access | Browser-based — no download required. Access via makerworld.com/makerlab |
| Input file formats | STL, 3MF |
| Output format | 3MF with colour zones assigned |
| AMS requirement | Required to print multi-colour output. Single-colour painting works without AMS |
| Bambu Studio version | Any current version — the exported 3MF imports directly |
| Credits | Currently free during beta. Credit cost post-beta not yet confirmed |
| Best for | Logos, text, image wrapping on curved surfaces, single-colour zone painting |
| Not suited for | Photographic gradients, more than 4–16 colour zones on a standard AMS setup |
Step-by-step: using Mesh Graffiti from scratch
The workflow below covers the full process from opening the tool to slicing the output. Screenshots are placeholders — add your own captures from the MakerLab interface at each step. The tool is in beta and the interface may evolve, but the core workflow described here reflects the current implementation.
Step 1 — Open MakerLab and navigate to Mesh Graffiti
Go to makerworld.com/en/makerlab in your browser. Log in with your Bambu Lab account if you are not already signed in. From the MakerLab tool list, select Mesh Graffiti. The tool opens in the browser — no download or installation required.
Step 2 — Upload your model
Click the upload button and select your STL or 3MF file. The model loads into the browser viewport and you can rotate, zoom, and inspect it before doing anything else. If you are working with a 3MF that already has some colour assignments, those will be visible. For a fresh STL, the model will appear in its default base colour.
Model complexity affects load time. Very high polygon count meshes may take longer to process in the browser. If you are working with a heavily detailed model and finding performance slow, consider exporting a lower-polygon version from your modelling software for the Mesh Graffiti workflow — the colour zones will apply at the mesh level and the polygon count of the painting surface does not significantly affect final print quality for colour zone purposes.
Step 3 — Choose your tool: brush, image stamp, or text
The left toolbar gives you access to the three primary tools. Select the one that matches your intent:
- Colour brush — for painting regions of the model surface in a specific filament colour. Use for zone colouring, spot accents, or large region assignment
- Image stamp — for applying a logo, graphic, or photo to the surface. Supports PNG (with transparency), SVG, and JPEG
- Text — for typing text that conforms to the model surface
Step 4 — Apply colour with the brush
Select the colour brush. Choose your filament colour from the colour picker — use the hex code field to match a specific filament if you know its colour value, or use the palette to pick visually. Set your brush size and edge type: smooth for organic shapes and curves, faceted for mechanical models where hard edges match the model’s aesthetic.
Click and drag across the model surface to paint. The brush follows the surface geometry — on a curved surface, it stays on the mesh rather than cutting through it. Zoom in close for fine detail work. Use the eraser to remove colour from areas painted incorrectly. Multiple colour passes are additive — you can build up a design layer by layer in the same session.
Step 5 — Stamp an image
Select the image stamp tool. Click the import button and load your image file. PNG with a transparent background gives the cleanest result — the transparency is respected during wrapping, so only the non-transparent areas of the image are applied to the model surface. A logo with a white background will apply the white as a colour region alongside the logo itself, which is usually not what you want.
Position the stamp on the model surface by clicking the area you want it to appear. A transform gizmo appears: drag to reposition, use the scale handles to resize, and rotate using the rotation arc. When the stamp is where you want it, apply it. The tool projects the image onto the mesh geometry, conforming to the curvature of the surface beneath it. On a cylinder, the image wraps around the curve. On a sphere, it conforms to the spherical surface. Review the result by rotating the model to check that the wrap looks correct from multiple angles.
Step 6 — Add text
Select the text tool. Type your text in the input field. Choose a font from the available library — the selection covers most common style categories from bold blocky sans-serifs to more decorative options. Set the size in millimetres relative to the model scale. Click the surface area where you want the text to appear and it is placed as a stamp, conforming to the surface geometry. Scale, rotate, and reposition using the same gizmo as the image stamp. Apply when positioned correctly.
For names on gifts or labels on containers, the text tool is the fastest route to a result. For precise typographic control or custom fonts, prepare your text as an SVG in a font design tool and import it as an image stamp instead — SVG preserves vector quality at any scale.
Step 7 — Review colour zones and filament mapping
Once you have finished applying colour, review the colour zone panel. Mesh Graffiti assigns each distinct colour you have used to a filament slot. The panel shows how many discrete colours are in the design and maps them to filament slot numbers. Check that the number of colours does not exceed your AMS capacity — a standard AMS 2 Pro handles four spools. If you have used more than four colours, either reduce the colour count in your design or plan for AMS Lite chaining if your setup supports it.
If a specific colour in the design maps to an unusual hex code that does not match a filament you own, adjust it in the panel. Use the hex code field to shift the colour to match the closest available filament — a small hue shift rarely affects the visual result significantly but ensures you are working with filaments you actually have.
Step 8 — Export as 3MF
Click Export and choose 3MF as the output format. The 3MF file packages the mesh geometry and all colour zone assignments together. Save it to your local drive. This file carries everything Bambu Studio needs — you do not need to re-configure colour assignments once the file is imported.
Step 9 — Import into Bambu Studio and slice
Open Bambu Studio and drag the exported 3MF into the build plate. The model loads with all colour zones pre-assigned to filament slots. Go to the filament panel and match the filament slot colours to the physical filaments loaded in your AMS — Studio shows you the hex colour assigned to each slot so you can match them to your actual filament colours. Run a layer preview to verify the colour zone distribution looks correct before sending to the printer. Check for any areas where the colour assignment looks unexpected and correct them using Studio’s colour brush if needed.
What works well — and what to watch for
Mesh Graffiti is in beta and the community is actively logging what works cleanly and what hits edge cases. Based on the current state of the tool and early community feedback, here is the practical picture.
It handles cylindrical and spherical surfaces well. These are the geometry types where manual image wrapping in Blender is most painful, and Mesh Graffiti genuinely solves the problem. A logo on a cylindrical container or text wrapping around a rounded model surface is straightforward and the result is clean. This is the primary use case the tool was designed for and it delivers.
Colour zones with smooth, well-separated regions work better than photographic gradients or dense patterns. Mesh Graffiti’s colour assignment is optimised for discrete filament zones — you are mapping to physical filaments, which are solid colours, not continuous tone. Images with photographic gradients or high-frequency patterns will be simplified to filament-compatible colour zones, which means detail is lost. Bold logos, simple icons, high-contrast text, and stylised graphics with clear colour separation are the optimal input. Photographic images are better handled by the Meshy AI Image-to-3D workflow if a realistic multi-colour result is the goal.
Stay within your AMS slot count. The tool will let you apply as many colours as you want, but each distinct colour in the design maps to a filament slot. If your design uses eight colours and your AMS holds four, you will need to consolidate before printing. Do that colour reduction in Mesh Graffiti before exporting, not in Bambu Studio after — it is easier to work with at the design stage than in the slicer.
PNG with a transparent background is strongly preferable for image stamps. Transparency is respected during the wrap and gives you clean edges around your applied graphic. If you are working with a logo that exists only as a JPEG or a PNG with a white background, remove the background in a tool like Photoshop, Canva, or the free remove.bg before importing. The extra step takes thirty seconds and makes a significant difference to the result.
Very high polygon meshes may perform slowly in the browser. The tool is doing surface projection calculations in real time in a browser environment, which is computationally heavier than the same operation in a desktop application. If performance is sluggish, try reducing the polygon count of the input model.
Use cases where this genuinely changes the workflow
Personalised gifts are the obvious application and probably the highest-volume use case. A name on a custom vase, a logo on a phone stand, a team badge on a figurine base — all of these previously required either a CAD detour or using Bambu Studio’s colour painting manually, which works on flat faces but becomes fiddly on curved surfaces. Mesh Graffiti brings that workflow into the browser and onto curved geometry.
Small business branding is a strong fit. If you are printing products to sell — organisers, display pieces, props, stands — adding your logo to the surface of a print adds a layer of professionalism that distinguishes the piece. With Mesh Graffiti this no longer requires a CAD revision of the base model every time you want to add or update branding. Upload, stamp, export, print.
Multi-colour display models benefit directly. Models from MakerWorld that arrive in a single colour can be given colour zones in Mesh Graffiti without touching Bambu Studio’s manual painting tools. For models with complex curved surfaces where the Studio brush is hard to control accurately, Mesh Graffiti’s projection-based approach is significantly more precise.
Educational and school projects are a strong use case that is easy to overlook. The browser-based, no-installation workflow makes it accessible on school-managed devices. Students can personalise models for projects, science fair pieces, or maker spaces without needing design software installed or IT permissions.
How it compares to Bambu Studio’s built-in colour tools
| Capability | Bambu Studio colour painting | Mesh Graffiti |
|---|---|---|
| Flat face colour assignment | Fast and precise | Works, but not the primary use case |
| Image wrap on curved surfaces | Not natively supported | Core capability — handles cylinders, spheres, complex surfaces |
| Text on curved surfaces | Possible via Text Shape tool (Studio) | Direct browser-based with surface conform |
| Requires desktop install | Yes — Bambu Studio must be installed | No — fully browser-based |
| AMS filament zone output | Yes | Yes — 3MF export with zones pre-assigned |
| Best for | Precise manual zone painting, functional part colour | Logos, image wrapping, text on curved surfaces, quick personalisation |
Beta status: what to expect
Mesh Graffiti launched in beta in April 2026. As a beta tool, it is free to use but comes with the usual caveats — the interface will change, edge cases will surface, and features may be added or adjusted before the full release. Bambu is actively collecting community feedback through the MakerLab forum thread and the dedicated feedback thread. If you hit issues or have specific requests, the forum is the right place to log them. The beta period is the window where user feedback most directly shapes the final tool.
Credit pricing for the full release has not been confirmed at the time of writing. During beta, the tool is free. Plan accordingly — if you want to explore what it can do without a credit cost, now is the time.
Summary
Mesh Graffiti solves a specific problem that has been a genuine friction point in the personalisation workflow: getting images and text to wrap correctly onto curved 3D model surfaces without opening CAD software. The tool does this in a browser, requires no installation, and exports directly to a Bambu Studio-compatible 3MF with colour zones pre-assigned. For logos on cylindrical objects, names on gifts, team badges on model bases, or any scenario where a graphic needs to conform to a non-flat surface, it removes a step that previously took anywhere from twenty minutes to several hours depending on your software familiarity.
It is not a replacement for Bambu Studio’s colour tools, which remain better for precise manual zone painting on flat faces and functional parts. It is also not the right tool for photographic multi-colour images — that is where the Meshy Image-to-3D workflow inside MakerLab comes in. Mesh Graffiti occupies the specific and previously underserved space between those two: you have a model, you want a graphic on it, and you do not want to spend your evening in Blender to make it happen.
It is in beta and it will improve. Use it now while it is free, give Bambu feedback through the forum thread, and expect the interface to refine over the coming months. This is the kind of tool that makes the Bambu ecosystem more accessible to a wider range of users — and it is a genuinely useful addition for experienced users too.
Access Mesh Graffiti at makerworld.com/en/makerlab. A Bambu Lab account is required.