The standard multi-colour workflow in FDM printing has a ceiling. Load four spools of AMS-managed PLA, assign colours to model regions in Bambu Studio, print. The colours are whatever the filaments are — exactly those colours, precisely separated. It produces excellent results for models designed around discrete colour zones, but it does not give you orange unless you have an orange spool. It does not give you purple, or teal, or any colour that is not sitting in your AMS waiting to be loaded. You are constrained by inventory.
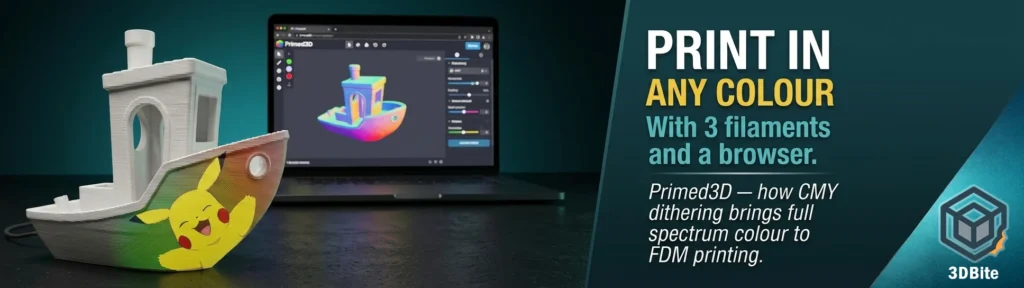
Primed3D is a free browser-based tool built by Josh at 3D Revolution that approaches this problem from a completely different direction. Rather than assigning existing filament colours to model zones, it translates any painted colour into a combination of CMY filaments — cyan, magenta, and yellow — and uses layer-by-layer dithering to create the visual impression of colours that none of those filaments actually are. Red, purple, green, orange, brown — all of them produced from three or five standard filaments by alternating layers in precise ratios. This post covers what the tool does, the science behind how it works, how to use it, what the results are actually like, and where the limits of the technique genuinely lie.
What Primed3D is
Primed3D is a free, open-source, browser-based STL painter and CMY dithering tool. It runs entirely in your browser with no server involvement — your files never leave your machine. There are no accounts, no tracking, no analytics. You upload an STL or 3MF, paint colours onto the model surface using a set of integrated tools, choose a filament mode, process the file, and download a 3MF ready to import into Bambu Studio or OrcaSlicer.
The tool was created by Josh at 3D Revolution and released publicly in early 2025 with regular updates since. The project is open source and available on GitHub. Josh also runs the 3D Revolution YouTube channel where the tool’s development, use cases, and techniques are documented in video tutorials.
It is worth being precise about what it is and is not. The Primed3D website says it is a “Free Full Spectrum 3D Printing Tool.” And while that’s mostly accurate, it is worth noting that it prints the “full spectrum” through dithering. The tool does not create new filament colours. It creates the visual illusion of colours by alternating layers of CMY filaments in ratios calculated to fool the eye at normal viewing distance. Understanding that distinction is the key to having accurate expectations of what the prints will look like.
The science: how colour dithering actually works
To understand Primed3D, you need to understand two things: subtractive colour theory and halftone dithering. Both are well-established techniques borrowed from print and display technology and applied here to FDM layer-by-layer extrusion.
Subtractive colour mixing — CMY
Printers — inkjet, laser, and offset — do not mix red, green, and blue light like a screen does. They use the opposite system: subtractive colour mixing. Instead of adding light, they subtract it by laying down pigments that absorb specific wavelengths. Cyan absorbs red light. Magenta absorbs green light. Yellow absorbs blue light. Mix cyan and magenta and you absorb both red and green, leaving blue. Mix cyan and yellow and you absorb red and blue, leaving green. Mix all three and you absorb everything, producing black — or close to it; in practice, printers add a separate black ink (K, for Key) because the CMY combination produces a dark muddy brown rather than a clean black. Add white as a fifth channel and you can lighten any colour toward a pastel without diluting it toward grey.
This is exactly the system Primed3D uses. Load cyan, magenta, and yellow filaments (plus optionally white and black), and in principle you have access to the full subtractive colour gamut — every colour a standard printing press can produce. The challenge in FDM printing is that you cannot blend filaments in the same layer the way a printer blends ink droplets. Each layer is a single filament. So how do you make orange from just cyan, magenta, and yellow?
Halftone dithering applied to layers
Halftone printing — the technique used in newspapers and magazines before digital — creates the illusion of continuous colour variation using dots of a fixed set of inks. A pink area in a halftone print is not printed with pink ink. It is printed with small magenta dots on a white background. Your eye, at reading distance, averages the dots together and perceives pink. The same principle applies to CMYK printing: every colour you see in a printed photo is actually a precise arrangement of dots from just four inks. The dots are small enough and close enough together that your visual system cannot resolve them individually.
Primed3D applies this principle vertically, across layers. Instead of dots of ink, it uses layers of filament. Each 0.08mm layer is assigned to a single filament — cyan, magenta, yellow, white, or black. The ratio of layers assigned to each filament over a vertical region determines the perceived colour of that region. A region that alternates four cyan layers and two magenta layers will read as blue-leaning purple. A region that cycles cyan and yellow in equal proportion will read as green. The layers are thin enough — 0.08mm, less than a tenth of a millimetre — that at normal viewing distance the eye cannot resolve individual layers and instead averages the colours together.
The illusion only works if you’re far enough away. In the case of FFF 3D printing, which doesn’t have pixels at all, the effect is far from perfect. This is the honest framing. The technique is a genuine approximation. The layers are not invisible — they are simply small enough that the eye blends them at normal viewing distance. Close up, the individual coloured layers are clearly visible. Step back and the colour impression emerges. How far back and how convincing that impression is depends on the model, the filament colours, and the print settings.
The filament modes: CMY, WCMY, KCMY, WKCMY
Primed3D offers five dithering modes, each using a different combination of filaments. Choosing the right mode for your specific situation is one of the most important decisions in the workflow.
| Mode | Filaments | Best for | Limitation |
|---|---|---|---|
| CMY | Cyan, Magenta, Yellow | Vibrant saturated colours on a white-bodied model or white printer surface | No way to produce pure whites or deep blacks — needs white background to read correctly |
| WCMY | White, Cyan, Magenta, Yellow | Colours with pastels and highlights — white filament handles the light tones | No deep blacks — dark colours print as dark grey |
| KCMY | Black, Cyan, Magenta, Yellow | Richer darks and shadows without black going muddy | No clean highlights — whites and pastels are limited |
| WKCMY | White, Black, Cyan, Magenta, Yellow | Best overall colour accuracy — white and black handle both ends of the tonal range | Requires 5 filament slots. More complex AMS setup. Longer prints with more colour changes |
| 2 Filaments | Any two chosen colours | Dual nozzle machines — dithering between exactly two colours | Limited colour range — only tones between the two chosen colours |
WKCMY is the mode Josh recommends for photo projection and complex colour work. White handles pastels and highlights, black handles shadows and deep darks, and CMY covers the full mid-tone colour range between them. For most uses beyond simple two or three colour gradient work, this is the mode to use. It requires five filament slots — cyan, magenta, yellow, white, and black — which on a Bambu AMS setup means five of your four standard slots, requiring AMS chaining or a second AMS unit unless you are using an AMS 2 Pro with additional slots.
The painting tools
Once a model is loaded, Primed3D offers five painting tools and an orientation utility. The interface runs in WebGL in the browser and handles most models without performance issues, though very high polygon count meshes can slow down processing on lower-spec hardware.
Brush
The standard paint brush. Left-click and drag to paint visible faces. The brush uses BFS (breadth-first search) spreading — it paints along the surface within the defined radius, following the mesh geometry rather than cutting through it. It will not bleed around corners or onto hidden faces. Adjust radius with the slider. This is the tool for most detailed colour work.
Sphere brush
Paints all faces within a 3D sphere radius, including through the model. Where the standard brush stays on the surface, the sphere brush paints any face within a three-dimensional volume — including faces on the other side of thin walls or hidden inside complex geometry. Useful for hollow models, highly concave surfaces, or any geometry where the surface brush cannot reach.
Fill
Two modes: Connected fill floods all connected faces of the same current colour with the new colour — similar to paint bucket fill in image editing. Angle Limit mode fills faces within a user-defined angle threshold from the clicked face, which is useful for painting a single flat surface or facet without spilling onto adjacent geometry at a sharp angle.
Gradient
Applies a smooth colour gradient across the model or a selected region. Set from and to colours, define the direction using rotation and pitch sliders (a purple arrow in the viewport shows the gradient direction), and apply. Works in whole-model mode for a gradient across the entire mesh, or in selection mode where you paint-select specific faces first, then define start and end points by clicking on the model. The Steps slider controls how many discrete colour bands the gradient uses — higher values produce smoother transitions at the cost of more filament changes during printing.
Photo projection
This is the most dramatic feature. Load a JPG or PNG image, position it over the model in the viewport using sliders for scale and rotation, drag to reposition, and apply. The tool projects the image onto the model surface, sampling each face’s colour from the photograph beneath it. Transparent PNG backgrounds are respected — only the non-transparent areas of the image are applied.
The photo projection works by mapping the image through a camera projection — the tool reads the colour of the image at the position corresponding to each visible face’s centre. On a model with many small triangles — a curved hull, a detailed figurine, an organic shape — this produces high apparent resolution as each small face gets its own colour sample. On a model with very few, large faces — a simple cube — the resolution is limited to a handful of samples per face and the result looks blocky.
The practical guidance from Josh: apply photo projection before scaling the model. If you scale after applying, the per-layer export detail falls back to face-average colours, which is still correct but loses the finer per-layer variation that makes photo projection look its best. Always apply photo projection at the final intended scale of the model.
The export modes
Dithered export (the CMY modes)
When you select any of the CMY-based filament modes and click Process, Primed3D slices the model into 0.08mm layers internally. For each layer, it calculates which filament should print that layer based on the painted colour and the CMY dithering algorithm. The output 3MF assigns each layer to the correct filament slot. Import into Bambu Studio or OrcaSlicer, assign your physical cyan, magenta, yellow, white, and black filaments to the correct slots, and slice at 0.08mm layer height. The slicer sees the layer assignments and handles them as standard multi-colour filament changes.
The critical slicer settings for dithered export are non-negotiable. Layer height must be 0.08mm — the dithering calculation is built around this value. Initial layer height should be 0.20mm or 0.16mm for bed adhesion. Any other layer height will misalign the dithering pattern and produce incorrect colour output. These settings are listed directly in the Primed3D interface as a reminder before export.
Solid colours — no dithering
This mode is a completely different workflow and one that is worth understanding separately. Rather than CMY dithering, Solid Colours exports each painted face as a discrete filament zone — the same output you would get from painting zones in Bambu Studio manually. No special slicer settings are required. The Palette Size option is the key feature here: it uses k-means colour clustering to reduce the full painted colour range to a fixed number of discrete filaments matching your AMS slot count. Paint your model with any colours you like, set Palette Size to 8 (or 4, or 12), and the tool automatically merges similar colours toward their nearest neighbours while preserving the most visually distinct colours. This makes Primed3D useful as a model painting and colour reduction tool even for users who do not want to attempt the dithering workflow at all.
The Solid Colours export also functions as a save format. Export as Solid, re-import the resulting 3MF back into Primed3D, and all your face colours are preserved for further editing. This round-trip workflow lets you save progress, continue painting in a later session, and eventually export either as solid colours or as a dithered CMY version.
Step-by-step: the complete workflow
Step 1 — Load the model
Go to primed3d.3drevolution.net in any modern browser. Drag your STL or 3MF file into the viewport or click the upload area. The model loads and renders in the WebGL viewport. Use the Orient button to click a face that should sit flat on the build plate — the tool will rotate the model accordingly. Use Scale to set the final size if needed.
Step 2 — Set your filament colours
Click the Filament Colours button and enter the hex codes of your actual filaments. This affects how the slicer preview displays the result — the dithering ratios themselves are always computed using ideal CMY theory, but entering your actual filament colours gives you a realistic preview of what the print will look like rather than the theoretical ideal. Find the hex codes from your filament manufacturer’s product page or swatch guide.
Step 3 — Paint the model
Select a colour from the colour picker and use any combination of Brush, Sphere, Fill, Gradient, or Photo tools to apply colour to the model surface. Use Ctrl+Z and Ctrl+Y for undo and redo. Set the Base Colour for all unpainted faces — this is the colour that unpainted surfaces will export as. For photo projection: load your image, position it carefully, scale and rotate to cover the area you want, and Apply. Use WKCMY mode when working with photos.
Step 4 — Choose mode and process
Select your filament mode from the dropdown — WKCMY for most colour work, CMY for simple vibrant colours on a white base, 2 Filaments for dual nozzle machines. Click Process. Depending on model complexity and your hardware, processing takes a few seconds to a minute. The tool slices the model and calculates layer assignments internally.
Step 5 — Download and import
Click Download to save the 3MF. Import it into Bambu Studio or OrcaSlicer. Assign the filament slots in the slicer to match your export mode — cyan to slot 1, magenta to slot 2, yellow to slot 3, white to slot 4, black to slot 5 (or whichever slot assignments Primed3D specifies in the file). Set layer height to 0.08mm, initial layer to 0.20mm. Slice and send to the printer.
What the results actually look like
This is the part that requires the most honest treatment, because the gap between the theoretical colour gamut and the printed reality is where the technique either earns its place or disappoints.
With the disclaimers out of the way, the results are pretty awesome. It seems to work best when you print entire surfaces in a single mixed colour or with gradients. That is a fair summary. The technique excels at producing smooth, organic colour transitions — a model that blends from one colour to another across its surface, a gradient from warm to cool, a figurine with colour variation across its body. At normal display distance, the blended regions read convincingly as the intended colour.
Photo projection on highly curved, high-polygon models also produces impressive results. A sphere or organic figure with a photo projected onto it has enough individual triangular faces that the colour sampling produces visible resolution. From display distance, the photographic image is recognisable on the surface of the print. Step closer and you see the individual coloured layers. This is the halftone effect in three dimensions.
The technique has hard limits. Layer heights of 0.08mm to 0.12mm are required — standard 0.2mm height introduces visible striping, particularly with opaque filaments. The 0.08mm mandatory layer height for dithered export is not arbitrary — it is the minimum at which the layers become small enough to blend visually at normal viewing distance. The trade-off is print time. At 0.08mm layer height, a model that would take two hours at 0.2mm takes five or more hours. Every colour change is also a filament swap on an AMS machine, so the total print time including AMS purging increases further.
Opaque filaments produce visible striping more than translucent ones. Translucent filaments blend slightly at the layer interfaces, which helps the dithering effect. Opaque filaments produce sharp, hard edges between layers, which means the individual colour bands are more visible at close range. The community has noted that translucent filament sets produce the most convincing results — the same knowledge developed in the HueForge community for lithophane-style printing applies here.
Flat surfaces are the weakest case for photo projection. A flat face with only two triangles gives the projection tool almost no resolution to work with — the colour is averaged across the entire triangle, and the result reads as a flat block of colour rather than an image. The tool is at its best on curved, organic, high-polygon geometry. On architectural or mechanical models with large flat faces, the solid colours export is likely a better choice than dithering.
How it compares to other approaches
vs. standard AMS colour printing
Standard AMS colour printing gives you exactly the colours of the filaments in your AMS — no more, no less. It is faster, simpler, and the colours are precise and sharp. Primed3D’s dithering approach gives you the theoretical ability to produce any colour from three to five base filaments, but the result is an approximation rather than a precise colour and requires 0.08mm layer height throughout. For models with defined discrete colour regions — a flag, a logo, a figure with clearly separated colour zones — standard AMS printing produces a better result. For models where blended, organic colour variation is the goal, Primed3D opens possibilities that standard AMS cannot approach.
vs. HueForge
HueForge is the established tool for colour multi-material printing, specifically focused on lithophane-style flat prints where images are reproduced on a flat panel using filament translucency. Primed3D applies a different technique — CMY dithering across layers — to full 3D models rather than flat panels. The approaches are complementary rather than competitive. HueForge is the right tool for flat image reproduction where filament translucency is the mechanism. Primed3D is the right tool for painting 3D models in a full colour gamut using subtractive dithering. The knowledge about filament translucency developed in the HueForge community is directly applicable to Primed3D.
vs. full colour processes (PolyJet, binder jetting)
Industrial full colour 3D printing processes like Stratasys PolyJet or binder jetting can place individual droplets of coloured material at specific voxel locations in three dimensions, producing truly photographic colour across the entire volume of a part. Primed3D’s technique is an approximation of this concept within the constraints of standard FDM hardware. The result is not comparable to PolyJet output — but PolyJet costs orders of magnitude more and is not available to hobbyists. Primed3D produces a genuinely interesting result from a standard Bambu machine with five standard-colour spools, which is a different thing entirely.
Practical tips for better results
- Use WKCMY for anything involving photos or neutral tones — CMY alone cannot produce clean whites, greys, or deep blacks. White and black filaments in the WKCMY mode handle these tones accurately. For simple saturated colour work on white-bodied models, CMY is fine
- Use high-contrast, bright photos — the dithering works on colour differences. Washed-out, low-contrast, or predominantly grey images will print as grey. Choose images with strong colour saturation and clear contrast between regions
- Model geometry matters more than print settings — a high-polygon curved model will produce significantly better photo projection results than a low-polygon flat model regardless of settings. Choose models with the technique in mind
- Apply photo before scaling — scaling after photo projection degrades the per-layer resolution of the colour export. Always set the final model scale before applying any photo
- Consider translucent filament sets — translucent cyan, magenta, yellow, white, and black produce better blending at layer interfaces than fully opaque versions. The HueForge community’s filament characterisation data is a useful reference for identifying good candidates
- Reduce print speed below normal — at 0.08mm layer height with frequent colour changes, running at full A1 speed is not advisable. Reduce outer wall speed to 40–60mm/s and let the print run at a measured pace
- Use the Solid Colours export as a save file — export Solid, keep the 3MF as your project file, and re-import to continue painting in a later session. All face colours are preserved
- Test on small models first — a small, curved object printed in WKCMY at 0.08mm will tell you whether your filament set and settings produce the expected colour blending before you commit to a multi-hour print on a complex model
Filaments to get started
You need CMY filaments — true cyan, magenta, and yellow — plus white and black for the full WKCMY mode. These are not standard colours on most shelves and require deliberate sourcing. eSun produces a CMYK PLA+ bundle that includes cyan, magenta, yellow, and white, which is a straightforward starting point. The Bambu Lab filament range includes cyan, magenta, and yellow as standard-named colours in their PLA Basic range. For the magenta specifically, be careful: some filaments labelled as magenta are closer to pink or rose, which shifts the colour output significantly. True magenta is a vivid blue-red — if your magenta spool reads as pink, colours requiring magenta in the mix will be off across the gamut.
The hex codes of your actual filaments matter more for preview accuracy than for print output — Primed3D computes dithering ratios from ideal CMY theory regardless of your specific filament’s exact hue. But the closer your filaments are to ideal cyan, magenta, and yellow, the closer your printed colours will be to what the tool predicts.
The honest verdict
Primed3D is a genuinely clever tool built by a developer who understands both the technique and its limits. The colour dithering approach is sound in theory and produces real results in practice — results that are not achievable through any other method on a standard single-nozzle AMS machine. A blended gradient across a model surface, a photo projected onto a curved figurine, an organic colour wash across a display piece: all of these are things Primed3D enables that were not possible before without either a tool changer, specialised slicer plugins, or industrial hardware.
The limitations are equally real. The 0.08mm mandatory layer height means long print times and high colour change counts. Flat-faced models produce poor photo projection results. Opaque filaments show layer banding more than translucent ones. The results look best at normal display distance and less convincing under close examination. It is an approximation, and the best results are achieved when you choose models and colour approaches that play to the technique’s strengths rather than exposing its weaknesses.
For anyone with an AMS-equipped Bambu machine, five spools of CMY-W-K filament, and a model that calls for colour variation beyond what your filament inventory can provide — Primed3D is worth the time. It is free, runs in a browser, requires no installation, and produces Bambu Studio-compatible output directly. The technique has genuine limitations, but the tool itself is well executed and the community around it is growing. Use it with honest expectations and it will produce results that surprise you.
Access Primed3D at primed3d.3drevolution.net. No account required. Josh’s tutorial videos are at the 3D Revolution YouTube channel.