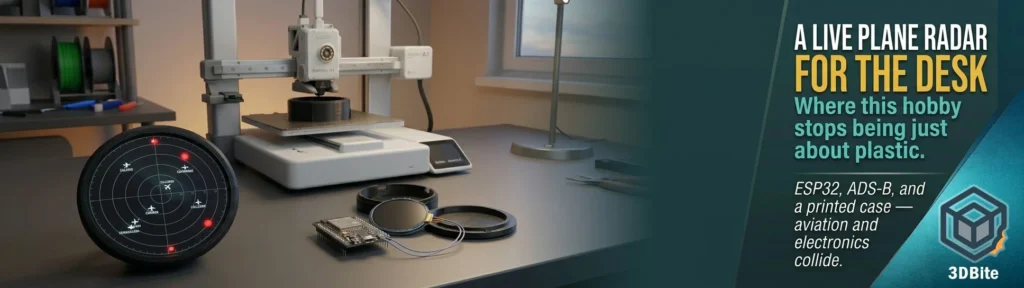
Every so often a project comes along that reminds me why I got into this hobby in the first place, and it is never purely about the plastic. The 3D printer is a brilliant tool, but the most satisfying projects are the ones where it is one component of something bigger rather than the entire point. This is one of those. The ESP32 Plane Radar by MakerWorld designer matixovi combines a small round display, a microcontroller, and live aircraft tracking data into a self-contained desk gadget that shows every plane currently flying near the house. Aviation and electronics are two of my other interests outside 3D printing, and this project sits at the exact intersection of both, with the printer providing the enclosure that turns a bare circuit board into something that actually belongs on a desk.
What ADS-B actually is, because it is genuinely clever
Before getting into the build, it is worth explaining what is actually happening technically, because the reason this project works at all is a piece of aviation technology that most people benefit from every time they check a flight tracking app without knowing why it works. ADS-B stands for Automatic Dependent Surveillance-Broadcast. Automatic, because it transmits without any external prompt. Dependent, because it relies on the aircraft’s own onboard GPS to determine its position rather than being tracked by a ground radar sweep. Broadcast, because the aircraft sends this data out openly on a specific radio frequency (1090MHz) for anyone within line of sight to receive — no encryption, no subscription, no permission required.
In practice: an ADS-B-equipped aircraft works out its own position, altitude, speed, and heading from its onboard systems, and broadcasts that information several times a second to anyone listening. It is genuinely one of the more elegant pieces of infrastructure in modern aviation — rather than a country needing to build and maintain a network of expensive radar installations to track every aircraft, the aircraft themselves do the work of announcing where they are, and all that is needed on the ground is a comparatively cheap receiver within radio range.
This is also why services like Flightradar24, FlightAware, and the specific service this project uses — adsb.fi — exist and are free. None of them are running their own satellite network. They are aggregating data from a genuinely enormous crowdsourced community of individuals who have set up their own ADS-B receivers — typically a Raspberry Pi, a cheap software-defined radio dongle, and a small antenna — and are voluntarily feeding that received data into a shared pool. adsb.fi specifically states it has over 6,000 feeders around the world contributing to open, unfiltered air traffic data. It is citizen infrastructure in the most literal sense: thousands of individual hobbyists, each covering their own local patch of sky, adding up to a genuinely global picture that anyone can query for free.
What this project does is take that already-existing global data pool and pull just the slice of it relevant to your specific location, displaying it locally on a small dedicated screen rather than requiring an app or a browser tab. You are not running your own receiver — that would need actual radio hardware, an SDR dongle and antenna, a considerably bigger project than this one. Instead the ESP32 simply queries adsb.fi’s API over WiFi for whatever aircraft the wider community’s receivers are currently seeing within your chosen radius, and renders that data on the round display.
What the finished device actually shows
The display itself is a 1.28-inch round GC9A01 screen — 240×240 pixels — rendering a sonar-style radar grid with your location at the centre. Aircraft appear as points on that grid, positioned and updated according to their real reported location, with callsigns and altitude shown alongside. A physical button on the back of the enclosure cycles through four range settings — 5, 10, 15, and 25 kilometres — so you can zoom the display out during a busy period or in when you want detail on something specific passing close by. Aircraft beyond the selected range still show up as red dots pinned to the rim of the display, a nice touch that tells you something is out there approaching the edge of your chosen radius without cluttering the main grid.
The whole thing runs on an ESP32-C3 Super Mini — a genuinely tiny microcontroller board with WiFi built in, USB-C for both power and flashing, and just about enough processing power to handle the display rendering and the WiFi API calls to adsb.fi. This is the same broad category of hardware as the CYD boards covered in the CYD desk buddy post — cheap, capable, WiFi-connected microcontrollers that have become the standard building block for exactly this kind of small connected gadget project. Where the CYD project pulled Bambu printer status through Home Assistant, this one pulls live aviation data through a public API directly. Same underlying philosophy, different data source, different niche interest being served.

The parts list and where the printer fits in
The bill of materials is genuinely short and cheap: one ESP32-C3 Super Mini (look for USB-C, a BOOT button, and 4MB of flash specifically), one 1.28-inch round GC9A01 SPI display at 240×240 resolution, and a proper USB-C data cable — the designer’s own notes flag this specifically, since a charge-only cable will connect power but never let the flashing process talk to the board, wasting time before you even realise what’s wrong. Both the ESP32 board and the display are sourced from AliExpress at low individual cost, putting the total electronics spend for this project at well under £15.
The printed enclosure is where this becomes a proper 3D printing project rather than just a breadboard exercise. The design is a two-piece snap-fit case: a main base that the round screen and the ESP32 press into, seating with an audible click, and a cover that fits over the top in two stages — pressed down on the screen side first, then on the ESP32 side. No screws, no glue, no fasteners of any kind. It is exactly the kind of clean, considered snap-fit design that turns a bare PCB and a fragile round screen into something that looks and feels like a finished consumer product rather than a prototype. Printed on the A1 at the designer’s suggested 0.2mm layer height with three walls and 15% infill, the whole enclosure is a quick single-plate print — well within a lunch-hour print session.
The wiring: small, deliberate, and worth doing properly
This is a genuinely compact wiring job — seven connections between the display and the ESP32, most of the wire runs around 11mm, with the DC line running slightly longer at roughly 25mm. The designer’s guidance to use 28-30 AWG wire, ideally silicone-insulated for flexibility, reflects how tight the tolerances are inside a case this small — stiffer wire at this scale fights the enclosure’s snap-fit assembly and makes it harder to get the cover to seat cleanly. The single detail worth taking seriously before touching a soldering iron: the display’s VCC connects to the ESP32’s 3.3V pin, never the 5V rail. This is stated explicitly and in bold in the designer’s own instructions, and it is exactly the kind of easy-to-overlook detail that fries a display in seconds if a wire ends up in the wrong pin during a distracted moment at the bench.
Assembly order matters too: screen and ESP32 go into the base first, pressed down until each clicks into its seated position, and only then does the cover go on — screen side of the cover first, ESP32 side second. It is a sequence clearly worked out through the designer’s own prototyping, and following it in order rather than improvising avoids putting stress on the wiring while everything is being pressed into place.
Getting it talking: firmware and WiFi, no Arduino IDE required
This is the part of the project that will feel most unfamiliar to anyone whose electronics experience stops at “plug it into the printer’s AMS port,” and it is worth demystifying, because the actual process is more approachable than it sounds. The firmware — the actual program running on the ESP32 that draws the radar display and talks to adsb.fi — comes pre-built as a release file from the project’s GitHub page. You do not need the Arduino IDE, you do not need to write or compile any code, unless you specifically want to modify how the project behaves.
Flashing happens entirely through a browser: web.esphome.io, run in Chrome or Edge specifically (this uses the WebSerial API, which is not universally supported across browsers), lets you select the downloaded firmware file and flash it directly onto the board over USB with a few clicks. Getting the board into the right mode to accept new firmware involves a small manual dance — unplug USB, hold the BOOT button, plug USB back in, wait two seconds, release BOOT — that anyone who has worked with ESP32 boards before will recognise instantly and anyone who has not will find slightly fiddly the first time and completely routine by the second.
Once flashed, the device creates its own temporary WiFi network — PlaneRadar-Setup — that you connect to from a phone or laptop to configure the real home WiFi credentials along with your latitude and longitude, entered through a simple local web page rather than any app. One hard limitation worth flagging before starting: the ESP32-C3 only supports 2.4GHz WiFi. If your home network is configured as 5GHz-only, or your router’s 2.4GHz band has a different name that you have half-forgotten exists, this device simply will not connect until that is sorted — worth checking before starting the setup process rather than discovering it partway through.
Why this is the kind of project that makes the whole hobby worthwhile
This is the point of this post, and it is worth being explicit about it rather than leaving it implied. A huge amount of what gets covered on this site is 3D printing as the entire activity — the print is the object, the object is the point. This project is different in a way I find genuinely more satisfying: the 3D printer is doing exactly one job, and it is doing it in service of something considerably bigger than itself. The clever part of this build is not the plastic case. It is the fact that a piece of open aviation infrastructure, maintained by thousands of volunteer hobbyists running receivers in their own homes, can be queried by a £15 microcontroller and rendered as a live, physical, always-on radar display sitting on a desk. The enclosure is what makes that usable and presentable rather than a loose PCB with wires hanging off it, but the enclosure is not where the interesting engineering lives.
This is exactly the same broader principle behind the CYD Home Assistant project — a 3D printer is genuinely at its best when it is one piece of a larger system rather than the whole story. Print the case, sure. But the reason this project is worth doing at all is the aviation data pipeline underneath it, built by a global community of people who care enough about tracking aircraft that they run their own radio receivers for free and share the results with everyone else. Building this device is a small, direct way of tapping into that infrastructure and putting a physical window onto it on my own desk, right next to the printers that made the case that holds it.
This one is going straight onto the build list. Parts ordered, print queued on the A1 alongside whatever else is running this week. I will report back on how the assembly and the WiFi setup actually go once it is built — and given how close I live to a flight path, I am genuinely curious what the radar picks up on a typical evening.