As covered in the Kobra X editorial and the Kobra 4 vs Kobra X post, I have had the Kobra X on my radar for a while. The ACE Gen 2 integrated multi-colour system, the purge waste reduction numbers, the direct head-to-head performance versus the Bambu A1 — all of it pointed to a machine that was genuinely worth the price. The sticking point was always that I did not need a second machine with the same 260 mm build volume as the A1 sitting on the desk.
Then Amazon offered 10% off. The price dropped to £234. At that point the argument collapsed and the order went in. The Kobra X is now on the desk.
In a nod to the advice in the how to convince your spouse you need another 3D printer post — and in the genuine spirit of getting the other half involved in the hobby — I handed the unboxing and setup to my spouse. A 3D printer that only I can set up is a harder sell than one that is straightforward enough for someone who has never assembled one before to get running without help. That was the test. She passed it. So did the printer.
The box and first impressions
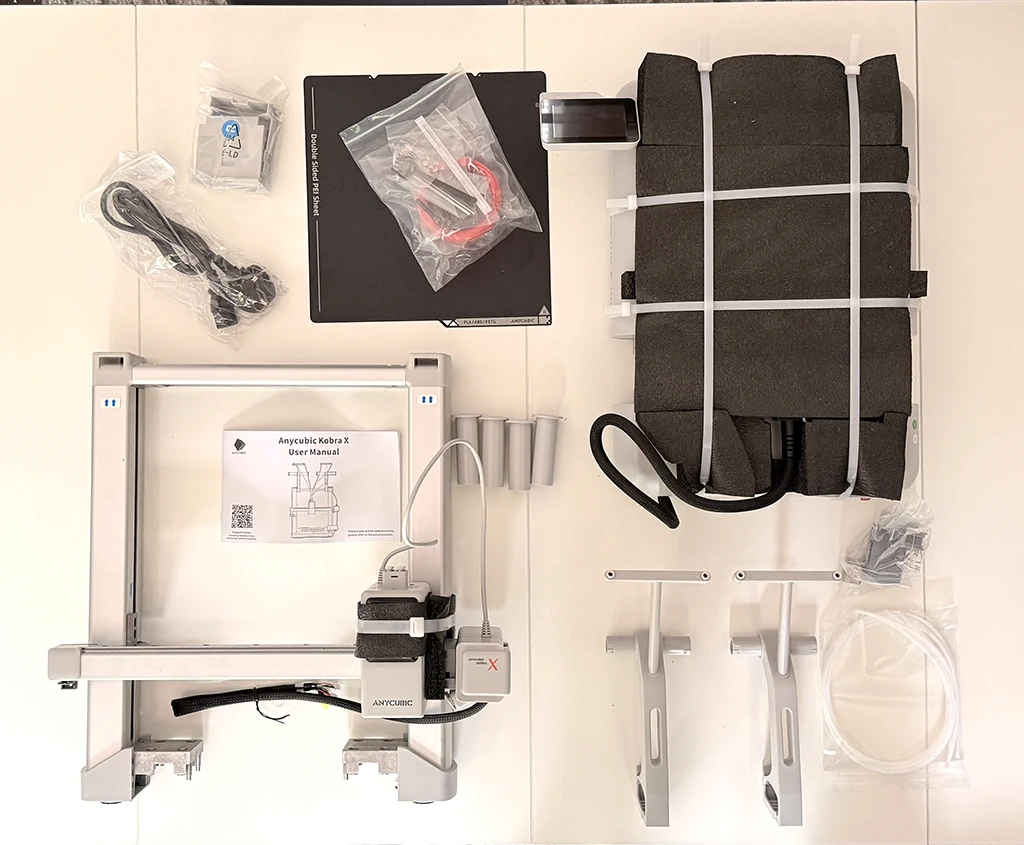
The Kobra X arrived promptly in a relatively compact box — more so than I expected given the machine’s dimensions. The Kobra X is very well packed, and there were no damaged parts during shipment. The foam protection is solid throughout. The one minor criticism that appears in multiple reviews is that the quick-start materials are buried inside rather than sitting on top where they are immediately accessible — they should be right on top where they can be found immediately. A minor point but worth knowing: dig out the instruction manual before you start rather than discovering it underneath the machine halfway through assembly.
First impression on lifting the components out: solid. The machine feels heavier and more substantial than the A1, which is something multiple reviewers have also noted. The gantry frame in particular has a rigidity to it that the A1 does not match. The gantry mounts are hefty — a great deal more robust and rigid than earlier 3D printers that simply had bolts between standard aluminium extrusions. Whether this translates to measurably better print quality at speed remains to be tested, but it reads as a more engineered product out of the box.

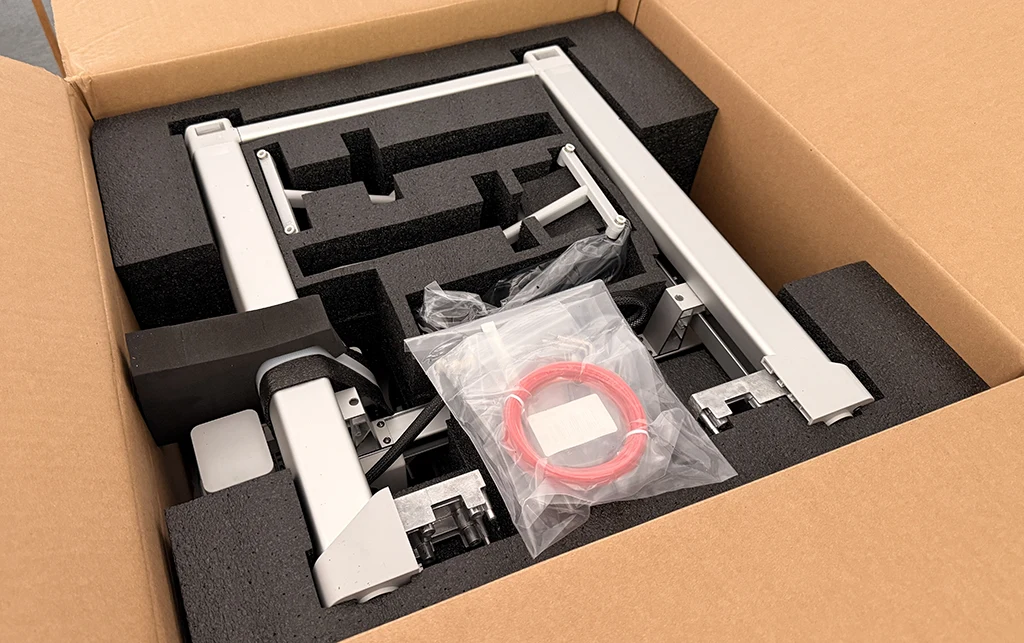
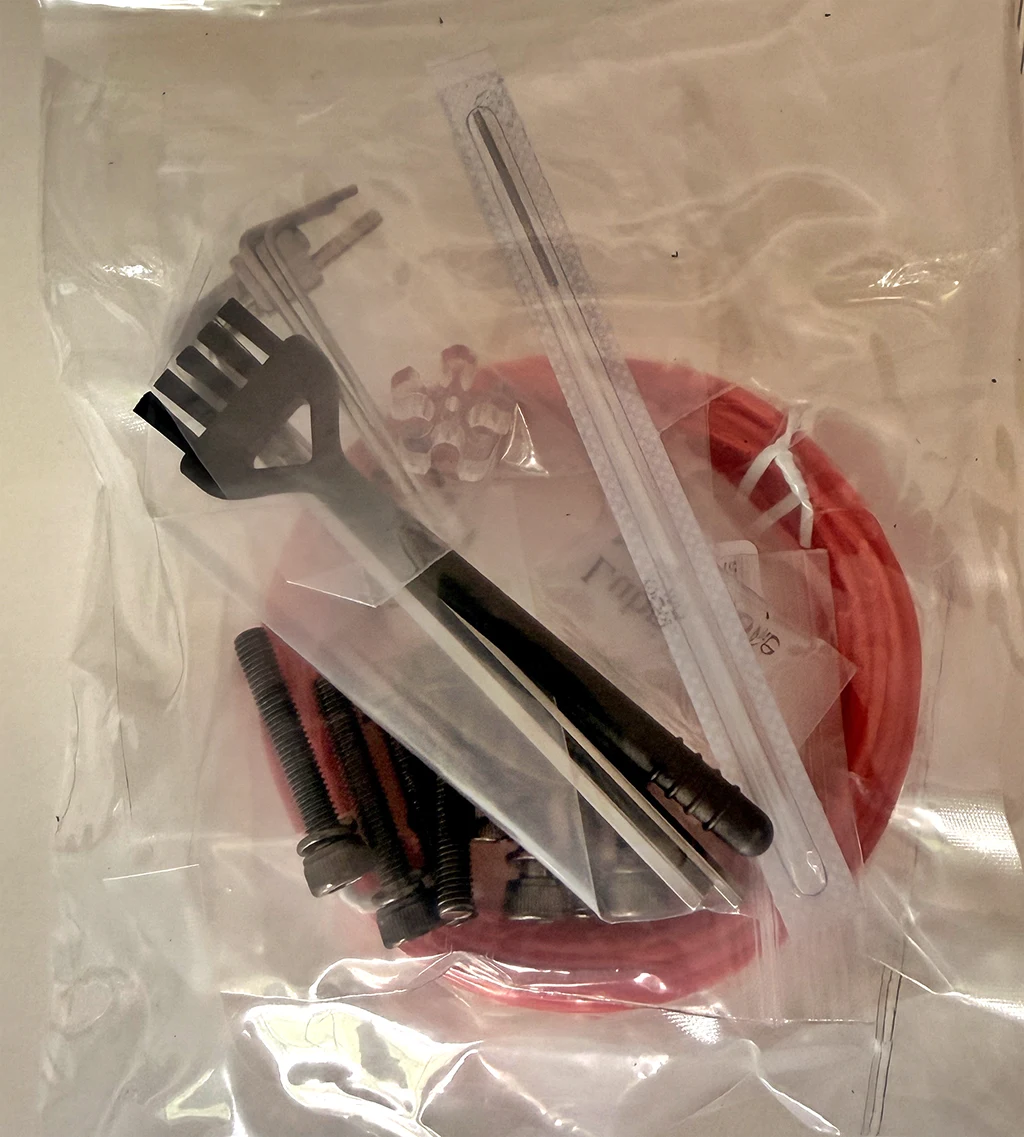
Worth noting: the box includes lubricating grease alongside the standard tools, filament sample, and instruction manual. The included tool kit is functional and covers everything needed for assembly and basic maintenance. A plus: it includes lubricating grease, something not always found in the box of machines in this price range. The Allen keys are magnetic — this will make it a lot easier to hold the tiny bolts during insertion. Small details that signal Anycubic has paid attention to the assembly experience at this generation.
Assembly
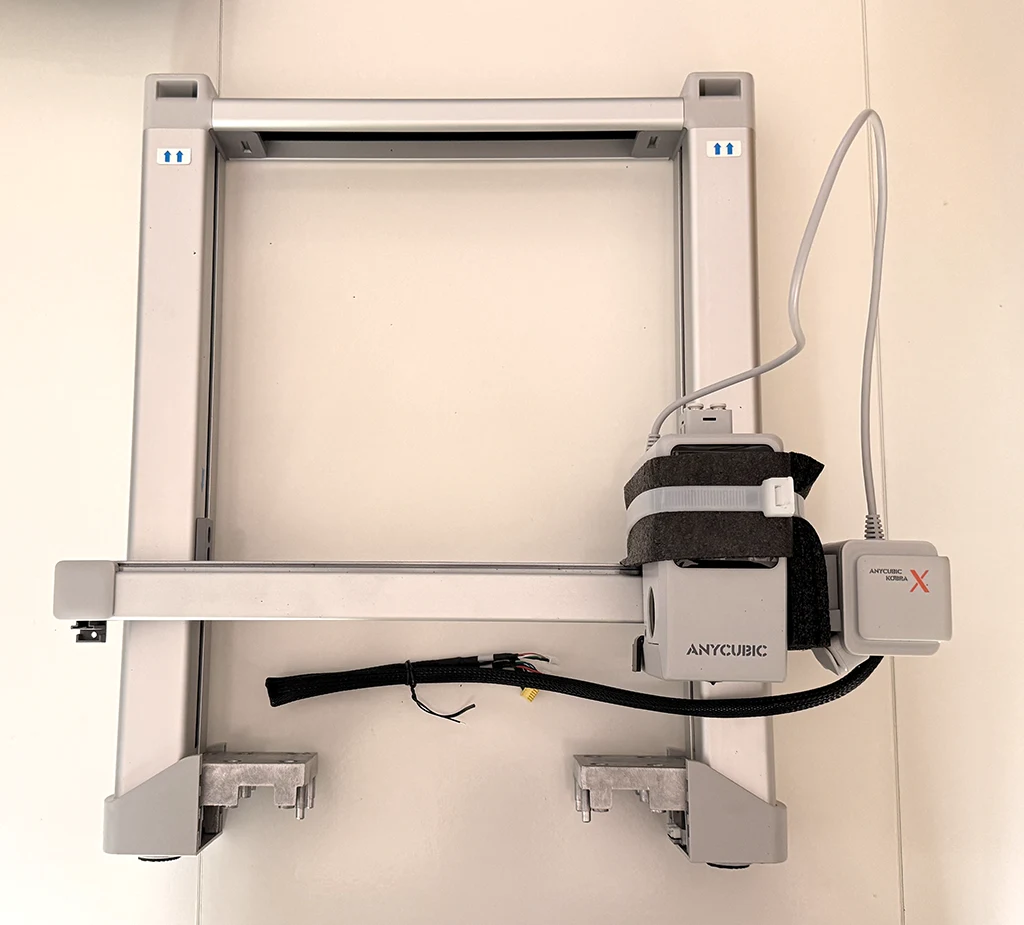
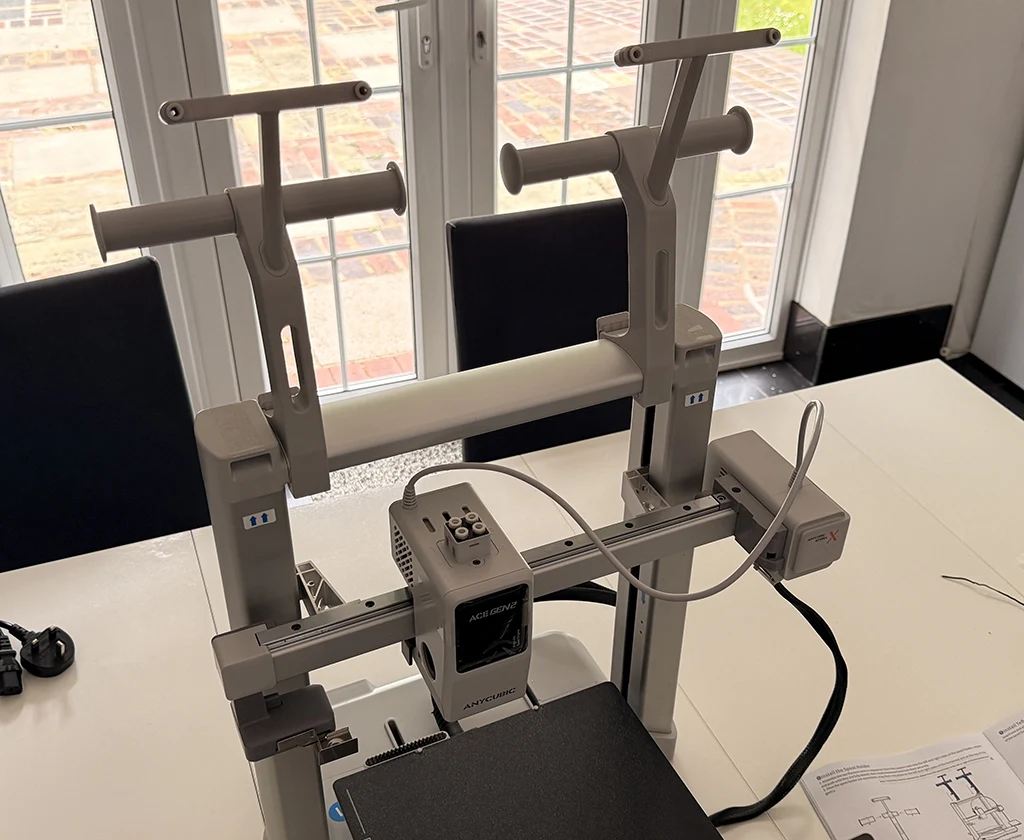
The Kobra X arrives in two main assemblies — the base unit and the gantry — which need to be joined. Everything else follows from there. The main gantry and bed arrive pre-assembled, and you connect four cable plugs and eight bolts. In practice the process involves a few more steps than that summary suggests, but the principle is correct: the heavy engineering work is done at the factory and the user assembly is attachment and connection rather than build-from-parts.
The sequence we followed:
- Remove the six retaining screws from the Z-axis gantry shipping brackets — three each side. Critical step: remove the 6 screws from the X-axis shipping brackets before turning on the machine. The machine will remind you of this on first power-up, but it is better done before the gantry is attached
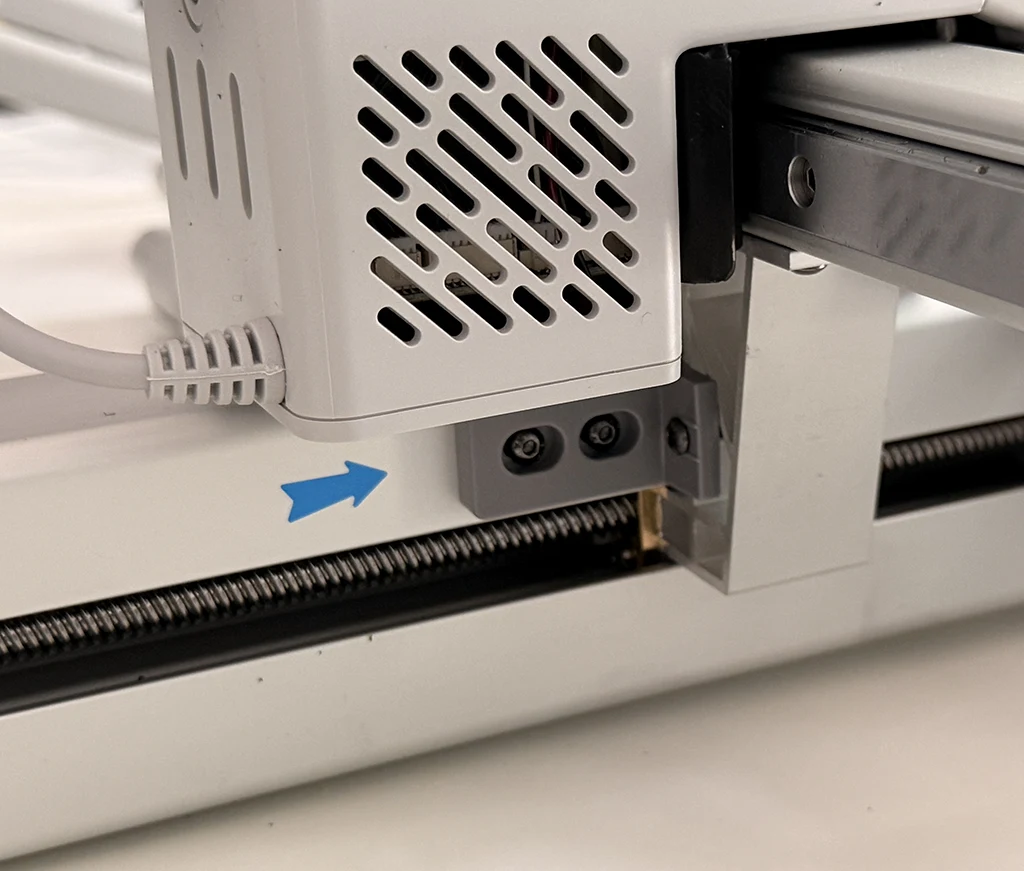
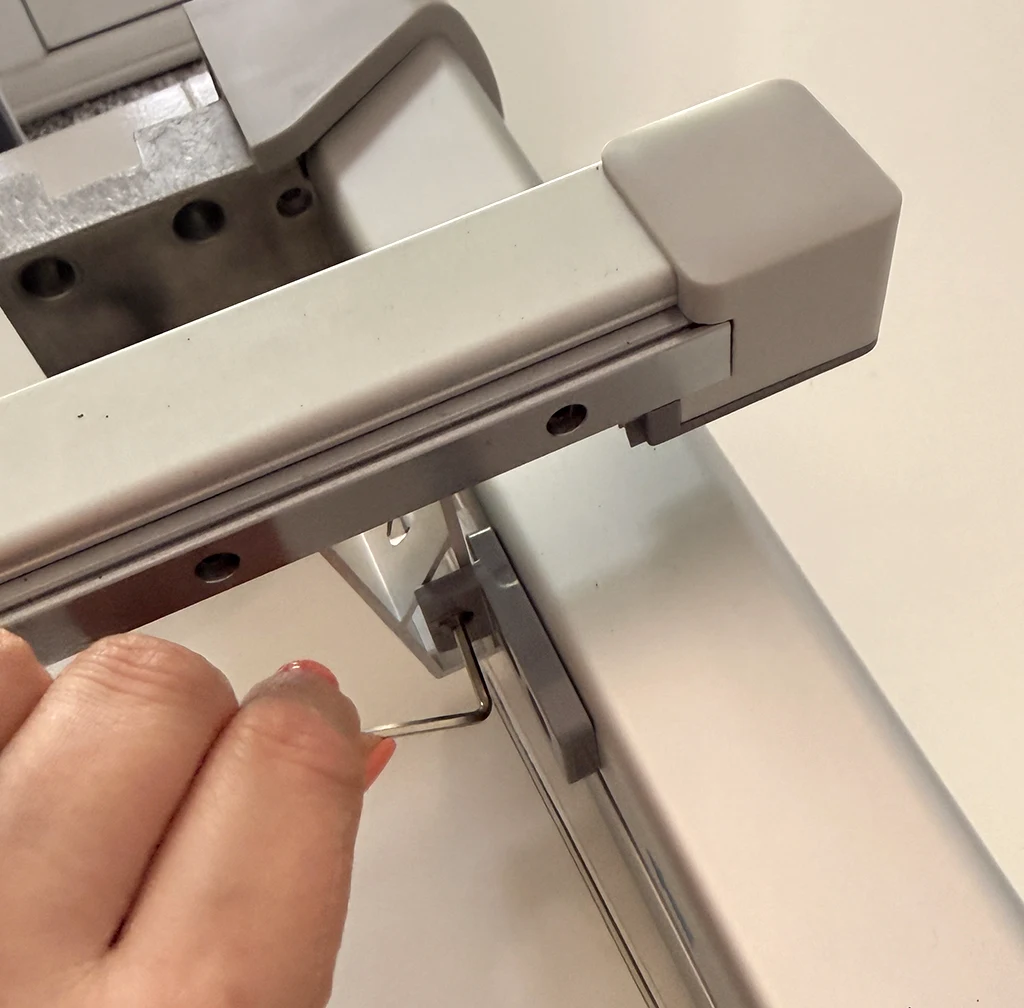
- Seat the gantry onto the base unit and secure with eight M5 hex bolts — four into each side. The gantry is held on with eight M5 screws into the base, four into either side. Fit the plastic trim covers over the bolt heads once secured
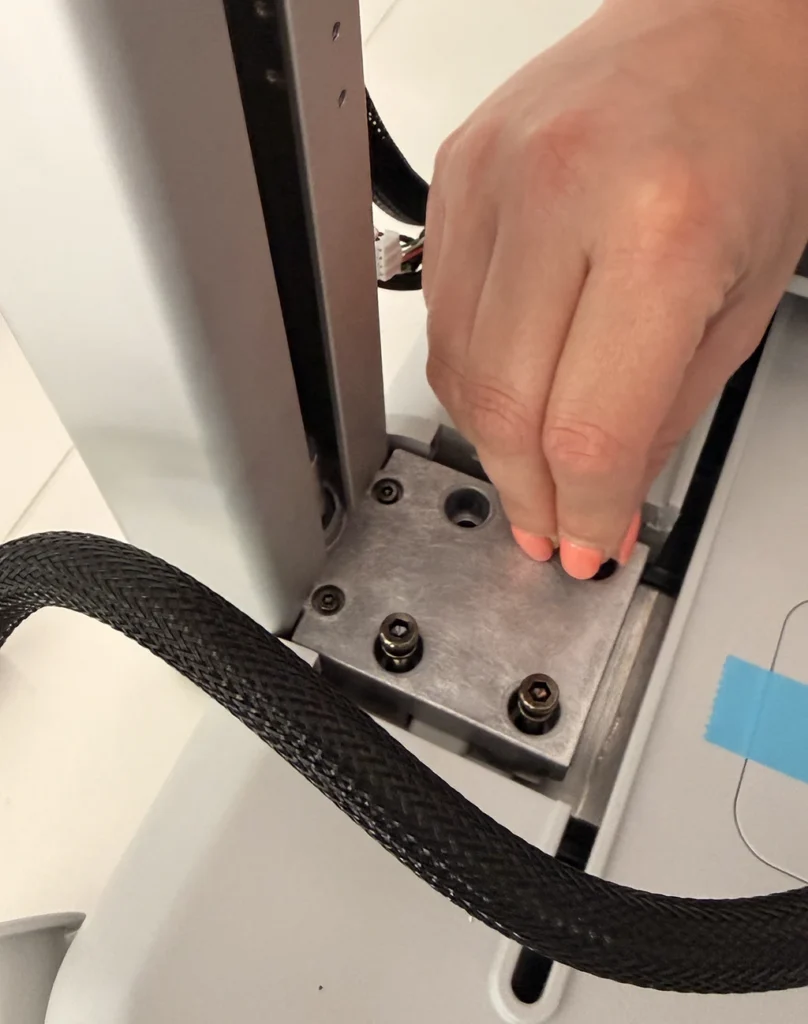
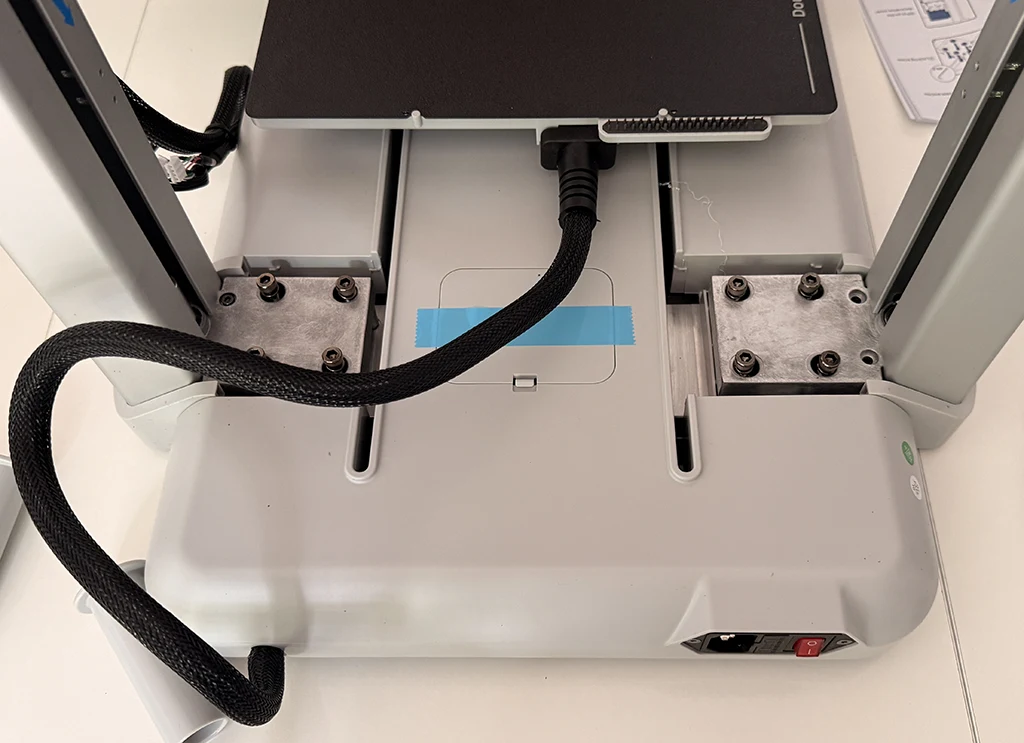
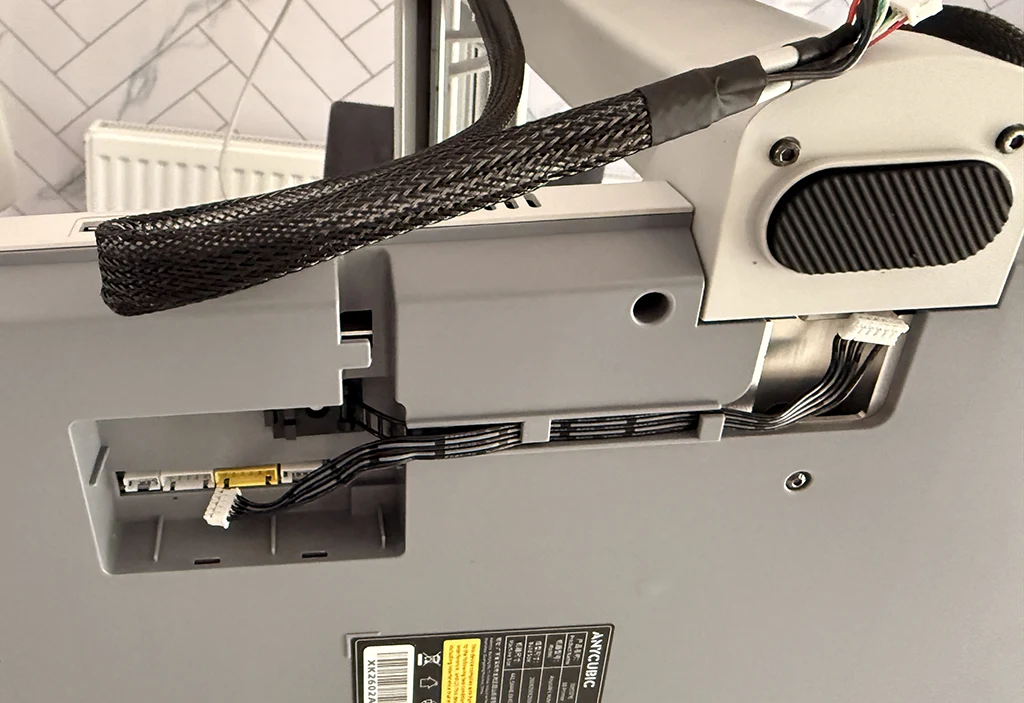
- Flip the whole unit over to access the base connections. Support the X-axis carefully as you do this — it is the step that most benefits from a second pair of hands. Plug in the connections for the camera, extruder, and motors. The cables are well labelled and plugged into the base once the gantry is secured. Different connectors for each function means there is no meaningful way to connect anything incorrectly
- Attach the filament purge wiper to the left side of the X-axis with a single screw
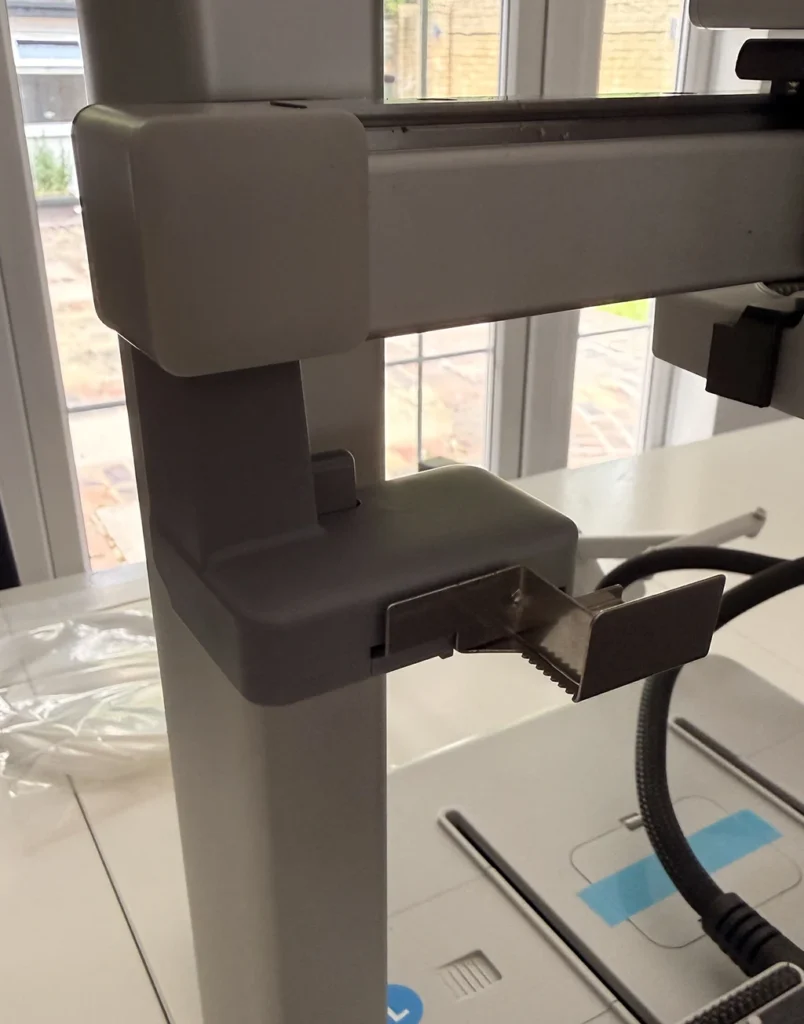
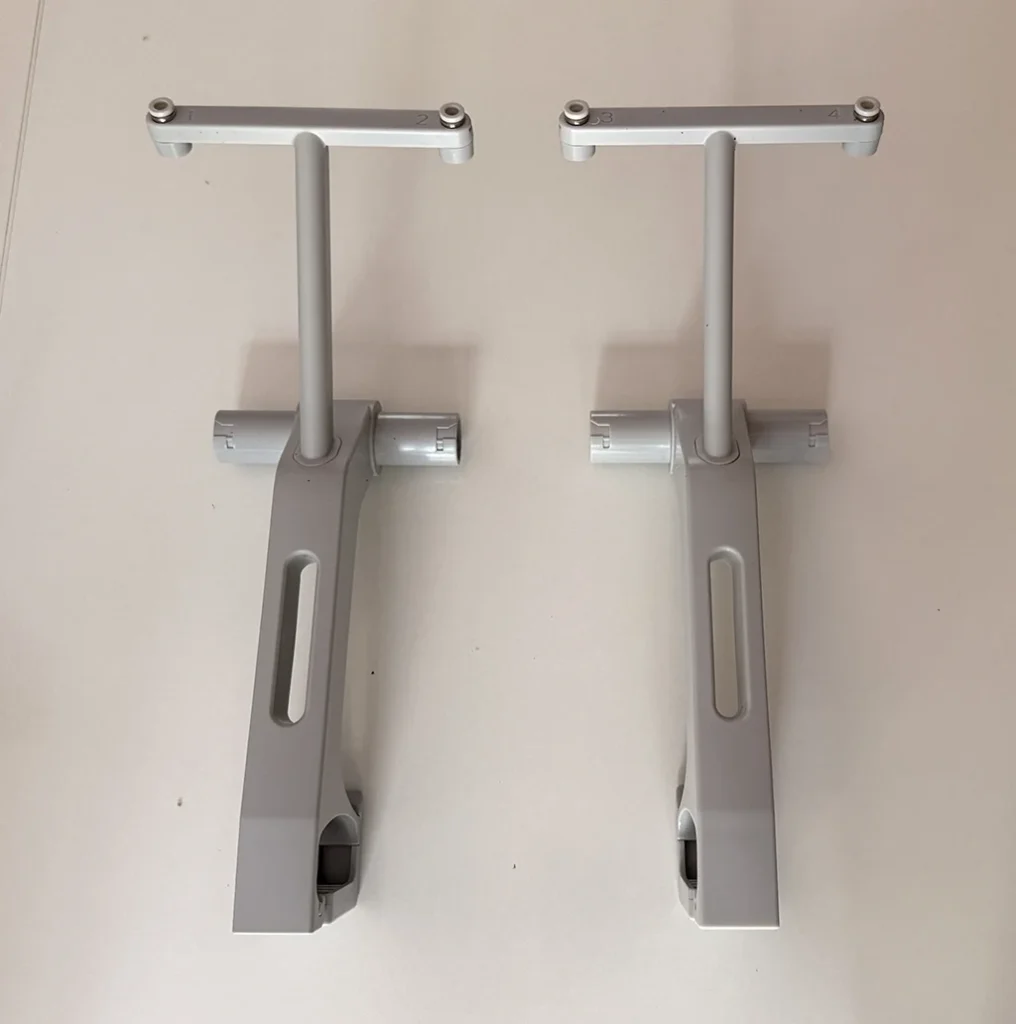
- Fit the spool holders on the top of the gantry — these click into place without tools. The spool holders clamp into place on the top of the gantry without tools. Space them as far apart as possible, as getting full-sized spools into the inner two holders is a tight fit.
- Attach the four filament guide tubes from the spool holders to the toolhead in the correct order — the order determines which slot feeds which channel on the ACE Gen 2 system
- Fit the wiring covers on the base
Total assembly time from opening the box to powered-up machine: well under an hour. My spouse, assembling a 3D printer for the first time with no prior experience of the process, had it together and running the first calibration sequence in around forty minutes. The Kobra X is one of the most straightforward bed-slingers I’ve assembled.
The assembly experience is comparable to the Bambu A1 and, if anything, slightly more straightforward. The A1’s gantry attachment is similar in principle. The Kobra X’s bolt coverage and labelling is marginally better. Neither machine requires tools beyond what is in the box and neither requires prior 3D printer experience to assemble confidently from the instructions provided.
Build quality compared to the A1
This is the thing I noticed most during assembly and it is worth stating clearly: the Kobra X feels more solid than the A1. Not marginally — noticeably. The gantry is stiffer, the base is heavier, and the overall feel when moving the axes by hand during setup is one of less flex and more precision. The gantry feels good and solid, and Anycubic has once again worked on the quality of the cable routing, so less of the workings are on show. The wiring management is clean in a way that earlier Anycubic machines were not.
Whether this structural rigidity produces better print output over long runs is something the head-to-head comparison post will address. On first impressions alone, the Kobra X feels like a more engineered machine than its price point suggests and stands up well beside the A1 without feeling like a budget alternative.
First power-up and calibration
Power on, and the touchscreen takes over. The setup process is guided from the screen — it walks you through confirming the shipping brackets have been removed, binding the printer to your Anycubic account for app access, and running the LeviQ 3.0 auto-levelling calibration. Once you switch on the machine, the interface will ask you to double check that all shipping brackets have been removed — a nice reminder, especially for beginners.
The account binding process links the printer to Anycubic’s cloud platform, making it accessible from the Anycubic app and from Anycubic SlicerNext on the desktop. The process is a close parallel to the Bambu first-setup experience — scan a code, confirm on the app, done. No IP addresses, no network configuration, no manual steps beyond following the on-screen prompts.
The calibration sequence runs for approximately 30 minutes. Once powered up and the calibration steps were run, which takes around 30 minutes, the printer is set to go. The LeviQ 3.0 system runs a 49-point auto-levelling mesh — no manual tramming required. 100% zero manual compensation means you can hit Print with total confidence. The axes are moved through their full range, the probe maps the bed surface, and the system generates a compensation mesh that corrects for any surface variation automatically. During this process the printer goes through some vigorous movements — don’t be alarmed by a few moments of strong vibration, which makes it seem like an explosion is imminent but is a normal part of the calibration process.
Loading filament
Filament loading on the Kobra X is simpler in practice than it looks on paper. Place the spool on one of the top holders, feed the filament end into the matching numbered Bowden tube, and push it through until the printer beeps to confirm the filament has been detected at the toolhead sensor. Set the filament type and colour either on the touchscreen or via the app. That is the complete process.
The numbered tubes and spool holders correspond directly to slots in the ACE Gen 2 system — tube 1 feeds slot 1 on the toolhead, and so on. As long as the tubes are connected in order (and the colour coding helps with this), the assignment in the slicer matches the physical filament. For the first print we loaded a single colour through slot 1 and left the other three unloaded. Single-colour loading on a four-colour system is completely normal for the initial test.
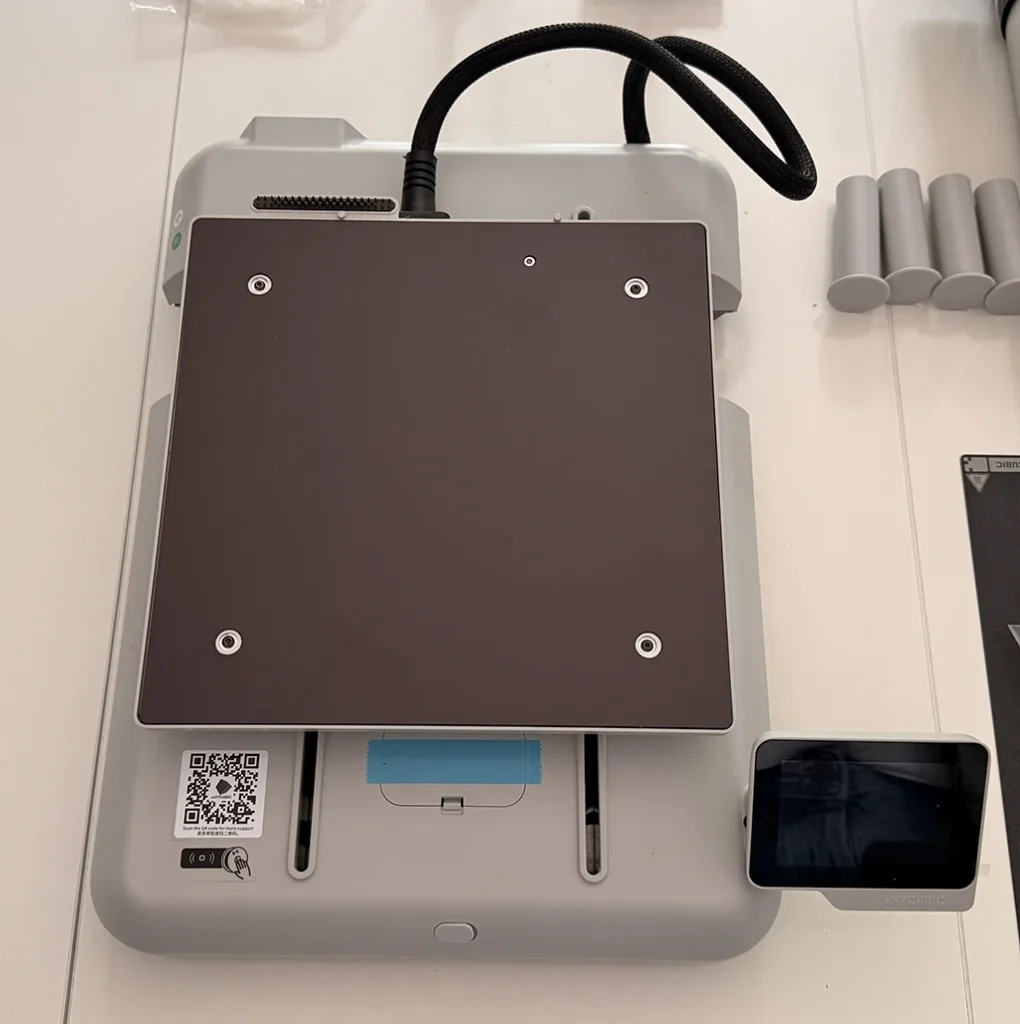
One thing to note for non-Anycubic filament users: the RFID reader on the base of the machine reads Anycubic’s own spool tags and auto-populates the filament type and temperature. For third-party spools, you set the filament type manually on the touchscreen exactly as you would in Bambu Studio. The RFID tag reader is located on the base of the machine and getting it into the system isn’t really worth the effort for non-Anycubic spools. You have to tell the machine you’re going to use the reader from inside the filament menu, wave the spool over the reader until it recognises it, then load the filament. For eSun PLA+ — my standard filament — manual entry is fine.
First print
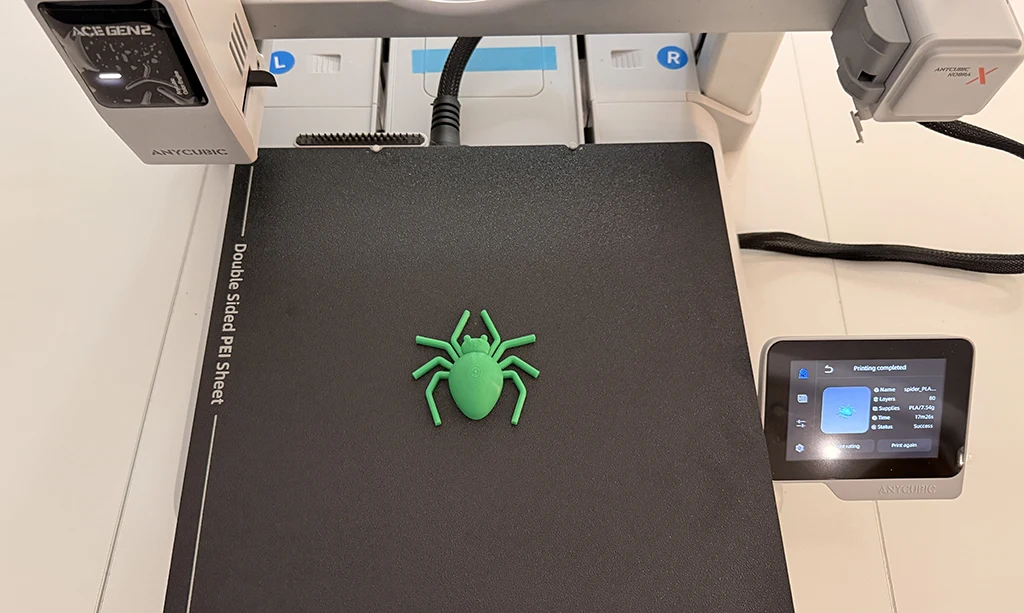
For the first print we ran one of the built-in sample files from the internal storage. This is the right call for any new machine — the sample files are specifically optimised for the printer’s own calibration and provide a clean baseline before you start running custom sliced files. The print ran without issue and completed without intervention.
On the first run, I checked the first layer accuracy, and once finished, the sheet of plastic that had been extruded was of exceptional quality, peeling back to reveal an even and well distributed layer of filament. Our experience matched this exactly. The first layer was even, clean, and released from the PEI plate without effort once the bed had cooled. No adhesion issues, no warping, no adjustment required before the second print.
Total time from opening the box to a completed first print: approximately one hour. That figure holds up whether you are an experienced user or — as in our case — a first-time assembler following the on-screen guide for the first time. From unboxing to your first print in under an hour. The Kobra X delivers on that claim without asterisks.
The touchscreen and app
The 3.5-inch touchscreen on the Kobra X is a step up from the A1’s display — more responsive, better resolution, and a cleaner interface layout. Navigating menus, setting filament parameters, and monitoring print progress all feel more polished than I expected. My initial impression — and this is not yet a tested conclusion — is that the touchscreen and filament handling feel better on the Kobra X than on the A1.
The Anycubic app works on the same principle as Bambu Handy: remote monitoring, print status, live camera feed, and the ability to send files. The setup connected cleanly during the first-power-up process and the camera feed was accessible from the phone immediately after calibration completed. The app interface is slightly less polished than Bambu Handy, and the model library is less developed than MakerWorld, as covered in the earlier editorial — but the core monitoring and control functions work as expected.
The slicer — Anycubic SlicerNext — is based on the same codebase as Bambu Studio and OrcaSlicer. If you are familiar with either of these, you will feel right at home with Anycubic SlicerNext. For anyone coming from a Bambu workflow, the transition requires about ten minutes of orientation rather than a learning curve. The Kobra X printer profile was already available in SlicerNext on first launch — no manual profile setup required.
Noise
This is subjective and not measured, but worth noting: the Kobra X is quieter than the A1 in normal operation. Both machines run a silent mode rated at 45 dB or below, but the Kobra X’s actual acoustic character during printing feels more subdued. The motors are less present, the movement transitions are smoother-sounding, and the overall ambient noise level during a standard PLA print is lower than my A1 under the same conditions. This matters more than the specification suggests if the printer is in a shared workspace or a room with other activity happening.
Early impressions summary
One hour from box to first print. Assembly simpler than the A1. Build quality that exceeds expectations at the price point. Calibration fully automated. App and slicer integration working immediately. First print clean without intervention.
The things I cannot yet assess: multi-colour performance against the A1 in real-world testing, long-term reliability, and whether the ACE Gen 2’s purge waste reduction holds up the way the Tom’s Hardware numbers suggest when printing my actual workflow rather than a benchmarking suite. Those answers will come with time and a proper head-to-head comparison post, which is what comes next.
For now: at £234 on a 10% Amazon discount, the Kobra X is on the desk and running. The A1 is still on the desk too. Two printers, one workspace, and a spouse who now knows how to assemble an FDM printer from scratch. That last part alone was worth the unboxing session.