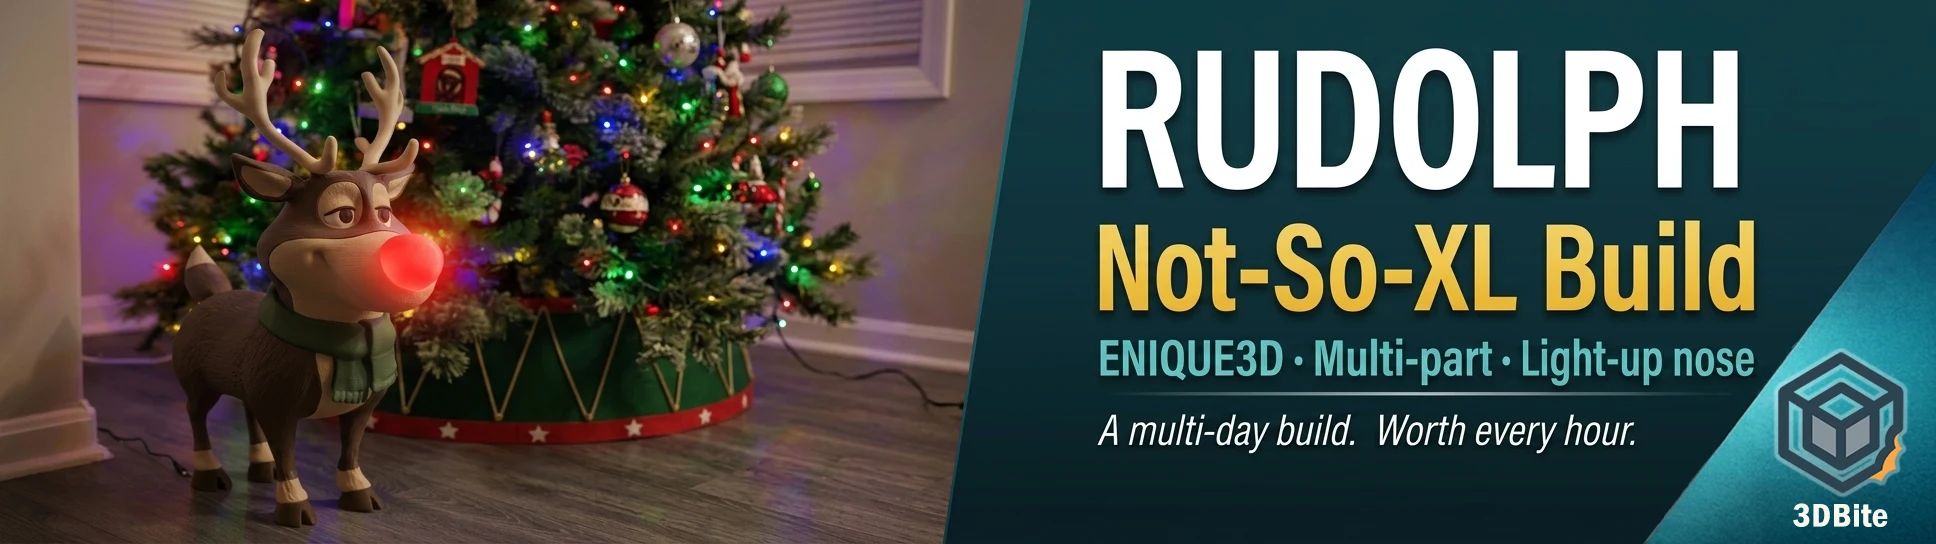
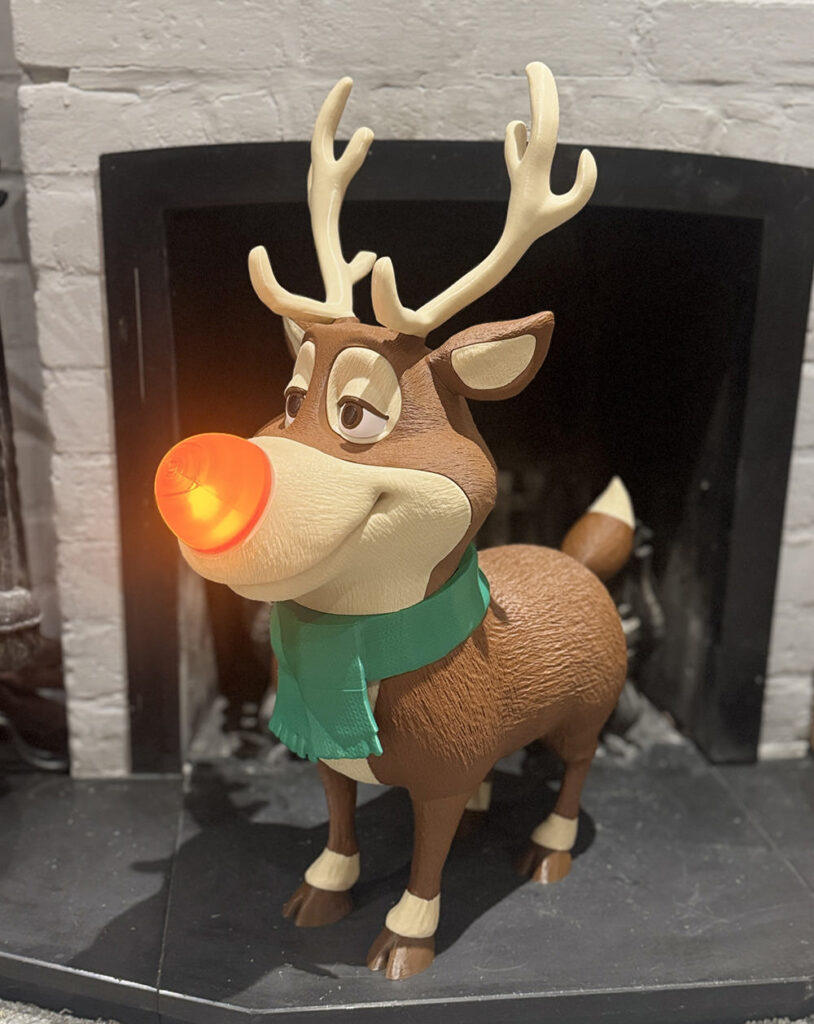
Some prints are ambitious on paper. This one is ambitious in person. ENIQUE3D’s Rudolph is a large-scale, multi-part, multi-colour decorative figure with a light-up nose, full body assembly, antlers, scarf, and the kind of expressive cartoon face that immediately draws a reaction from anyone who walks past it. The Not-So-XL version — built for a 256 × 256 × 256 mm build plate — took several days and a significant amount of filament across multiple colour jobs. The result is sitting next to the Christmas tree and earning every gram of eSun PLA+ that went into it.
This is one of the more involved seasonal builds I have tackled, and there is one honest note I will share upfront: the nose needs more work. More on that below. Everything else came together well.
The model
The Not-So-XL Rudolph is available on Thangs, designed by ENIQUE3D. There is also a full XL version for larger build plates above 320 × 320 × 320 mm if your machine can accommodate it. The Not-So-XL is scaled and split specifically for 256 mm build volumes, which covers the Bambu A1, P1S, and X1C. No scaling adjustments needed on the A1 — load the files and print.
The model is a paid file, and it is worth what it costs. The engineering behind the connector system, the part splits, and the lighting integration is well thought out. ENIQUE3D also supports a Patreon where subscribers get access to an extended catalogue of seasonal and decorative models. If you enjoy this build, it is worth supporting the designer — the quality of the work across their entire range is consistently high.
Colours and filament
The figure uses a range of colours across the body, face, antlers, scarf, and accent details. My colour set, all eSun PLA+ except where noted:
- Dark brown — body, legs, main body panels
- Tan / bone — face, muzzle, inner ears, antlers
- Dark green — scarf
- White — eyes and accent details
- Dark brown (darker shade) — hooves
- Translucent red — nose (more on this below)
eSun PLA+ is my default across all colour jobs and it performed well throughout. Consistent extrusion, clean colour, no issues across any of the main body parts. The material choice from the designer’s own build notes references Bambu Matte and Bambu Basic ranges, but any quality PLA+ will work. The key is consistency — using the same brand and material type across all colour jobs means your settings stay stable between plates and you are not chasing different extrusion characteristics on different parts of the same figure.
Print settings
| Setting | Value used | Notes |
|---|---|---|
| Filament | eSun PLA+ (all colours) | Consistent across all jobs |
| Layer height | 0.2 mm | Standard for this scale of model |
| Infill | 15% | Decorative piece — structural load is minimal |
| Supports | Tree supports (default) | Required on face panels and some body parts |
| Support top Z distance | 0.275 mm | Designer recommendation — critical for clean release on supported surfaces |
| Bed | Textured PEI | Standard for PLA on A1 |
| Nozzle temp | 220°C | Standard eSun PLA+ |
| Bed temp | 55°C | No adhesion issues across any plate |
The support top Z distance of 0.275 mm is worth setting specifically. The designer flags this in the assembly notes for good reason — at the default Z distance, supports on the face and body panels can leave a rougher contact surface than you want on parts that will be visible in the assembled figure. At 0.275 mm they release cleanly and leave a surface that needs minimal post-processing. The supported areas on the front face panels are the most heavily supported parts of the build, but they are not visible once assembled, which is a sensible design choice.
Assembly
The connector system ENIQUE3D uses across this model is consistent with their other large builds — the same approach as the lamppost but applied to a more complex multi-limb figure. Connectors are designed for a snug press-fit and permanent assembly requires glue. Before you reach for the superglue, do a full dry assembly first. This is not optional on a build of this complexity. Parts are similar in shape and only fit one way — getting them in the wrong position before glue sets is the kind of mistake that costs you a reprint.
The assembly sequence matters. Start with the feet and legs, working up through the lower body before attaching the body panels. The front and back body sections join using four large connectors, then the legs attach using four more. If any connector feels too tight — which can happen depending on printer calibration and filament shrinkage — scale the connector down by 1–2% before reprinting rather than forcing it. Forcing a snug connector into a slightly undersized socket risks cracking the socket, and on large body panels that is a painful outcome.
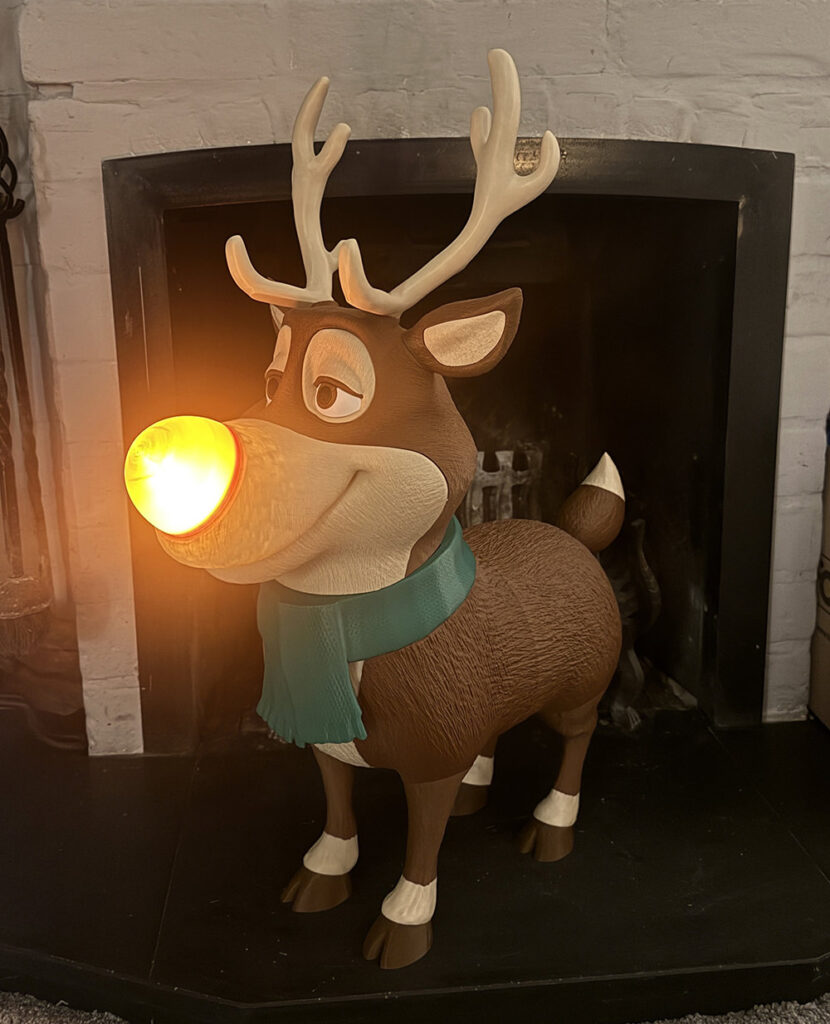
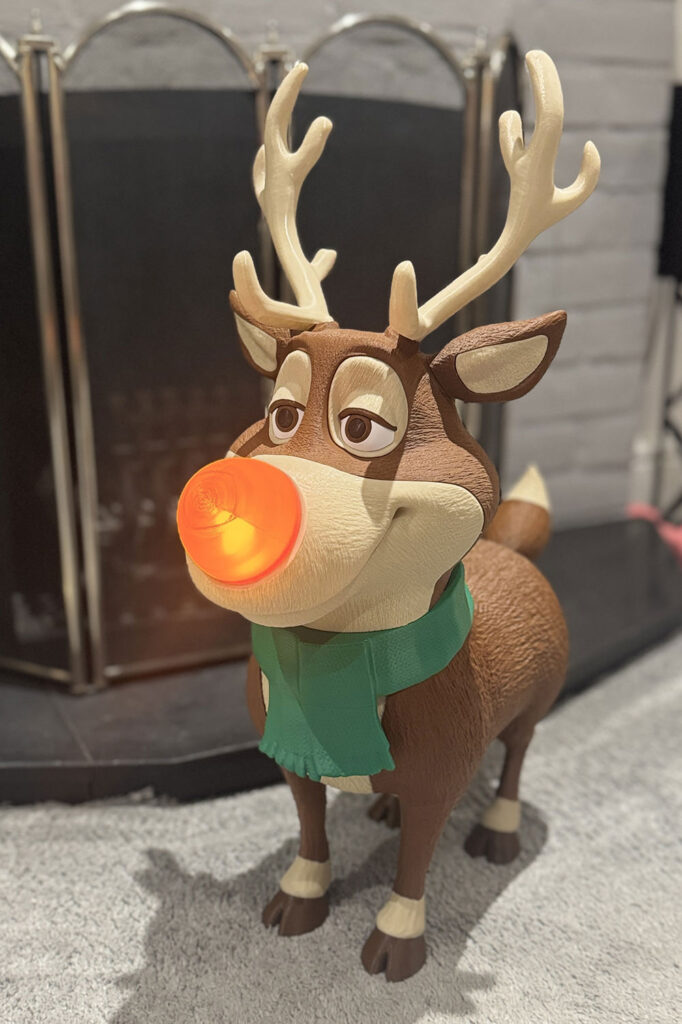
The head assembly builds in stages: eyes first (four parts, slot together without connectors — keep track of left and right), then ears (inner slots into outer, attaches to head with a connector), then antlers (single small connector). The nose is the final step and attaches via a twist-lock mechanism regardless of whether you print it in translucent or solid PLA. The twist-lock also doubles as the housing for the light source — a 38mm tea light or an LED puck up to 8cm in diameter both fit. The LED puck gives significantly brighter and more consistent illumination; the tea light produces a gentle flicker but is noticeably dimmer through the translucent nose.
The nose: honest feedback
The nose is the one part of this build that needs more attention before I can call it done. The translucent red PLA I used came out stringy — more stringing than I have seen from other colours on the same machine — and the surface quality was not where I wanted it. The nose is a focal point on this figure. It is literally the first thing people look at. A rough surface reads immediately.
Translucent filaments behave differently to opaque ones, and this is the reason. The dyes and additives that give standard PLA its opacity also affect its viscosity at printing temperature and its tendency to string between moves. Transparent and translucent filaments typically have fewer additives, which means they can be more fluid at temperature and more prone to stringing on travel moves — particularly on a round enclosed geometry like the nose where the nozzle is frequently crossing open space.
The fixes I will try on the reprint: lower the temperature by 5°C from my standard eSun profile, increase retraction distance slightly, enable combing mode to keep travel moves inside the perimeter where possible, and reduce travel speed to give retraction time to complete before the nozzle moves. I will also look at whether a different translucent red — potentially Bambu’s own transparent PLA, which the designer used on their reference build — performs better than the eSun equivalent on this geometry. Different brands of translucent PLA vary considerably in how they handle stringing.
I will update this post when I have a better result. For now the nose is printed in a solid red as a placeholder — it reads well from a distance, loses the light-up effect but gains a clean surface, and the figure still looks exactly as it should.
Scale of the project
This is a multi-day build. Between the number of colour jobs, the size of the individual parts, and the assembly time at the end, Rudolph is not a weekend print. Plan your filament colours in advance, batch any jobs that share a colour to reduce spool swaps, and do not try to rush the assembly. The figure is large enough that handling it before glue joints have fully cured is a real risk — a partially assembled Rudolph with a leg that has not fully set will test your patience.
Filament consumption is substantial across the full build. Budget for more than a single spool across all colours combined — the body panels alone account for significant material. If you are printing in a colour combination that requires five or six distinct filaments, make sure each is sufficient for its portion of the build before you start. Running out mid-job on a large body panel and having to do a colour match on a second spool introduces a visible join line on the finished part.
Result
Rudolph is standing next to the Christmas tree, nose (temporarily) solid red, and he looks exactly right. The expression ENIQUE3D has built into the face design — slightly world-weary, immediately recognisable — lands well at this scale. The figure is substantial enough to be a room feature rather than a shelf ornament, and the multi-part construction means the colour separation between body, face, scarf, and antlers is sharp and clean.
The nose will be reprinted. That is the only unresolved element of this build, and it is a settings problem rather than a design one. Everything else — the connectors, the body geometry, the face assembly, the antler fit — worked as the designer intended. This is a demanding build that rewards patience. If you have the time and the filament, it is one of the more impressive seasonal prints you can put out on a 256 mm machine.
Model and designer
- Not-So-XL Rudolph — Thangs (paid model)
- ENIQUE3D on Patreon — extended catalogue, subscriber extras
- ENIQUE3D on MakerWorld
If you print this, give the designer a boost wherever you downloaded from. The quality of the design work across ENIQUE3D’s seasonal range is consistently high and worth supporting.