
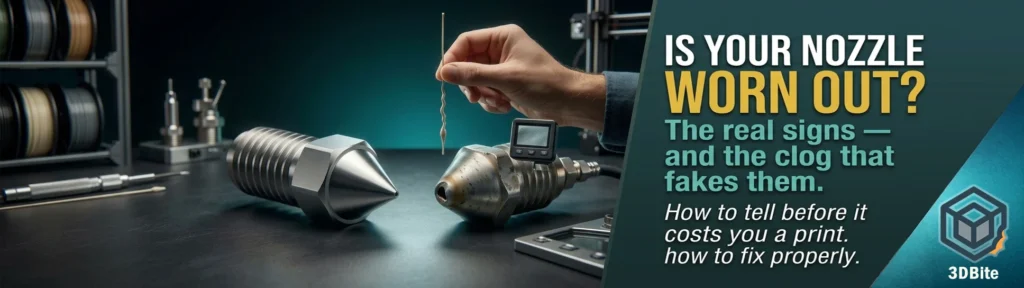
A nozzle is a genuinely cheap part — a few pounds for brass, a bit more for hardened steel — and yet it is the single component most likely to be blamed incorrectly for problems that are actually something else entirely. Before working through the real symptoms of a worn nozzle, it is worth being clear about the most common trap in this whole diagnosis: a partial clog can produce almost identical symptoms to genuine wear, and replacing a nozzle that was actually just dirty means spending money and losing calibration time on a fix that never addressed the real problem. Rule out a clog first. Then look for the signs below.
Rule out a clog before blaming the nozzle
Even a brand-new nozzle can appear worn if there is burnt filament or carbonised debris restricting the internal bore. These partial clogs often let enough filament through to fool the printer into thinking everything is fine, while still visibly affecting layer lines and causing the extruder to click intermittently. Before assuming the nozzle itself is at fault, run a cold pull — covered in full in the cold pull guide — and see whether the symptoms clear. If a cold pull resolves the problem completely, the nozzle was fine. It was dirty. That distinction matters because it is the difference between a five-minute free fix and an unnecessary replacement.
It is also worth ruling out settings before blaming hardware entirely. Sudden under-extrusion or increased stringing is not automatically a worn nozzle — retraction settings, pressure advance, and print speed all affect the same symptoms. Over-retracting soft filaments like TPU or PETG specifically can pull melted filament back into the nozzle where it degrades and eventually burns, creating a false impression of nozzle wear that is actually a retraction tuning problem. Check the settings side, covered in the calibration routine post, before reaching for a new nozzle.
The visual inspection: shape tells the real story
With the nozzle removed and fully cooled, a direct visual comparison against a new one of the same size is the single most reliable diagnostic available, and it does not require any special equipment beyond a decent light source. A new nozzle has a conical opening with thick, evenly tapering walls that focus pressure precisely at the tip for clean adhesion, and a clean beveled rim that prevents debris catching on the edge. Wear degrades this specific geometry in predictable ways: flattened tips, unevenly angled extrusion holes, asymmetric exit profiles, and rounded edges where friction and heat have worn away the crisp original shape. A worn tip has lost the geometry that made it produce accurate, controlled extrusion in the first place, and no amount of settings adjustment restores geometry that has physically eroded away.
This is worth knowing specifically because tip shape wear shows up before the bore diameter has visibly enlarged in an obvious way. Independent testing referenced by Sovol UK’s own guidance suggests abrasion often attacks the tip geometry first, and that shows up as first-layer inconsistency and increased stringing before the hole itself looks dramatically bigger under casual inspection. If your first layers have quietly gotten worse over months and you cannot pin down why, the tip shape — not just the raw hole size — is worth examining closely under good light or magnification.
Discolouration and dimpling on the nozzle’s outer surface are additional visual cues worth checking at the same time. Significant discolouration beyond normal light staining, or visible dimpling in the metal itself, both affect material flow and heat distribution and are a reasonable trigger for replacement even without a specific print-quality complaint yet.
The extrusion consistency test
A worn nozzle bore no longer constrains flow to a consistent, predictable diameter. At printing temperature, manually extrude a length of filament and watch the strand come out — it should be a smooth, consistent-diameter thread. A strand that varies noticeably in thickness along its length, or that comes out with visible ridges or an irregular cross-section rather than round, is a mechanical symptom worth taking seriously. This test is not perfect — air currents and ambient temperature can affect the strand slightly — but it is a fast, tool-free way to get a “something is mechanically off” signal before committing to a full teardown.
The pattern to watch for during actual printing is genuinely inconsistent extrusion within a single print — sections that look correctly extruded followed by sections that are visibly thin or gapped, without any corresponding change in settings. This alternating over- and under-extrusion, happening on its own rather than in response to anything you changed, is one of the more reliable signatures of a nozzle whose internal geometry has degraded unevenly rather than simply widened uniformly.
The flow multiplier creep
This is a genuinely useful early-warning sign that most guides do not mention, and it is worth watching for specifically if you keep a calibrated flow rate profile per filament as covered in the calibration routine post. If you find yourself nudging the extrusion multiplier or flow rate upward over successive calibration sessions just to maintain the same wall thickness and surface quality you used to get at a lower value, that creeping compensation is a red flag rather than a coincidence. It can have multiple causes, but if it correlates with a nozzle that has been through a run of abrasive filament or several hundred hours of printing, nozzle wear should move up the suspect list rather than assuming your filament batch changed or your printer’s steps-per-mm has drifted.
Leaking and oozing from places it should not
Filament oozing out from around the nozzle body during printing — rather than cleanly from the tip where it belongs — is not a normal or acceptable symptom at any stage. This typically means the seal between the nozzle and the heater block or heat break has failed, either from loose threading that has worked its way open over time and thermal cycling, or from wear at the sealing surface itself. Left unaddressed, the leaking filament builds up and solidifies around the hotend, which creates its own secondary problems — accumulated residue interfering with cooling, or eventually forming a wider mechanical fault. A leaking nozzle warrants immediate attention rather than being left to run through the current print, both for print quality reasons and because the accumulating mess makes the eventual fix more involved than it needed to be.
Persistent clogs that keep coming back
A single clog is routine maintenance — the cold pull guide covers exactly how to deal with it. A nozzle that clogs repeatedly, despite proper cleaning and despite ruling out wet filament as the cause, is telling you something different. Persistent, recurring clogging on an otherwise well-maintained machine with dry filament suggests the internal bore geometry has degraded enough that debris catches more easily than it should, or that wear has created an irregular internal surface that filament no longer passes through smoothly. If cold pulls are becoming a weekly rather than occasional occurrence on the same nozzle, replacement is very likely the correct next step rather than continuing to treat each individual clog as an isolated incident.
Declining fine detail on prints that used to come out crisp
This is the symptom most likely to be noticed on decorative or detailed prints specifically — the kind of figurine and multi-colour work that makes up a large share of what actually gets printed here. A worn nozzle opening affects the precision of exactly where and how much material is deposited, and fine features that used to resolve cleanly start coming out blurred, slightly misaligned, or lacking the sharp definition they used to have. If a model you have printed before, on the same settings, comes out noticeably less crisp than the earlier version, and settings, filament, and calibration have all been ruled out as the cause, nozzle wear is a reasonable next suspect — particularly on a nozzle that has seen meaningful print hours since the last comparison print.
How fast this actually happens, and why material is the biggest variable
This is the point that deserves the most emphasis, and it connects directly to the abrasive filaments guide already on this site. A brass nozzle printing standard PLA can genuinely last hundreds of hours, sometimes well beyond a thousand, with essentially no meaningful wear. The same brass nozzle running abrasive filament wears at a dramatically different rate. E3D’s own published abrasive wear testing found heavy, visible wear after just 250 grams of carbon-fibre filament through a standard brass 0.4mm nozzle — a genuinely small quantity of material to produce that much degradation. This is precisely why the hardened steel nozzle requirement for CF, GF, and metal-fill filaments, covered at length in the abrasive filaments post, is not an optional precaution. Running abrasive material through brass is not a slow-wear scenario. It is a fast, predictable, well-documented one.
For most hobbyist use — PLA and PETG on the A1 and A2L, without a heavy diet of abrasive materials — a reasonable maintenance rhythm is checking nozzle condition every three to six months depending on print volume, rather than waiting for symptoms to appear before investigating. For anyone running CF, GF, glow-in-the-dark, or metal-fill filaments regularly, that interval shrinks considerably, and treating the nozzle as a genuine short-term consumable rather than a fixture is the correct mental model from the start.
The quick diagnostic checklist
| Symptom | Check first | If that doesn’t fix it |
|---|---|---|
| Clicking, intermittent under-extrusion | Cold pull to rule out a clog | Inspect tip shape against a new nozzle |
| Inconsistent extrusion within a print | Check retraction and flow settings | Manual extrusion consistency test |
| Fine detail blurring on familiar prints | Confirm settings and filament unchanged | Compare tip geometry visually |
| Recurring clogs despite cleaning | Confirm filament is properly dried | Very likely genuine wear — replace |
| Filament leaking around the nozzle body | N/A — this is not a settings issue | Check threading, replace if seal has failed |
| Flow multiplier creeping upward over time | Confirm no filament brand/batch change | Nozzle wear likely, especially after abrasive filament use |
A nozzle is one of the cheapest parts in the whole printing setup, and replacing one proactively when the signs above start stacking up is a far better trade than chasing a print quality problem through settings changes and recalibration for weeks when the actual cause has been sitting in the hotend the entire time.


The flow-multiplier-creep call is the one I wish more nozzle guides led with. I had been bumping flow from 0.98 to 1.04 over a few months on the same PLA profile to hold 0.4 mm walls on a Bambu A1, treating it as filament batch drift, until a side-by-side against a new 0.4 mm brass tip showed the old one flattened before the hole looked oversized. Cold-pull first is also right — I have thrown a nozzle after PETG over-retraction carbonised the bore when a 90C pull would have cleared it. For functional parts I generate as printable STLs (luphra.com), reprinting a known-good model at unchanged settings is now my first check: if walls thicken or first-layer consistency drops after a few hundred PLA hours (or ~250 g of CF through brass), I inspect tip geometry before retuning the slicer.