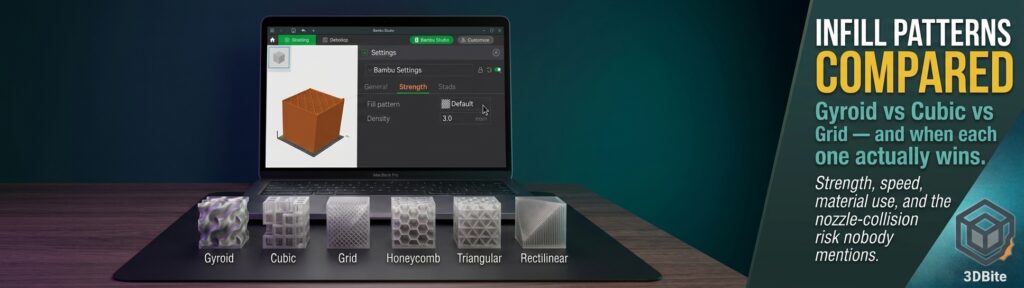
Most people pick an infill pattern once, leave it on Gyroid forever, and never revisit the question. That is, honestly, not a bad default — Gyroid earns the position it has as the near-universal recommendation in most slicer profiles in 2026. But “near-universal default” is not the same as “always correct,” and understanding what each pattern is actually doing mechanically means recognising the specific situations where a different choice genuinely produces a better result. This is the properly considered version of that decision, covering what each pattern does structurally, how they compare on speed and material use, and — a detail that matters more on a fast machine like the A1 or A2L than most infill guides acknowledge — which patterns can actually cause mechanical problems at high print speed.
What infill is actually doing, and why pattern matters more than most people assume
Infill is the internal lattice structure printed between the outer walls and the top and bottom solid layers. Its job is providing compressive support so the top layers do not sag into open space — directly connecting to the mechanism explained in the pillowing post — while adding whatever bulk strength and stiffness the part actually needs without the weight, material cost, and print time of a fully solid print. Density is the number most people think about first, and it genuinely matters: peer-reviewed testing has confirmed that infill density significantly influences compressive, tensile, and flexural strength. But pattern geometry is doing something density alone cannot — it determines the direction in which that strength is actually distributed, and this is where the real decision-making happens once density is already set sensibly.
The genuinely useful rule that most experienced sources converge on: infill density matters more than pattern for most strength decisions in absolute terms — a 30% Gyroid print is stronger than a 15% Honeycomb print, even though Honeycomb has a slightly better strength-per-gram ratio at matched density. Pick the right density for the job first. Then pick the pattern that suits the specific load direction and print requirements. Getting the order backwards — obsessing over which exotic pattern to use at a density too low to matter — is a common way to waste time on the wrong variable.
Gyroid: the default for a genuine reason
Gyroid is a triply periodic minimal surface — a continuously curving, wave-like 3D structure with no flat faces or sharp corners anywhere in its geometry. That specific shape is what makes it isotropic: it resists load roughly evenly regardless of which direction the force comes from, which is precisely why it is the sensible default when you do not know exactly how a part will be loaded in use, a point already made in the infill-related sections of the pillowing post and worth restating here as the core reason Gyroid earns its default status rather than simply being the most fashionable pattern.
Gyroid also has genuinely excellent shear resistance — it handles twisting and lateral forces particularly well, which is why it is specifically recommended for parts that flex or twist in use rather than experiencing simple compression. And despite its visually complex, organic appearance, it prints at a moderate to genuinely competitive speed, because the continuous curving path involves fewer sharp direction changes than a pattern built from straight intersecting lines — a detail covered in more depth below, because it turns out to matter for reasons beyond simple print time.
Cubic and Cubic Subdivision: strong in every direction, genuinely durable
Cubic infill builds a three-dimensional lattice of interlocking cubes, oriented at an angle through the model rather than aligned flat to the build plate. This produces genuinely good strength in all directions simultaneously, in a similar isotropic spirit to Gyroid, and it is specifically named across multiple sources as a strong choice for parts that need to hold weight over time and resist long-term deformation under sustained load — a slightly different strength profile from Gyroid’s particular strength in twisting and shear resistance. Cubic Subdivision, the more advanced variant available in Bambu Studio and OrcaSlicer, adapts the cube size based on proximity to the model’s outer walls — denser small cubes near the surface, larger and sparser cubes toward the interior — which produces a genuinely efficient strength-to-material ratio without needing to manually vary density by hand.
Grid: the classic default, now largely superseded
Grid infill is a straightforward crosshatch — two perpendicular sets of straight lines overlapping on every layer, essentially two rectilinear passes combined into one pattern. It is easy for the slicer to calculate, produces predictable strength in the two axes the lines actually run along, and was for years the default in most slicers before Gyroid took over that role. At equivalent density it sits structurally between simple rectilinear infill and Gyroid — stronger than a single-direction rectilinear pass, but without Gyroid’s genuine isotropic behaviour or its shear resistance.
The honest assessment across current sources is that Grid has been largely superseded — one detailed comparison states plainly that few users choose Grid in 2026 specifically because Gyroid covers the same general-purpose use case better, at comparable print speed, with better multi-directional strength. Grid still has a genuine niche worth knowing about, covered in its own section below, but as an everyday default it has been overtaken.
Honeycomb: strong, light, but slower to print
Honeycomb builds a lattice of hexagonal cells — the same geometric principle a real honeycomb uses, and for the same structural reason: hexagons distribute load exceptionally efficiently for their weight, giving Honeycomb one of the best strength-to-material ratios of any common infill pattern. It is specifically recommended for parts loaded primarily from the sides and for any application where strength-to-weight ratio genuinely matters more than raw print speed — lightweight structural components where every gram counts.
The trade-off is time. Honeycomb consistently prints 20-30% slower than a comparable rectilinear or Grid pattern at the same density, because tracing the hexagonal cell walls involves considerably more direction changes and shorter individual line segments than a simple straight-line pattern. For a part where that strength-to-weight advantage genuinely justifies the extra print time — aerospace-style lightweight brackets, anything where the part will be carried or where every gram matters — Honeycomb earns the time cost. For general-purpose functional printing where Gyroid or Cubic already deliver adequate strength at a faster print speed, Honeycomb’s specific advantage is not usually worth the trade.
Triangular: strong in-plane, weaker through the Z axis
Triangular infill is built from repeating triangle shapes on each layer, and its defining structural property comes from basic geometry: a triangle cannot be deformed without changing the length of one of its sides, which makes the pattern genuinely rigid within the X-Y plane and particularly resistant to lateral forces and side impacts. This is a real and specific advantage for panels, enclosures, and any component where in-plane stiffness — resisting a push or impact from the side — is the primary requirement.
The corresponding weakness is real too: Triangular is noticeably weaker through the Z-axis than Gyroid or Cubic, since its in-plane rigidity does not translate into equivalent vertical compressive strength. It is, as one source puts it precisely, a 2D-strong but 3D-limited pattern. For a part where the load genuinely comes from the side rather than from above, that is the right trade to make. For anything with meaningful vertical load or unknown load direction, Gyroid or Cubic remain the better general choice.
The setting most infill guides skip: nozzle collisions at high speed
This is a genuinely important technical point for anyone running the A1 or A2L at anything approaching their full speed capability, and it is worth including because most infill guides discuss pattern choice purely in terms of strength and print time without mentioning this mechanical risk at all. Patterns built from straight, intersecting lines on the same layer — Grid and Triangles specifically — produce raised plastic build-up exactly where those lines cross each other, because the intersection point receives more deposited material than the surrounding single-line sections. On a high-speed CoreXY machine moving at speed and acceleration well beyond what older printer generations were designed around, the nozzle physically striking that raised intersection point as it travels across the layer acts, in the words of one detailed technical guide, like a tiny speed bump — and at speeds above roughly 250mm/s with acceleration exceeding 10,000mm/s², this can genuinely contribute to layer shifts and unwanted frame resonance, connecting directly to the mechanism covered in the ghosting and ringing post.
Gyroid and Rectilinear, by contrast, are non-crossing patterns — Gyroid’s continuously curving surface never produces a hard intersection point the way Grid’s straight crosshatch does, and simple single-direction Rectilinear has nothing to intersect with on the same layer either. Switching away from Grid or Triangles specifically on a fast CoreXY machine eliminates this mechanical striking risk entirely, which is one more reason Gyroid’s position as the default for machines like the A1 and A2L is not just about strength — it is also the pattern least likely to introduce a self-inflicted vibration and ringing problem at the speeds these machines are actually capable of running.
Speed and material use, ranked
For pure speed and minimal material use, simple Rectilinear (Lines) or Zigzag patterns win outright — continuous paths with the fewest direction changes of any pattern, well suited to prototypes that will be reprinted at higher quality later, or batch production runs where individual part strength genuinely does not matter. Lightning infill, a slicer-specific option in some current software, takes this further by only generating support directly beneath overhangs and top surfaces rather than filling the whole interior uniformly, producing the lowest material use of any pattern for parts that are purely decorative or extremely lightly loaded. Gyroid sits at a genuinely competitive middle position on speed — meaningfully faster than Honeycomb at equivalent density, and close enough to Grid and Triangular that the small speed penalty rarely justifies choosing a weaker or riskier pattern purely to save print time.
The full comparison table
| Pattern | Strength profile | Speed | Material efficiency | High-speed printer risk | Best for |
|---|---|---|---|---|---|
| Gyroid | Isotropic — even in all directions, excellent shear/twist resistance | Moderate-fast — continuous path, few sharp turns | Good | None — non-crossing pattern | General-purpose functional parts, unknown load direction, twisting/flexing parts. The sensible default. |
| Cubic / Cubic Subdivision | Isotropic — strong sustained load-bearing, good long-term durability | Moderate | Good, especially Subdivision variant | Low | Parts under sustained weight, load-bearing brackets, anything needing long-term dimensional stability |
| Grid | Good in the two line directions, weaker diagonally | Fast | Moderate | Higher — crossing intersections | Simple 2D-loaded parts on slower machines; largely superseded by Gyroid on modern hardware |
| Honeycomb | Excellent strength-to-weight, strong from the sides | Slow — 20-30% slower than Grid/Rectilinear | Excellent — best strength-per-gram | Low | Lightweight structural parts where every gram counts and print time is not the priority |
| Triangular | Very strong in-plane (X-Y), weak through Z | Moderate — faster than Honeycomb, slower than Rectilinear | Good | Higher — crossing intersections | Panels, enclosures, anything loaded from the side rather than vertically |
| Rectilinear / Lines | Weakest — single direction only | Fastest | Best for pure speed | None | Prototypes, test prints, batch jobs where individual strength doesn’t matter |
| Lightning | Minimal — support-focused, not structural | Very fast | Lowest material use of any pattern | None | Purely decorative prints, very lightly loaded parts, minimising weight and cost |