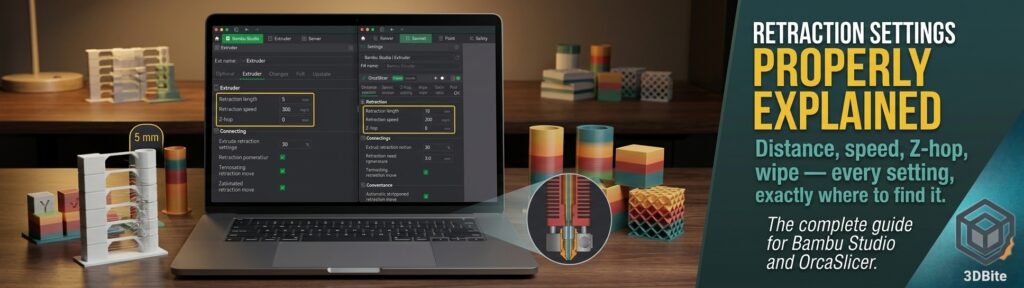
Retraction is the setting most people know they should tune and the one most people tune incorrectly, because a lot of guides treat it as a single number to increase whenever stringing appears. It is actually a small cluster of related settings — distance, speed, a lift, a minimum trigger threshold, and a wipe move — each doing a specific job, and getting all of them right together produces a noticeably better result than aggressively cranking the one setting most people have heard of. This is the full breakdown: what each setting actually does, where it lives in both Bambu Studio and OrcaSlicer, and the order to tune them in.
What retraction is actually solving
Every time the nozzle finishes printing a feature and needs to travel somewhere else across open space, molten filament sitting under pressure in the melt zone wants to keep oozing out. Retraction pulls the filament backward through the nozzle just before that travel move begins, relieving the pressure so there is nothing left to leak while the nozzle crosses open air — this is the same mechanism covered in detail in the stringing post, and this post is the settings-level companion to that one, going deeper into exactly what each individual retraction parameter does and where to find it.
Retraction distance
This is the setting everyone knows about — how far, in millimetres, the filament pulls back before a travel move. It is also the setting most sensitive to extruder architecture, and getting this distinction wrong is the single most common retraction mistake. A direct-drive extruder — what both the A1 and A2L use — has the drive gear mounted right at the toolhead, with a short, rigid path to the melt zone. Pressure changes transmit almost immediately, so very little pull-back is needed: 0.5-2mm is the commonly cited range, with Bambu’s own firmware-calibrated defaults typically landing around 0.8-1.0mm for PLA. A Bowden extruder has the drive gear mounted away from the hotend, pushing filament through a long, flexible PTFE tube — that tube has genuine give in it, and a much larger pull-back, typically 3-10mm, is needed to actually relieve pressure at the nozzle end rather than just taking up slack in the tube. Using a Bowden-appropriate distance on a direct-drive machine, or vice versa, is a common and avoidable mistake, and it is worth confirming which architecture your printer actually uses before copying a retraction value from an unrelated machine or a generic online guide.
Too little retraction distance and stringing persists because pressure was never fully relieved. Too much risks grinding — the extruder gear chewing a flat spot into the filament because it is trying to pull back further than the mechanism can accommodate cleanly — or, in the worst case, jamming. Bambu’s own guidance for their hardware specifically recommends staying under 2mm; going longer risks the filament plugging rather than retracting cleanly.
Bambu Studio: Printer Settings → Extruder → Retraction length. Can also be overridden per-filament under Filament Settings → Advanced → Setting Overrides if a specific spool needs different treatment from your general profile. OrcaSlicer: Printer Settings → Extruder → Retraction → Length, same override capability under the filament’s own Advanced tab.
Retraction speed
This governs how fast the pull-back itself happens, and it interacts with distance rather than acting independently. A retraction that happens too slowly gives the melt zone time to partially re-pressurise even as it is being withdrawn, which reduces the effective benefit of whatever distance you have set. Community testing on a range of machines suggests trying values across a genuinely wide span — 10-100mm/s in coarse steps, then narrowing with finer 5mm/s adjustments — to find the speed that actually works for a specific hotend and filament combination, since default profiles do not always land on the true optimum. The one caution worth repeating: pushing retraction speed too high risks pulling molten filament away from the solid filament above it too abruptly, separating the two rather than retracting the filament as a single continuous column — a failure mode that produces its own inconsistent extrusion problems on the next feature.
Bambu Studio: Printer Settings → Extruder → Retraction speed. OrcaSlicer: Printer Settings → Extruder → Retraction → Speed.
Deretraction speed
This is the less-discussed sibling setting — how fast filament is pushed back into the nozzle after a retraction, once the travel move is complete and printing is about to resume. Setting this to zero tells the slicer to use the same speed as the retraction itself, which is a perfectly sensible default for most printing. Deliberately setting a different, typically slower, deretraction speed can help on materials or setups where the sudden re-pressurisation at the start of the next extrusion move causes a small blob or over-extrusion right at that transition point — a gentler return to pressure gives the melt zone a smoother restart rather than a sudden spike.
Bambu Studio: Printer Settings → Extruder → Deretraction speed (visible in Advanced mode). OrcaSlicer: Printer Settings → Extruder → Retraction → Deretraction speed.
Retraction minimum travel distance
This setting stops the printer from retracting on every single tiny travel move, which matters more than it sounds. Short hops between nearby features do not need a full retraction cycle — the distance is so small that any minor ooze during that brief crossing is negligible, and retracting anyway simply adds unnecessary wear on the extruder gear and unnecessary time to the print with no quality benefit. This threshold sets the minimum travel length that must be exceeded before the slicer bothers triggering a retraction at all. A typical value sits around 1-2mm; setting it too high means genuinely stringing-prone short travels stop triggering retraction and start showing wisps, while setting it very low means the printer is retracting constantly on moves too short to have caused a problem in the first place.
Bambu Studio: Printer Settings → Extruder → Retraction minimum travel (Advanced mode). OrcaSlicer: Printer Settings → Extruder → Retraction → Minimum travel distance.
Retract on layer change
This forces a retraction specifically at the Z-height transition between one layer and the next, regardless of whether the XY travel distance at that point would otherwise have triggered one. Layer changes are a natural point where a small amount of ooze is more likely to become visible, since the nozzle is moving vertically as well as horizontally and the timing coincides with a fresh layer’s surface being exposed. Enabling this is a sensible default for most prints and rarely causes any downside beyond the marginal time cost of the extra retraction cycles.
Bambu Studio: Printer Settings → Extruder → Retract when changing layers. OrcaSlicer: Printer Settings → Extruder → Retraction → Retract on layer change.
Z-hop (lift Z)
This is a genuinely different job from everything above, and it is worth understanding the distinction clearly because the terminology in both slicers can blur the two together. Retraction manages pressure inside the nozzle. Z-hop physically lifts the nozzle a small amount during a travel move so it clears any already-printed walls or features it might otherwise drag across. A community troubleshooting thread on the Bambu forum captures this confusion precisely: retraction hints at pulling back filament to avoid stringing, while Z-hop is the separate action of raising the print head to avoid physically dragging across the model — two settings with genuinely different jobs that get talked about as though they were one.
Z-hop matters most on multi-part plates and complex geometry where the toolhead’s travel path is likely to cross over an already-printed wall at some point — without it, the nozzle can catch on and knock over fine detail, or drag a thin film of ooze across a clean surface. For a simple single-part print with a straightforward travel path, Z-hop is less critical and a small value, or none at all, is a reasonable default. A starting value of 0.2-0.4mm is the commonly recommended range where it is needed, adjusted upward only if actual collisions are still occurring.
Bambu Studio: Filament Settings → Advanced → Setting Overrides → Z hop when retracting, with a separate Z hop type option (Auto, Normal, or Slope) governing exactly how the lift and lower motion is performed. OrcaSlicer: Printer Settings → Extruder → Retraction → Z hop height, with the same type selector available.
Wipe on retraction
This setting moves the nozzle a short distance along the path it just printed, at the same moment retraction is happening, specifically to clean any material that may have leaked or is sitting on the outside of the nozzle tip before the travel move begins. The logic is straightforward: rather than lifting off cleanly and carrying a small blob of residual material into open air where it will string, the wipe drags that residual material across a surface that is either about to be covered by subsequent layers or otherwise unobtrusive. Community guidance is consistent on this one: it is generally best left enabled, and other settings should be tuned first before considering disabling it, since it rarely causes problems and frequently helps.
Wipe distance controls how far along that path the nozzle travels during the wipe. Depending on how the wipe interacts with the retraction distance and speed already configured, an additional small retraction move may be needed to fully withdraw any filament still present after the wipe completes — this is handled automatically by both slicers rather than requiring manual coordination, but it is worth knowing the two settings are linked rather than fully independent.
Bambu Studio: Filament Settings → Advanced → Setting Overrides → Wipe while retracting, with Wipe distance nearby. OrcaSlicer: Printer Settings → Extruder → Retraction → Wipe, with Wipe distance as a paired field.
A specific Bambu-only gotcha worth knowing: Reduce Infill Retraction
This is a genuinely useful troubleshooting detail that surfaced in a Bambu forum thread and is worth including because it addresses a specific, confusing failure mode: a print head that appears to drag across infill despite retraction and Z-hop both apparently being configured correctly. The fix, confirmed by the affected user, involved a setting outside the retraction menu entirely — Others → G-Code Output → Reduce Infill Retraction, found under the general G-code output settings rather than anywhere near the extruder or filament retraction controls. This setting, when enabled, deliberately skips retraction on some infill travel moves specifically to save time, on the assumption that infill is not visible and any minor stringing there does not matter. On some models and geometries, that assumption produces exactly the dragging behaviour described above. Turning it off, combined with confirming Z-hop is genuinely enabled with a sensible travel distance threshold, resolved the issue. Worth checking this specific setting if retraction and Z-hop both look correctly configured and the dragging problem persists regardless.
The full settings table
| Setting | What it does | Bambu Studio location | OrcaSlicer location | Typical starting point |
|---|---|---|---|---|
| Retraction length | How far filament pulls back before a travel move | Printer Settings → Extruder | Printer Settings → Extruder → Retraction | 0.5-2mm direct drive / 3-10mm Bowden |
| Retraction speed | How fast the pull-back happens | Printer Settings → Extruder | Printer Settings → Extruder → Retraction | 25-45mm/s, tune per machine |
| Deretraction speed | How fast filament returns after retraction | Printer Settings → Extruder (Advanced) | Printer Settings → Extruder → Retraction | 0 (same as retraction speed) as default |
| Minimum travel distance | Shortest travel move that still triggers retraction | Printer Settings → Extruder (Advanced) | Printer Settings → Extruder → Retraction | 1-2mm |
| Retract on layer change | Forces retraction specifically at layer transitions | Printer Settings → Extruder | Printer Settings → Extruder → Retraction | Enabled |
| Z-hop height | Lifts nozzle during travel to clear printed features | Filament Settings → Advanced → Setting Overrides | Printer Settings → Extruder → Retraction | 0.2-0.4mm on multi-part plates |
| Wipe on retraction | Drags nozzle across the last path to clean residual ooze | Filament Settings → Advanced → Setting Overrides | Printer Settings → Extruder → Retraction | Enabled |
| Reduce Infill Retraction | Skips retraction on some infill travel moves to save time | Others → G-Code Output | Not a direct equivalent — check travel optimisation settings | Disable if causing dragging on infill |