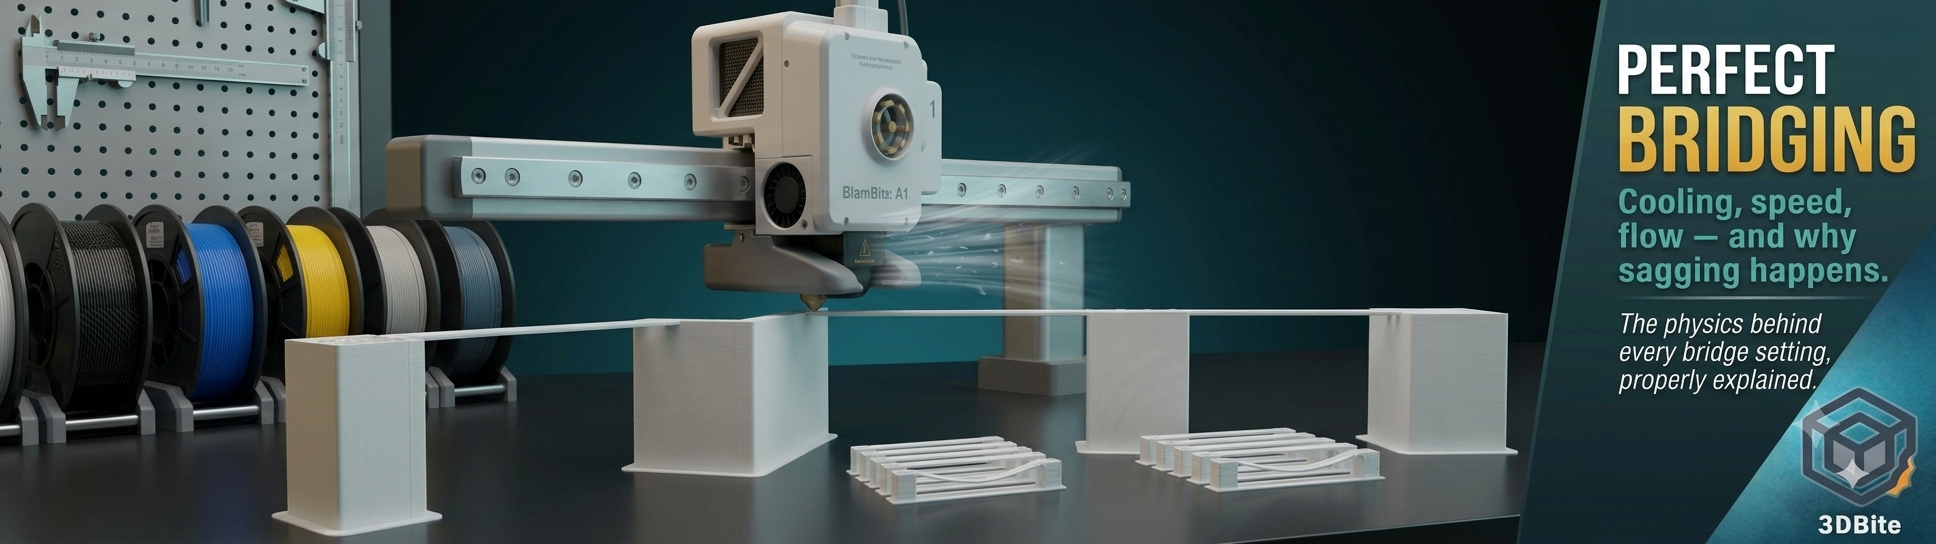
A bridge is the one place in FDM printing where the nozzle deposits filament into thin air and expects it to stay where it is put. Every other extrusion move lands on something solid underneath it. A bridge does not — it spans between two anchor points with nothing beneath the middle, and the only thing keeping that middle section from sagging into a droopy mess is how fast the plastic solidifies relative to how fast gravity pulls on it. Understanding that one sentence explains almost everything about why bridge settings look the way they do, and gives you a genuine diagnostic framework rather than a list of numbers to copy.
What makes a bridge different from an overhang
The slicer treats bridges and overhangs as different categories of geometry, and it matters that you know which one your model is producing, because bridge settings only apply when the slicer has actually classified the feature as a bridge. An overhang extends outward from a single wall with nothing supporting the far edge — think of a shelf jutting out from a vertical surface. A bridge spans between two anchor points, both ends supported, with the middle unsupported. That difference matters physically: the two anchor points on a bridge put the extruded strand in tension, which is what makes bridging possible without support in the first place. An overhang has no second anchor point to create that tension, which is why overhangs rely on different settings (slower speed, more cooling) but can never fully replicate the taut, self-supporting behaviour of a proper bridge.
This distinction causes a specific and common frustration reported across the Bambu community forum: bridge flow and speed settings sometimes appear to have no effect, and the reason is frequently that the slicer has classified the feature as an overhang rather than a bridge, so the bridge-specific settings never apply. Check the line type in the slicer’s preview (in Bambu Studio and OrcaSlicer, colour-coded by feature type in the preview view) before assuming your bridge settings are being ignored — they may simply not be the settings governing that particular geometry.
The physics in one paragraph
When the nozzle extrudes across a gap, the filament comes out molten and has to solidify quickly enough to hold its own shape before gravity pulls it down into a sag. Every bridge setting exists to serve this one goal: cool the plastic as fast as possible, minimise the weight of material being asked to hold its shape, and give gravity as little time as possible to act before the strand has hardened. Miss any one of these and you get the familiar bridging failure modes — sagging in the middle, stringy inconsistent lines, or a bridge that starts fine and gets progressively worse across its span as heat accumulates in the print area.
Cooling: the single most important setting
Fan speed is the most critical factor for bridge quality, and it is not close. Nearly universal guidance across the community and the slicer developers themselves is to run the part cooling fan at 100% specifically for bridging moves, regardless of what fan percentage you use for the rest of the print. The logic is straightforward: maximum airflow means maximum cooling rate, which means the extruded strand solidifies as quickly as physically possible after leaving the nozzle.
In Bambu Studio: Process → Cooling → Bridge fan speed sets this independently from the general part cooling fan setting used for the rest of the print. Bambu Studio’s defaults already push bridge fan speed high, but it is worth verifying it is set to 100% specifically rather than inheriting a lower general cooling value.
In OrcaSlicer: Process → Cooling → Bridge fan speed, same location and same logic. OrcaSlicer also exposes an Auxiliary fan setting on machines that have a secondary cooling fan — the P1S benefits noticeably here — which can supplement the main part fan specifically during bridging for even more aggressive cooling.
Fan duct direction matters as much as fan speed on the A1 specifically. The A1 has a single part cooling fan rather than the dual-fan arrangement on some other Bambu machines, and community documentation notes this means paying attention to fan direction relative to the bridge direction is more important on the A1 than on machines with more comprehensive cooling coverage. The fan airflow should be aimed so it blows directly along the direction of the bridge span, hitting the fresh extrusion as directly as possible rather than glancing across it at an angle. If your bridges are inconsistent on one axis but fine on the perpendicular axis, fan duct orientation relative to that specific bridge direction is worth investigating.
Speed: slow enough for the cooling to catch up
Bridge speed and cooling work together rather than independently. A fast bridge speed outruns the fan’s ability to cool the strand before it sags; a slow bridge speed gives the fan more time per unit length of bridge to do its job. The commonly recommended bridge speed range across the community sits at 15-30mm/s, considerably slower than standard print speeds. This is a deliberate trade — bridging is one of the few places in a print where slowing down is not a compromise but a direct structural requirement.
In Bambu Studio: Process → Speed (Advanced mode) → Bridge speed, set independently from the general print speed. In OrcaSlicer: Process → Speed → Bridge speed, same location.
A genuinely useful and slightly counterintuitive data point from the Bambu community forum: one user experiencing sagging bridges on an A1 running default settings found their bridges were failing at a slow speed setting (19-20mm/s) and the fix was to increase speed to around 50mm/s. This runs against the general “slower is better” instinct, and the explanation is that at very slow speeds, heat can build up in a small localised print area faster than the fan can remove it — particularly on a small model where the nozzle keeps circling back over freshly-deposited, still-warm plastic. If a bridge is sagging despite already running at what sounds like a conservatively slow speed, testing a moderately faster speed is a legitimate troubleshooting step rather than a step backwards. The same forum thread also flags “Slow down for overhangs” as a setting worth disabling if it is compounding an already-slow bridge speed into something too slow for the specific model’s heat dissipation.
Flow rate: less material, more tension
Bridge flow ratio controls how much plastic is extruded relative to the standard flow rate for the same movement distance. Reducing it produces a thinner, lighter strand that has less mass to hold up and cools faster because there is simply less material for the heat to escape from. The community-recommended starting range for PLA is 85-95% of standard flow, with some guides suggesting testing down to 75-90% depending on the specific bridge span and filament. The goal is a strand that is thin enough to be light and taut but not so thin that it fails to bridge the gap at all — genuine experimentation with a dedicated bridge test print, adjusting incrementally, is the recommended approach rather than guessing at a single universal number.
In Bambu Studio: Process → Advanced → Bridge flow ratio. In OrcaSlicer: Process → Quality → Bridging tab → Bridge flow ratio, with a separate Internal bridge flow ratio setting for bridges over solid infill (internal bridges) rather than external bridges over open air — these are genuinely different situations and OrcaSlicer treats them separately. For internal bridges specifically, OrcaSlicer’s own documentation notes that increasing the flow ratio above 1.0 can actually improve strength and top surface quality, because internal bridges are supporting the layers printed above them rather than needing to minimise sag over open visible space — the opposite logic from external bridges, where reducing flow is almost always the right direction.
Temperature: cooler prints solidify faster
Reducing nozzle temperature specifically for bridging — by roughly 5-15°C below the standard printing temperature for the material — gives the extruded plastic a head start on solidifying once it leaves the nozzle. Not every slicer setup allows a temperature change specifically for bridge moves without a temperature tower or manual G-code, so this is the least commonly adjusted of the bridge parameters in practice, but it is worth knowing as a lever if cooling and flow adjustments alone are not resolving a persistent sag.
Design and orientation: the settings-free solution
Every material has a maximum distance it can bridge reliably regardless of how well the settings are tuned. For standard PLA on a well-cooled machine, spans up to roughly 30-40mm are commonly achievable with good settings; beyond that, even a perfectly tuned bridge profile starts to struggle. Before reaching for more aggressive cooling or flow settings, it is worth asking whether the model’s orientation — as covered in the orientation post — could shorten the bridge span in the first place. Rotating a model so a long bridge becomes a shorter one, or splitting a design so the bridging feature falls at a more favourable angle, is often a more reliable fix than pushing settings to their limits on a span that is simply too long for the material to reliably hold.
Redesigning with chamfers rather than flat overhangs, where the geometry allows it, converts a hard bridging problem into a manageable overhang problem — and overhangs, while still requiring good cooling, are a more forgiving failure mode than a genuinely sagging bridge. Support should be reserved for spans that genuinely cannot be avoided through reorientation or redesign — it remains the fallback for geometry that no combination of settings will bridge reliably, rather than the first response to every bridging challenge.
The per-filament reality
PLA is the easiest material to bridge well because it cools and solidifies quickly compared to most alternatives — this is a direct consequence of the same glass transition temperature that makes PLA vulnerable to heat creep in warm rooms, as covered in the hot weather post. The same property that is a liability in a warm workshop is an asset for bridging: fast solidification is exactly what a bridge needs.
PETG bridges noticeably less predictably than PLA because of its stickier melt behaviour and slower cooling characteristics — community testing comparing PETG brands found meaningfully different overhang and bridging performance between brands at identical settings, which is a reminder that bridge tuning is genuinely filament-specific rather than universal even within a single material category. Running a dedicated bridge test for every new filament spool, as several guides recommend, is not excessive caution — it reflects genuine, measurable variation between brands.
ABS and other warping-prone materials that benefit from an enclosed chamber for print quality generally are also harder to bridge well, because the very warmth that helps prevent warping works against the rapid cooling that bridging needs. This is one of the genuine trade-offs of enclosed printing — the same enclosure that solves ABS’s warping problem can make its bridging performance worse unless the machine has dedicated bridge-specific cooling capable of overriding the chamber’s ambient warmth locally.
The practical routine
Run a bridge test on any new filament before trusting it on a real project — a small, disposable calibration model rather than discovering a bridging problem partway through a long print. Free bridge test models exist on Printables and MakerWorld specifically for this. Set bridge fan to 100%, bridge speed to 15-30mm/s as a starting point, and bridge flow to roughly 90% for PLA as the initial baseline, then adjust from there based on how the test print looks — sagging means more cooling or less flow; ragged or thin gaps mean flow is already too low or speed too fast for the fan to keep up.
Check the slicer’s line-type preview before assuming bridge settings are or are not being applied — if the feature is classified as an overhang rather than a bridge, the bridge settings are irrelevant to it and a different set of overhang-specific settings governs it instead. And before reaching for more aggressive settings on a genuinely long span, consider whether reorientation could shorten the bridge in the first place — the cheapest fix for a difficult bridge is frequently not a setting at all.