
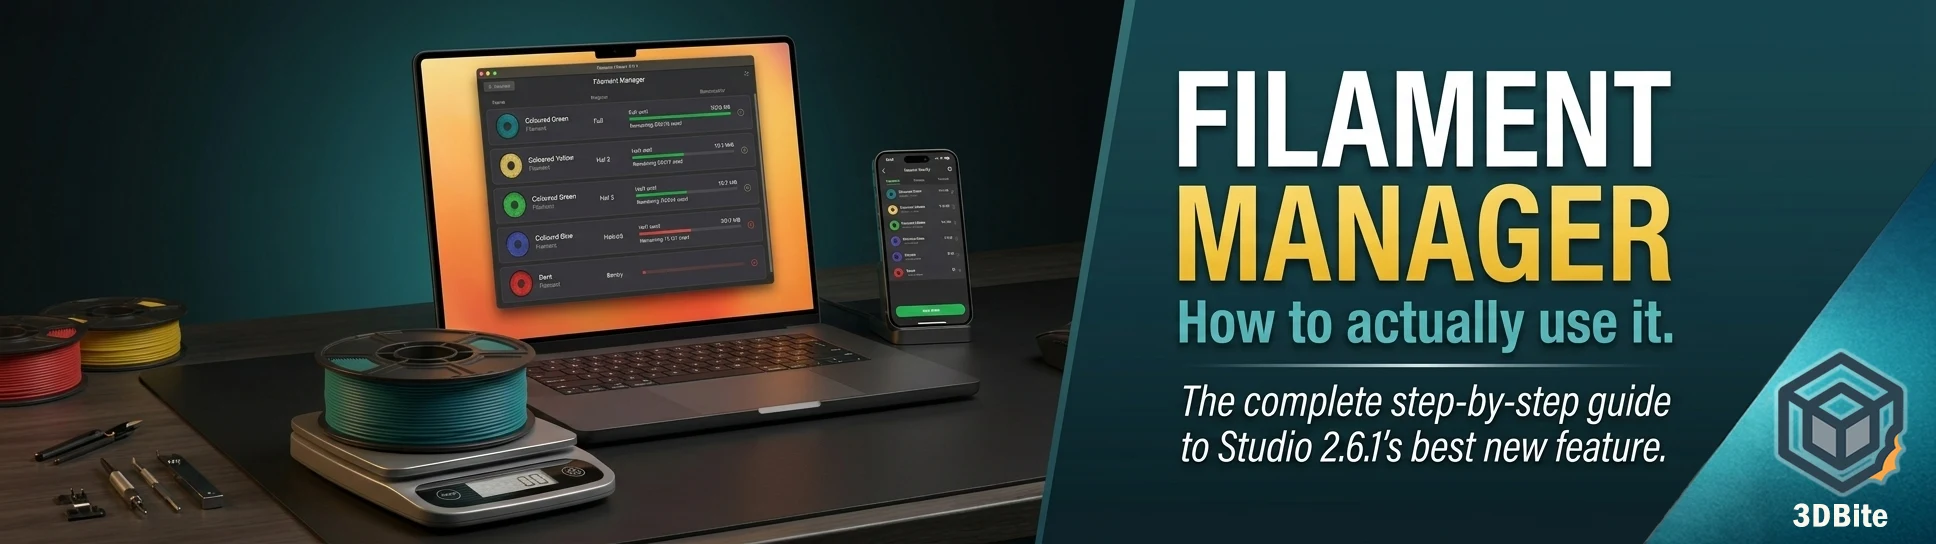
For two years the question before every long print was the same: is there enough left on this spool? The honest answer was usually a guess — a visual estimate of the roll thickness, a rough mental calculation against a previous print, or the slightly anxious decision to just start and hope. Bambu Studio 2.6.1 introduced the Filament Manager to replace that guess with an actual tracked number. This post is a complete walkthrough of how to set it up, how to use it day to day, how to handle third-party spools without RFID tags, and how to get the most out of the Bambu Handy integration that makes the whole thing useful away from the desk.
If you have not yet updated to Bambu Studio 2.6.1 Beta, this is the feature worth updating for. The installation is straightforward — download from the Bambu Studio GitHub releases page, it installs alongside your existing version without replacing it, and you can roll back if anything causes issues. Nothing in the core slicing workflow changes. The Filament Manager is an addition, not a replacement for anything that was already there.
What the Filament Manager actually does
Before the walkthrough, it helps to be clear about what the Filament Manager is and what it is not. It is a spool inventory and tracking system. It maintains a record of every spool you register — brand, material, colour, starting quantity — and deducts consumed material after each print. It syncs between Bambu Studio on your desktop and Bambu Handy on your phone via Bambu Cloud. It reads Bambu Lab spool data automatically via RFID. It accepts manual entry for third-party spools without RFID tags.
It is not a replacement for the filament profile system — the profiles that control print temperature, speed, retraction, and other settings are a separate area of Bambu Studio and the Filament Manager does not change how those work. It is also not a real-time mid-print tracker in the sense of showing you a live counter decreasing as the print runs — it updates the remaining amount after each completed print job. And it requires an internet connection to sync changes and remaining amounts between Studio and Handy. Offline users can still use the local view in Studio, but changes will not propagate to other devices until a connection is available.
Where to find the Filament Manager in Bambu Studio
The Filament Manager lives in two places in Bambu Studio 2.6.1 and the two entry points serve slightly different purposes.
The primary entry point is through the top menu: Help → Filament Manager. This opens the full inventory view — all your registered spools, searchable, groupable, filterable, with the ability to add, edit, and delete entries. This is where you do inventory management: registering new spools, updating remaining amounts after weighing a partially used spool, and reviewing what you have across your full collection.
The second entry point is from the Device tab when your printer is connected. In the AMS panel on the Device page, each loaded slot now shows the filament currently assigned to it, and you can click through to the spool record for that slot directly. This is the quick-access path for checking remaining amounts on currently loaded spools without navigating through the full inventory.
Step 1 — First launch: what you will see
On first launch the Filament Manager will be empty unless you have Bambu Lab spools loaded in your AMS at the time. If you do have Bambu spools loaded, Studio reads the RFID data and populates the manager automatically — brand, material, colour, and an initial remaining amount calculated from the RFID tag data. This is the smoothest first experience: load your Bambu spools, open the Filament Manager, and your current AMS contents are already registered.
If you open it with no spools loaded or with third-party spools, you will see an empty inventory and will need to add entries manually. That process is covered in the section below on third-party spools.
The interface shows spools in a list or grid view — the community is still exploring which view Bambu has settled on as the default in this beta, so your experience may vary slightly from the description here. Each spool entry shows brand, material type, colour, and remaining amount as both a gram value and a percentage of the original spool weight.
Step 2 — Registering a Bambu Lab spool
For Bambu Lab spools with RFID tags, the registration process is largely automatic. Load the spool into your AMS Lite, ensure the printer is connected to Bambu Studio and online, and navigate to the Filament Manager. Click the sync or refresh button — the AMS data is read and the spool entry is created or updated automatically. The RFID tag carries the spool’s serial number, material type, colour code, and the original weight, which gives the system a starting point for tracking.
After the spool is registered, you can optionally add or edit details that the RFID does not carry: a nickname for the spool if you want to distinguish multiple spools of the same colour, a purchase date, or notes. These are optional quality-of-life additions rather than required fields.
Step 3 — Registering a third-party spool manually
This is where the Filament Manager does the most useful work for anyone who primarily uses third-party filament — which, as covered in the true cost post, is most active users running eSun or similar. Third-party spools have no RFID tag. The system cannot read them automatically. You register them manually, providing the information the RFID would have supplied.
In the Filament Manager, click Add Spool or the plus button. The entry form asks for:
- Brand — type the manufacturer name. For eSun, enter eSun. The field accepts free text for brands not in the default list
- Material type — select from the dropdown. PLA, PLA+, PETG, TPU, ABS, and so on. Select the closest match to your actual filament
- Colour — use the colour picker or enter a hex code. Getting this right is worth a moment of effort — it makes the inventory view visually useful for identifying spools at a glance
- Remaining amount — this is the critical field for tracking. Enter the current weight of usable filament on the spool in grams
The remaining amount field is where you need to do a small piece of preparation before you can enter accurate data for a partially used spool. For a brand new, unopened spool, the figure is simply the spool weight — 1000g for a standard 1kg spool, 750g for a 750g spool, and so on. For a partially used spool, you need to weigh it.
How to calculate remaining filament by weighing
Weigh the spool including the plastic spool core on your kitchen scales or a postal scale. Then subtract the empty spool weight to get the filament-only remaining amount. Empty spool weights vary by manufacturer — eSun’s standard plastic spool weighs approximately 200–220g. Many manufacturers print the empty spool weight on the spool itself, on the box, or list it on their website. If you cannot find the specific figure, 200g is a reasonable working estimate for standard eSun PLA+ spools.
Example: your partially used eSun PLA+ spool weighs 680g on the kitchen scales. The empty spool weighs approximately 210g. Remaining filament is approximately 470g. Enter 470 in the remaining amount field.
This is a one-time setup cost per spool. Once registered, the system tracks consumption automatically from that starting point. You only need to weigh again if you want to correct drift in the tracked amount — which can happen if a spool was used outside the Filament Manager’s tracking window, such as before you set up the system.
Step 4 — Searching, grouping, and filtering your inventory
Once you have a collection of spools registered — and for anyone with 20, 30, or 40+ spools this is a meaningful number — the search and filtering tools become the most useful part of the Filament Manager.
The search bar at the top of the inventory view filters by brand name, material type, or colour name as you type. Typing “eSun” filters the view to all eSun spools. Typing “PETG” filters to all PETG regardless of brand. The filter is live — the view updates as you type without needing to press enter or confirm.
Grouping organises the inventory by category. The grouping options available in the current beta include grouping by brand, by material type, and by colour family. Grouping by material type is the most useful view for pre-print planning — you can see at a glance all your PLA+ spools together, sorted by remaining amount, which immediately tells you which spools are getting low and which have plenty left for a long job.
Filtering by remaining amount is the highest-value workflow for anyone who prints regularly. Filter to show only spools below a threshold — say, less than 200g remaining — to identify which spools need restocking before they are needed mid-print. This is the feature that replaces the anxious visual squint at a spool before committing to a four-hour job.
Step 5 — How tracking works after a print
This is the part that makes the Filament Manager useful over time rather than just at setup. After each completed print, Bambu Studio deducts the consumed filament amount from the registered spool’s remaining quantity. The deduction is based on the slicer’s calculated filament usage for the completed job — the same figure shown in the print preview before you send the job.
For Bambu Lab spools in the AMS, this happens automatically. The RFID serial number identifies which spool was used on which AMS slot, and the deduction applies to the correct spool record. For third-party spools, you need to have assigned the spool to the correct AMS slot in the Filament Manager before printing, so the system knows which registered spool to deduct from.
The deduction includes purge waste — the filament used for prime towers, flush into infill, and waste chute deposits is factored into the consumed total. This is correct behaviour: that material was used, even if it did not go into the model. Your remaining amount reflects what is actually left on the spool, not what went into the model specifically.
The accuracy over time depends on the accuracy of the slicer’s filament use calculation, which is a good estimate but not perfectly precise. Real-world extrusion has variables the slicer does not model exactly — slight over-extrusion, manual purges, and filament consumed during failed prints that were not completed through normal channels. Over many prints, small discrepancies accumulate. Periodically weighing a partially used spool and correcting the registered amount keeps the tracking accurate. This is the maintenance step that the system requires from the user — not onerous, and far less work than weighing every spool before every print.
Step 6 — Assigning spools to AMS slots before printing
For the tracking to work correctly for third-party spools, you need to tell the Filament Manager which physical spool is in which AMS slot before you start a print. This is the step that closes the loop between the inventory record and the physical spool the printer is using.
In Bambu Studio, navigate to the Device tab with your printer connected. The AMS panel shows each slot and its current filament assignment. For each slot loaded with a third-party spool, click the slot and select the matching spool from your Filament Manager inventory. The system now knows that slot 2, for example, contains the eSun PLA+ red spool registered as 470g remaining. When the print finishes, the deduction applies to that specific record.
For Bambu Lab spools, this step is automatic — the RFID identifies the spool and the slot assignment is recorded without manual action. For third-party spools, it is a ten-second step before each print or filament change. Build it into your pre-print routine and it becomes habitual quickly.
Step 7 — Using the Filament Manager in Bambu Handy
The Bambu Handy integration is where the Filament Manager becomes useful away from the desk. Because the data syncs via Bambu Cloud, the same spool inventory and remaining amounts visible in Bambu Studio are accessible in the Handy app on your phone.
In Bambu Handy, navigate to Devices → Filament → View All → Manage. This opens the same inventory view available in Studio, accessible on your phone. Before starting a remote print, you can check whether the spools currently loaded have enough remaining for the job — without being in the room with the printer, without weighing anything, and without opening a laptop.
You can also add and edit spool entries directly from Bambu Handy. If you receive a new delivery of filament and want to register the spools immediately, the Handy app supports the full add spool workflow. Entries created in Handy sync to Studio, and vice versa. The inventory is the same regardless of which device you access it from.
The community has noted that the Handy filament management section existed in a limited form before 2.6.1, but the integration with Studio and the remaining amount tracking are the additions that make it genuinely useful. Previous versions of the Handy filament section were, by general community assessment, not detailed enough to be meaningful. The 2.6.1 update connects the dots.
Step 8 — Editing and correcting spool records
Remaining amount entries can be edited at any time. This is the correction mechanism for accumulated tracking drift. Weigh a spool, calculate the actual remaining amount, open the spool record in the Filament Manager, and update the remaining field to the measured value. The system will use the corrected figure as the new starting point and track accurately from there.
To edit a spool record: in the Filament Manager, find the spool in the list, click or tap to open the detail view, and select Edit. The same fields available at creation — brand, material, colour, remaining amount — are all editable. Save the changes and the updated figure syncs to Handy.
Deleting a spool record removes it from the inventory permanently. Do this when a spool is finished and disposed of, or when you want to start fresh with a corrected entry. Deletion syncs across devices — the record will disappear from Handy as well as Studio.
Step 9 — Creating custom filament profiles for third-party spools
The Filament Manager tracks inventory and consumption. Filament profiles — the temperature, speed, retraction, and extrusion settings — are a separate system in Bambu Studio, but they work alongside the manager and are worth setting up correctly for third-party filaments so that slicer profiles match the registered inventory entries.
To create a custom filament profile for a third-party spool, go to Filament Settings → the Settings icon → Custom Filaments → Create New. Fill in the vendor name, filament type, and a descriptive name. Select a base filament preset to inherit default settings from — for eSun PLA+, the closest Bambu base preset is typically eSun PLA+ if it exists in your version, or Bambu Lab PLA Basic as a starting point. Select which printers in your inventory the profile should be created for. Save.
When user preset synchronisation is enabled, the newly created filament presets will be uploaded to the server cloud. However, the server level can only store a limited number of user presets — currently 200 filaments. When all user presets exceed this limit, newly created or imported presets will only be saved locally and cannot be synchronised. For most users with 40–60 spools, 200 filament presets is more than enough headroom. It is worth knowing the limit exists before building an extremely granular profile library.
Once created, the custom profile is selectable in the Filament Manager when registering a spool — the inventory entry and the print profile are linked, ensuring that when you assign a spool to an AMS slot in the Device tab, the correct print settings are also applied automatically.
The pre-print workflow with Filament Manager active
Once the Filament Manager is set up and populated, the pre-print routine changes in a specific and useful way. Here is what a typical pre-print check looks like with the system running.
- Slice the model in Bambu Studio and check the filament usage estimate in the print preview — this shows grams required per slot
- Open the Filament Manager (or check Bambu Handy if remote) and compare the required amount against the registered remaining amount for each loaded spool
- If any spool’s remaining amount is close to or below the required amount, swap it for a fuller spool before starting the job
- For third-party spools, confirm the slot assignment in the Device tab matches the physical spool loaded
- Send the print
The key step — comparing required versus remaining before starting — is the step that was previously impossible without weighing spools. With the Filament Manager populated and kept reasonably current, it takes ten seconds to confirm a spool has enough material for a job. That is the value. Not dramatic, not technically complex, but genuinely useful every time you do it.
The Spoolman alternative for power users
Before the Filament Manager arrived in 2.6.1, the community built its own solutions. Spoolman is the most capable of them — an open-source, self-hosted spool inventory system with a web interface, barcode scanning support, multi-printer integration, and an AMS sync plugin that listens for MQTT updates from Bambu printers and automatically deducts filament usage. There are community options that allow you to take an inventory of spools comfortably and keep remaining filament synchronised through AMS readings. There are also applications that allow you to read the RFID labels of the coils and include them in the system.
Spoolman is significantly more powerful than Bambu’s Filament Manager for users with complex setups — multiple printers, very large filament collections, detailed cost tracking, or the need to run everything locally without Bambu Cloud. The BambuMan companion app allows Spoolman to import spool data by reading Bambu Lab NFC tags directly from a phone, automating registration entirely. For a hobbyist running one A1 with a collection of 40 spools who wants cloud sync and Handy integration, Bambu’s built-in Filament Manager is the easier path. For a power user with multiple printers, a preference for local-only operation, or a need for more detailed analytics, Spoolman is the better tool and worth the setup investment.
Known limitations and what is still missing
The Filament Manager is a 1.0 implementation and the community has already noted the gaps. Tracking accuracy depends on the initial setup and periodic manual correction — it is not fully autonomous. The 200-filament profile limit is generous but finite. The cloud dependency for sync is a limitation for LAN-only users. There is no low-filament warning system yet — the system tracks remaining amounts but does not automatically alert you when a spool drops below a threshold before you start a print. That feature has been requested and will likely arrive in a future update.
The community forum has also noted that the Handy filament management section, while improved, still lacks some colour detail — not all colour variants are fully populated for all brands in the current version. Entering a custom hex code in the colour picker is the workaround for accurate colour representation when the predefined colour list does not include your specific variant.
Summary
The Filament Manager in Bambu Studio 2.6.1 solves the problem it was designed to solve: the pre-print uncertainty about whether a spool has enough material left for the job. Set it up properly — register your Bambu Lab spools by loading them and syncing, register third-party spools by weighing and manually entering the remaining amount, assign spools to AMS slots before printing — and it becomes a quiet, reliable part of the pre-print routine. The Bambu Handy integration means the information is accessible from your phone before a remote print without any additional steps.
It requires an initial investment of time to populate the inventory accurately, and periodic maintenance to correct drift from the calculated tracking. Neither is onerous. The payoff is a precise answer to the question that previously had only a guess: is there enough left on this spool?

Thank you very much for this very clear introduction to this new feature. I didn’t understand this manager before reading your doc, now it is clear! However, I still have an issue syncing the (non-Bambu) spools installed in the AMS with the status provided by the filament manager: I’ve cleared the spools from the AMS in the device tabs and re-installed my custom spools but – after syncing both the filament manager and the project filaments in the prepare tab, the AMS space remains empty in the filament manager. Any idea about the things I’m doing wrong here?
Once again, many thanks for your tutorial!
Hey Marc. To be honest I am finding this very hit or miss at the moment. Somtimes it works perfectly, but others times I just can’t get it to work at all. I don’t think I am doing anything different to cause it. Maybe it’s just a bit flakey as it’s still in beta? I’ll follow up again when I’ve used this a bit more!
Step 6, assigning spools to AMS slots before printing, just doesn’t work for non-Bambu spools. There is no way to select a spool from the filament manager when assigning an AMS slot. The menu looks the same as before, where you manually set the filament type and color.
For some reason I just cant get this to work at all now. I’m sure I’m not doing anything different! Hoping that there will be a quick update to Bambu Studio to iron out some of the bugs!
Seems to me there’s a major oversight by not having a field called “filament name” or “colour {color} name”.
When in the list view (there is no grid view) , you only see the hex codes, not the actual filament name.
Also, when choosing what filament is loaded in the AMS, there doesn’t seem to be any correlation back to the library.
Even the profiles could be linked somehow back to the library.
This all seems a bit disjointed at the moment, I hope they get it sorted with some s/w updates, otherwise I can’t see it being very useful for the amount of effort to enter in every filament and hex code.
I’m running version 2.7.1.57, which is the latest release as of 5th June.