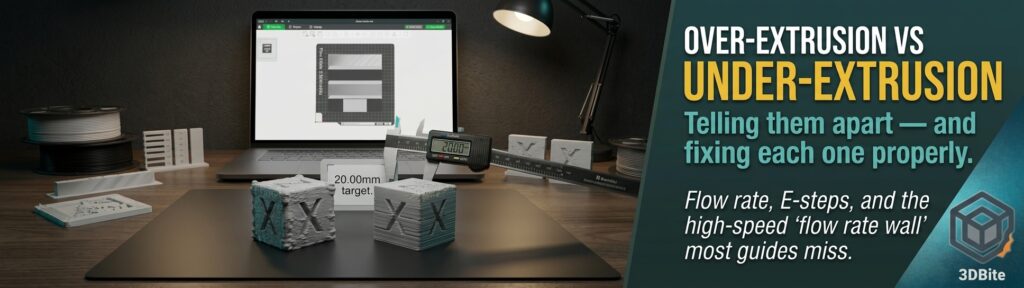
Over-extrusion and under-extrusion are two ends of the same underlying problem — the amount of plastic actually coming out of the nozzle does not match the amount the slicer commanded — but they look, feel, and get fixed in opposite directions. One produces too much material and the other too little, and while the diagnostic approach for both is genuinely similar, working through causes systematically rather than guessing, the specific fixes pull in opposite directions entirely. Confusing the two, or applying a fix meant for one to a symptom of the other, is a common way to make an already frustrating print quality problem worse rather than better.
Telling them apart: what to actually look for
Over-extrusion is most reliably identified by extra material sitting somewhere it should not be. Blobs and small zits on the surface, particularly at corners and seams where the nozzle pauses briefly while changing direction. Bulging perimeter walls that look slightly swollen rather than crisp and flat. A generally rough, lumpy surface texture rather than a clean one. And critically, a part that measures oversized when checked with digital calipers against the model’s intended dimensions — a calibration cube printed 0.2-0.3mm larger than its nominal 20mm in any axis is a strong, unambiguous signal.
Under-extrusion shows the opposite signature: visible gaps between adjacent lines of the same layer that should have fused together seamlessly, thin or patchy top surfaces where the infill or previous layer shows through where it should be fully covered, weak layer adhesion that lets parts snap or delaminate more easily than they should, and a part that measures undersized against its intended dimensions. A calibration cube coming out at 19.7mm rather than 20mm is the mirror image of the over-extrusion signature above.
The calibration cube test is worth treating as the definitive diagnostic rather than eyeballing surface texture alone, precisely because it gives you an actual number rather than a subjective impression. Print a simple 20mm cube or a single-wall test print, measure with digital calipers across all three axes, and compare directly against the model’s intended dimensions. Oversized means over-extrusion. Undersized means under-extrusion. This single test resolves ambiguous cases faster than staring at surface texture trying to decide which category a defect falls into.
The causes that push toward over-extrusion
The flow rate multiplier set above 100% is the most direct and common cause — check the filament profile’s flow rate setting first, and if it has previously been nudged upward as a fix for some other unrelated problem, that is worth investigating properly rather than leaving in place, since stacking an incorrect flow rate on top of whatever the original problem was compounds rather than resolves anything.
An incorrect filament diameter entered in the slicer is a specific and easy-to-overlook cause: if the slicer believes the filament is thinner than it actually is, it will calculate that a longer length needs to be pushed through to achieve the intended volume, and that miscalculation pushes out more material than the model geometry actually needs. Measuring the actual filament diameter with calipers at several points along a metre or two of the spool and entering the genuine average into the filament profile takes two minutes and can resolve a chronic over-extrusion problem that no amount of flow rate tweaking would have found, because the flow rate setting was never the actual source of the error.
Temperature set too high makes filament more fluid than intended, and that excess fluidity causes it to flow more freely than the commanded rate accounts for — this is the same mechanism covered from the stringing angle in the stringing post, and over-extrusion is frequently the companion symptom sitting alongside stringing on a print that is simply running too hot for the material in use.
E-steps (or rotation distance on Klipper-based firmware) calibrated too high is a hardware-level cause distinct from anything in the slicer software: the extruder motor is commanded to move a specific distance but the actual mechanical calibration causes it to feed further than intended for the same number of motor steps. This is worth distinguishing clearly from flow rate, which is a filament-specific software setting — E-steps calibrate the physical extruder hardware itself, while flow rate calibrates for how a specific filament behaves once melted. Both can cause identical-looking symptoms, and confusing which one is actually at fault means tuning the wrong variable.
The causes that push toward under-extrusion
Flow rate set below 100%, or E-steps calibrated too low, produce the exact mirror-image mechanism to the over-extrusion causes above — the printer believes it is delivering the commanded amount of filament but is genuinely delivering less. A partial nozzle clog restricts the physical flow of material regardless of what the slicer and firmware are commanding, and this is worth checking with a cold pull, covered in full in the cold pull guide, before assuming the problem is purely a settings issue rather than a physical obstruction.
Temperature set too low is the direct opposite of the over-extrusion temperature cause — filament that has not reached full melt viscosity flows more sluggishly than intended and cannot keep pace with the commanded extrusion rate, producing gaps and weak adhesion even though the flow rate setting itself may be entirely correct. Worn or slipping extruder gears, covered in the abrasive filaments guide and the general maintenance guide, produce inconsistent grip on the filament — the gear may be intermittently slipping rather than reliably pushing the full commanded length through, which shows up as under-extrusion that comes and goes unpredictably within a single print rather than as a consistent, steady shortfall.
The 2026-specific cause that gets misdiagnosed constantly: the Flow Rate Wall
This is the single most important addition to the standard over-extrusion troubleshooting checklist for anyone running a genuinely fast modern machine like the A1 or A2L, and it is worth understanding properly because it produces symptoms that look identical to a simple flow rate miscalibration while having a completely different root cause and a completely different fix. Every hotend has a maximum volumetric flow rate — the fastest rate, in mm³/s, at which it can genuinely melt filament and push it out reliably, covered in detail in the nozzle size guide. If the slicer’s calculated speed and layer height demand a flow rate beyond that physical ceiling — say the hotend’s genuine maximum is 25mm³/s but a high-speed infill pass is asking for 30mm³/s — the hotend simply cannot keep up. Pressure builds in the melt zone because material is arriving faster than it can be extruded cleanly.
The critical detail is what happens next: when the print head then slows down for a corner or an external perimeter, where the commanded volume per second is naturally lower, all of that built-up pressure suddenly releases at once, and the printer dumps the excess material it had effectively been storing in the melt zone. The result — blobs at corners, rough surfaces, dimensional inaccuracy — is visually indistinguishable from ordinary over-extrusion caused by a flow rate set too high in the slicer. But the actual cause is entirely different: the hardware has hit its genuine volumetric ceiling, not a software miscalibration. Reducing the flow rate multiplier in this situation does not address the real problem and can make the print worse elsewhere by starving the areas of the print that were not actually overflowing. The correct fix is running the maximum volumetric speed calibration covered in the calibration routine post and reducing print speed specifically at the points where the calculated flow demand exceeds the hotend’s genuine capability, rather than reducing flow rate globally across the whole print. This is a specifically 2026 problem in the sense that it barely mattered on the slower machines of a few years ago — at 300-600mm/s becoming the everyday norm rather than the exception, even a small flow rate mismatch that would have been invisible on a slower printer becomes an obvious, print-ruining defect, and it is worth ruling this specific cause in or out before assuming a straightforward flow rate recalibration will fix a genuinely speed-related problem.
The correct diagnostic and fix order
Working through causes systematically, rather than randomly adjusting settings until something improves, is the approach every source researched for this post converges on. The recommended order:
First, measure the actual filament diameter across several points along a metre or two of the spool, and enter the genuine average into the filament profile rather than trusting the manufacturer’s printed 1.75mm nominal figure blindly. This two-minute check resolves a surprising number of chronic extrusion problems on its own.
Second, confirm E-steps or rotation distance are correctly calibrated at the hardware level, separately from flow rate. The standard method: mark the filament at a known point above the extruder, command a 100mm extrusion through the printer’s manual controls, then measure how far the mark has actually moved. If 100mm was commanded but only 98mm was genuinely extruded, the E-steps value needs adjusting by the corresponding ratio — current value multiplied by the commanded distance divided by the measured distance. This calibration should always be run with the hotend at full printing temperature rather than cold, since the back-pressure a molten hotend presents to the extruder motor is genuinely different from a cold one, and calibrating cold produces a value that will not hold up once printing actually begins.
Third, and only once diameter and E-steps are both confirmed correct, tune flow rate in small increments — 2-5% adjustments per test, reprinting a simple calibration cube or single-wall test between each change rather than jumping straight to a large correction and hoping it lands. This is the same flow rate calibration covered in the calibration routine post, and it is the setting that should absorb any remaining filament-specific behaviour once the two hardware-level variables above are already correct.
Fourth, check temperature against the material’s genuine optimal range rather than the filament label’s printed suggestion, using the temperature tower approach covered in the stringing post — too hot pushes toward over-extrusion symptoms, too cold pushes toward under-extrusion, and getting this dialled in removes a variable that would otherwise confound the flow rate tuning above.
Fifth, and specifically for anyone running high speeds on the A1 or A2L, rule out the Flow Rate Wall before assuming any remaining over-extrusion symptom is a straightforward calibration issue. Run the maximum volumetric speed test, and if the demanded flow rate at your current speed settings is genuinely exceeding the hotend’s measured ceiling, the fix is reducing speed at the specific points that exceed it, not reducing flow rate globally.
Seam-specific blobs: a distinct sub-case worth naming separately
Blobs appearing specifically and consistently at the seam point — where each perimeter loop starts and ends — are a distinct and common enough issue to deserve their own fix rather than being lumped in with general over-extrusion troubleshooting. The nozzle parks briefly at the seam while changing direction between one layer’s end and the next layer’s start, and accumulated ooze during that pause drops precisely at that point. This connects directly to the seam-specific settings covered in the Z-seam guide: enabling Scarf Seam smooths the transition by overlapping the seam ends gradually rather than stopping and starting abruptly, switching to Random seam positioning distributes any residual blobs around the model rather than concentrating them in one visible line, and enabling Wipe on Loops mechanically shears the forming blob by moving the nozzle along the wall during the retraction that happens at the seam. If over-extrusion symptoms are showing up specifically and only at a consistent seam line rather than generally across the whole print, these seam-specific fixes are the correct target rather than a global flow rate adjustment that would affect the entire print for a problem that is only happening in one place.
The quick reference table
| Symptom | Category | Most likely cause | Fix |
|---|---|---|---|
| Blobs, zits, bulging walls, rough surface | Over-extrusion | Flow rate too high, filament diameter set wrong, temperature too high, E-steps too high | Measure filament diameter, verify E-steps, then reduce flow rate 2-5% at a time |
| Part measures oversized on calipers | Over-extrusion | Same as above | Same as above |
| Gaps between lines, patchy top surface, weak layers | Under-extrusion | Flow rate too low, partial clog, temperature too low, worn/slipping extruder gears | Cold pull to rule out a clog, verify E-steps, increase flow rate 2-5% at a time |
| Part measures undersized on calipers | Under-extrusion | Same as above | Same as above |
| Blobs/roughness only at high-speed infill or fast passes, on an otherwise well-calibrated printer | Looks like over-extrusion, is actually the Flow Rate Wall | Commanded flow rate exceeds the hotend’s genuine volumetric ceiling | Run max volumetric speed calibration; reduce speed at the affected points rather than reducing flow rate globally |
| Blobs appearing consistently at one visible seam line | Localised over-extrusion, not general | Ooze accumulating during the pause at the seam’s start/end point | Enable Scarf Seam, Random seam position, or Wipe on Loops rather than adjusting global flow rate |