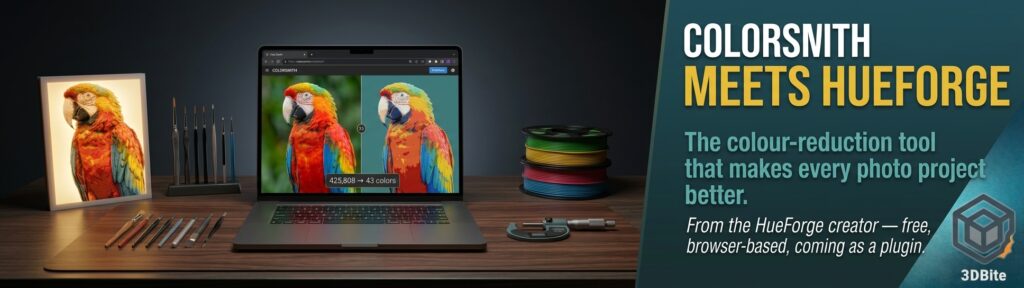
The HueForge post from a few days ago covered a year of genuinely good experience with the tool that turns photographs into backlit, layered-filament prints. Since then, the same developer has quietly put out a new tool called ColorSmith, and it is a genuinely elegant answer to a problem that has been sitting underneath HueForge the entire time without anyone quite naming it properly. It is free, it runs entirely in the browser, and it is coming first as a HueForge plugin before a standalone desktop version follows. Given how directly it slots into a workflow already covered here in depth, this deserves its own post rather than a footnote on the original.
The problem ColorSmith is actually solving
Every photograph you have ever taken, however clean and simple it looks to the eye, contains a genuinely absurd number of distinct colours at the pixel level. ColorSmith’s own examples make this concrete: a photo of a macaw in flight comes in at 425,808 distinct colours. A bunch of grapes: 527,599. A simple portrait: 126,529. These are not exaggerated numbers for effect — they are what a typical digital photograph actually contains once you count every subtly different pixel value, most of which is noise, compression artefact, and blends too fine for the eye to register as anything other than “smooth.”
HueForge, as covered in the earlier post, works by mapping the source image’s brightness or colour to physical layer height and filament swaps across a stack that might realistically use somewhere between five and fifty distinct filament colours for a given project. That is the actual constraint every HueForge project has always been working within — a handful of real, physical colours trying to represent an image that technically contains hundreds of thousands. ColorSmith’s own framing of the problem is the clearest explanation I have seen of why this matters: for the first time, the number of colours in the image can be close to the number of blend levels HueForge has to work with, which changes the whole exercise from heavy compromise toward something closer to direct conversion.
What it actually does
Drop an image in — PNG, GIF, JPG, WEBP, or a HueForge project file directly — and ColorSmith counts the distinct colours it contains, then automatically rebuilds the image using far fewer of them. The automatic pass shown across the site’s own examples is genuinely impressive: the macaw photograph goes from 425,808 colours down to 43, with no manual editing at all, and the reduced version still reads clearly as the same photograph rather than a degraded, posterised mess. A black and white portrait drops from 256 to 31. A dog photo goes from 490,911 down to 40. In every published example, the reduction happens in a single automatic click, with the manual refinement tools presented as optional rather than required.
The philosophy behind the reduction is worth understanding properly, because it is not simply “use fewer colours indiscriminately.” ColorSmith’s own description of this is precise: it removes colours that are not earning their place in the image, and lets you put colour back exactly where it visibly improves the result — skin, sky, an eye, wherever a genuinely important small detail needs the extra range that a blanket reduction would otherwise flatten. This is a genuinely different approach from a naive colour-reduction filter that treats every part of an image identically. It is spending the reduced colour budget deliberately, on the parts of the image that actually need it, rather than distributing it evenly and losing detail everywhere at once.
The honest limitations, stated by the developer directly
This is worth including because it is refreshingly candid for a product page, and it tells you exactly which images this tool is and is not suited to. Some images genuinely need more colours than ColorSmith’s automatic pass will comfortably give them, and the site names the specific failure case directly: combine a lot of different hues with lots of shallow gradients simultaneously, and there is no small palette that keeps every one of those blends smooth at once, and no single automatic repair that fixes them all together. The more common and narrower version of the same problem is large smooth areas — skies, fog, studio backgrounds, long skin-tone gradients — which push hardest against any reduced colour count and can show up as visible banding once compressed too aggressively.
This is exactly where the manual tools earn their place rather than being decorative extras. Refine Gradient smooths out banding that appears across skin or other large gradient areas after the automatic pass — one published example shows a portrait’s skin banding fixed by increasing the palette slightly from 36 to 51 colours specifically in that region. Recover Color Range restores detail the automatic reduction flattened into mud — a snake’s eye that lost its gold to a muddy, undifferentiated colour in the automatic pass gets that gold back with a targeted fix, moving from 33 to 38 colours. Change Color plus Preserve lets you hold a specific tone — skin colour in one example — while deliberately keeping another region, a face, achromatic. None of these tools are trying to drive the colour count as low as physically possible. They are giving you control over exactly where the limited colour budget gets spent, which is precisely the design philosophy the site states outright.
The practical test worth knowing about
ColorSmith’s own guidance gives a genuinely useful rule of thumb for anyone deciding whether a specific photo is worth attempting as a HueForge project in the first place, before spending any time in HueForge itself. If an image still looks good once reduced to around 50 colours or fewer, it is probably a strong HueForge candidate. This is a meaningfully more useful pre-check than simply staring at a photo and guessing whether it will translate well — you can now actually test it, in seconds, in the browser, before committing to the layer-height mapping and filament-swap planning that a full HueForge project involves.
The privacy angle, done properly
Worth noting explicitly because it is stated clearly and repeatedly on the site itself: no image data leaves your browser. The colour counting and reduction happen entirely client-side, which matters if the photo in question is a personal one — a family portrait, in several of the developer’s own examples — that you would rather not upload to a third-party server just to test whether it would print well. This is the same privacy-conscious architecture as the self-hosted tools and browser-based generators covered elsewhere on this site, and it is worth choosing this kind of client-side tool over a server-uploading alternative wherever one exists.
How it will actually reach HueForge users
ColorSmith is coming first as a free plugin integrated directly into HueForge, before a standalone desktop application follows separately. The integration demo image on the developer’s own site shows it as a proper tab inside the HueForge desktop application, sitting alongside the palette and swatch editing tools that already exist there, with a 3D print preview visible in the same window — which suggests the eventual workflow will be a single continuous pass from source photo through colour reduction straight into HueForge’s own mesh generation, rather than a separate standalone step you complete in one tool before manually importing the result into another. Given the plugin ecosystem HueForge has already built — FlatForge, Color Drop, and HugeForge, all covered in the earlier post — this looks like a natural extension of exactly that same pattern of ongoing, genuinely useful free development that made HueForge worth the original purchase price in the first place.
The plugin is not yet available at time of writing — the site offers an email signup for a release notification rather than a working download, with the HueForge Devlog at devlog.thehueforge.com the place to watch for the actual release announcement. The core web tool at colorsmith.app is live now, though, and worth trying on any photo you have been considering for a HueForge project. Running a photo through the 50-colour test before committing to a full HueForge build is a genuinely useful step to add to the process even before the plugin integration ships properly.
ColorSmith is at colorsmith.app. Given how directly this builds on a tool already reviewed favourably on this site after a year of real use, this is one to genuinely look forward to rather than a passing curiosity — and once the HueForge plugin actually lands, it will be worth a proper hands-on follow-up post.