
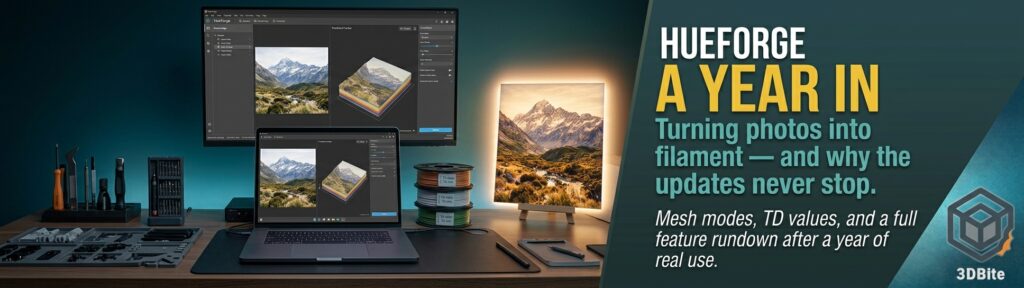
I have been using HueForge for over a year now, and it is one of the few pieces of software I have paid for in this hobby that has genuinely earned its keep the whole way through. Every update since I bought it has been free, the developer ships new features at a pace that puts a lot of subscription software to shame, and the core idea behind it is still one of the cleverest applications of basic optics I have come across in 3D printing. Given how often it comes up when people ask how a specific photo-realistic print was made, it is well overdue a proper writeup on this site.
What it actually does
HueForge takes a 2D image and turns it into a 3D-printable model by mapping brightness — or in some modes, colour — to height. Bright areas of the source image become taller sections of the model; dark areas stay shorter. You then print that model as a series of thin, stacked layers using different coloured filaments, and because each layer is thin enough for light to pass through it, the colours blend visually as light travels down through the stack and bounces back up. Stand it under a light and you get a full-colour image with genuine photographic depth, made entirely from swapped layers of opaque filament rather than any printed pigment mixing.
The reason this works reliably rather than being a lucky guess is Transmission Distance, or TD — a measured value for how much light passes through a specific filament at a given thickness. HueForge ships with a database of hundreds of filaments from the major brands, Polymaker, Overture, Bambu Lab, and Prusament among them, each already measured. Because the software knows the TD value for the filaments you have loaded, it can predict what a specific stack of coloured layers will actually look like before you print a single one — which is the difference between HueForge being a design tool and being a slot machine.
The bit that actually matters: it does not lie to you about the result
The live preview is genuinely the feature that sold me on this software in the first place. You see your source image on one side and HueForge’s predicted render of the finished print on the other, updating as you adjust settings. What you see in that preview is what comes off the plate, assuming your filament’s actual TD matches the database value closely enough — and in my experience over a year of using named, well-known brands, it usually does. That predictability is the entire value proposition. Nobody wants to run an eight-hour, six-colour print only to find the shadows have gone muddy or a highlight has blown out because the software guessed wrong about how a specific white behaves at 0.2mm.
Values genuinely do vary batch to batch, and HueForge is upfront about this rather than pretending its database is gospel. If you want precision beyond what the community-measured library offers, you can run the Seashell Test — a free calibration print that measures your specific spool’s actual transmission — or use a dedicated TD1 device for a more exact reading. I have not needed to go that far for the filaments I use regularly, but the option is there for anyone chasing colour accuracy on a spool the database does not already cover well.
The five ways HueForge can interpret an image
HueForge calls these Mesh Modes, and picking the right one for a given image matters more than most people realise on their first attempt.
Standard and Combo mode are the starting point for most projects and the ones I use most often. Both map brightness directly to height — brighter parts of the image get taller, darker parts stay short — with Combo adding a contrast slider that lets you fine-tune how aggressively that mapping stretches across the tonal range. Max Channel and Scaled Max Channel sit alongside these as brightness-based variants aimed at more advanced users who want finer control over exactly how the tonal range gets distributed across the available layer heights.
Colour Aware and Colour Pop work from colour rather than pure brightness. Colour Aware maps specific colours in the source image to specific height ranges rather than treating everything as a greyscale brightness value, which is genuinely useful for multi-colour filament painting where you want particular hues to land at particular points in the stack rather than wherever brightness alone would put them. Colour Pop separates colour and greyscale regions of an image from each other entirely, which is a distinctive effect worth trying on the right source image.
Colour Match is the most advanced mode and the one I have used least, mostly because it demands the most deliberate setup. It maps specific colours to specific heights using a reference image you supply, giving full control over exactly which filament colour appears at exactly which layer. It is clearly aimed at experienced users chasing a very specific result rather than a starting point for a first project.
What it deliberately does not do
This is worth stating plainly because it shapes the whole workflow. HueForge will not choose colours for you. You pick the filaments, decide the order, and HueForge shows you the predicted result and tells you exactly where in the layer stack each swap needs to happen. The creative decisions stay yours; the software’s job is making sure you can see the consequence of those decisions before committing filament and print time to them.
It also does not export 3MF files, and does not function as a slicer. What it exports is an STL alongside a Describe.txt file listing every colour swap and the exact layer it needs to happen at. You then enter those swaps manually into whichever slicer you actually use — Bambu Studio, OrcaSlicer, PrusaSlicer, or anything else that supports layer-based colour changes. This is a deliberate design choice rather than a missing feature: keeping HueForge slicer-agnostic means it works identically whether you are running an A1 with AMS handling the swaps automatically, or a machine with no multi-material capability at all where you are pausing the print and swapping filament by hand at each instructed layer. Almost all of the prints in HueForge’s own example gallery were done with manual swaps rather than automated hardware, which is a good reminder that none of this actually requires an AMS to work.
The plugin ecosystem: where the free updates keep paying off
This is exactly the kind of ongoing development I mean when I say the software keeps earning its price a year in. Three plugins currently extend the core tool in genuinely useful directions. FlatForge lets you print HueForge models flat, facedown, and double-sided, which opens up bookmarks, coasters, and keychains as practical applications rather than everything needing to be a standing framed piece. Color Drop nests mesh pieces together by shared filament colour to reduce the total print height needed for a given image, meaning the same design prints noticeably faster without changing the visual result. HugeForge tiles a HueForge print across multiple build plates, letting a single image scale up to something genuinely large-format rather than being capped by whatever your printer’s plate size happens to be — a direct answer, incidentally, to exactly the kind of large-format ambition that pushed me toward the A2L in the first place. There is also a third-party 3MF Export Plugin from a developer called Additive Atom, which addresses the one workflow friction point in an otherwise smooth pipeline — going from Describe.txt manual entry to a proper 3MF that carries the colour data directly.
Pricing and the licence structure
The Personal Use licence is a one-time purchase, historically around $18-30 depending on whether it lands during a sale, and it covers unlimited personal use with the software’s updates included for a set period. You cannot sell prints or models made under this licence, though you are free to give them away as long as anything you distribute carries the same non-commercial terms. For anyone wanting to sell HueForge prints commercially, Limited and Professional Commercial tiers exist as annual licences instead, reflecting the fact that commercial use is a genuinely different value proposition from a hobbyist making things for their own shelf.
What has actually mattered to me day to day is simpler than the tier structure: since I bought my Personal licence, every point release has arrived free, and the developer’s own devlog reads like someone genuinely iterating on the software in public rather than treating it as a finished product waiting for the next paid upgrade cycle. The current release as I write this is v0.9.4.3, running on Windows, macOS (both Intel and Apple Silicon), and Linux, which is a broader platform spread than a lot of niche 3D printing tools bother to support.
Where this connects to what already gets covered here
HueForge is doing something genuinely distinct from the exposed-infill and photo-displacement texturing techniques covered in the texturing post — those are about surface geometry and tactile texture, where HueForge is entirely about colour produced through light transmission rather than surface relief. It is also a different approach from the SolidVents pattern generator covered separately, which is about ventilation and decorative geometry rather than photographic colour reproduction. If you want a genuine photograph or piece of artwork reproduced in physical, backlit form on a shelf, none of the other tools covered on this site do that job — HueForge is the one purpose-built for exactly this, and a year of regular use has not turned up a competitor doing it as well for the price.
HueForge is available at shop.thehueforge.com, with an examples gallery worth browsing before buying to get a genuine sense of what the mesh modes actually produce across different source images.
HueForge is the right tool when you want a lithophane or filament-painted image rather than a solid part — those parametric color layers are the whole point. When the job is a real printable object from a photo or a prompt instead of a color-mapped plate, I generate on luphra.com and download the STL for free, then slice as usual. Different jobs, different files, and this review makes that HueForge path pretty clear.