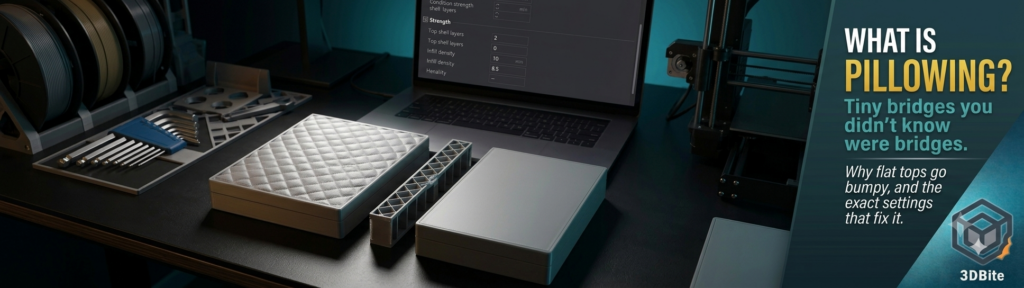
Pull a box lid or a flat-topped case off the plate and the top surface should be smooth. Instead, it has a faint quilted texture — small puffy bumps arranged in a pattern that, if you look closely, matches the infill pattern underneath. That is pillowing, and the name describes it well: the surface genuinely looks like it is made of tiny pillows stitched together rather than a single continuous plane. It is one of the more common surface defects in FDM printing, it is almost never a hardware fault, and it has a specific and fully understandable cause once you know what the top layer is actually being asked to do.
Why the top layer is secretly a series of tiny bridges
This is the concept that makes pillowing make sense rather than seeming random. Every top layer on a print with anything less than 100% infill is not printing onto a solid, continuous surface below it. It is printing across the gaps between infill lines — and each of those gaps, however small, is a miniature bridge. The bridging post covers this same physics at the scale of a genuine open span. Pillowing is exactly the same mechanism, just happening at a much smaller scale, repeated across the entire top surface of a print, dozens or hundreds of times per layer, everywhere the top layer crosses an infill gap rather than solid material underneath.
Each of those tiny bridging strands needs to solidify quickly enough to hold its own shape before gravity pulls it down into the gap beneath. When it does not cool fast enough, it sags very slightly into the infill void, sticking to the infill walls on either side while drooping in the middle. That sagging strand becomes the surface the next layer prints on top of, and if the next layer sags too, the effect compounds. By the time you reach the actual visible top surface, what should have been flat is a field of small dips and bumps that trace the infill pattern below — hence the pillow-like, quilted appearance.
The four contributing factors, and how they interact
Pillowing is rarely caused by one single wrong setting. It is the result of an imbalance between heat, cooling, and the structural foundation the top layers are being asked to bridge over — four factors working against each other, and fixing pillowing reliably means understanding which of the four is the dominant cause in your specific case rather than changing everything at once.
Infill density and pattern
Low infill means wide gaps for the top layer to bridge across. At 5-10% infill, the gaps between infill lines are large enough that a single strand of hot plastic has a genuinely difficult bridging job to do at every single gap, repeated continuously across the whole surface. The relationship between infill percentage and top surface quality is not linear — one detailed guide notes that going from 10% to 20% infill produces a dramatic improvement in top surface quality, while going from 25% to 50% barely changes anything further. This matters practically: doubling infill from 10% to 20% is a meaningfully more efficient fix for pillowing than pushing infill to 50% or higher chasing a smoother top that the extra material largely will not deliver.
The infill pattern itself also matters. Patterns that leave large open spans — sparse grid or lightning infill at low density — create wider individual gaps than a denser gyroid or triangular pattern at the same overall percentage, because the geometry distributes the material differently. If pillowing persists after raising density, switching to a pattern with more evenly distributed support points is worth testing before going further.
Cooling
This is consistently identified as the most significant single lever. A part cooling fan running at 100% freezes each tiny top-layer bridge in place almost immediately after it is deposited, before gravity has time to act on it. The same geometry printed with the fan at 30% lets the same strand droop visibly before it solidifies. For PLA specifically, running the fan at full speed for the top layers is close to a universal recommendation across every source on this topic, and it is usually the single change that produces the most improvement for the least effort.
Material matters here in a way that is worth being explicit about. PETG and ABS have inherently lower cooling tolerance than PLA — both benefit from some active cooling but degrade in layer adhesion if pushed to the same aggressive fan speeds that PLA tolerates easily. This is why PETG and ABS consistently produce rougher top surfaces than PLA at otherwise identical settings, and why pillowing on these materials sometimes needs a different balance — slightly reduced cooling relative to what would be ideal purely for pillowing, traded off against the layer adhesion those materials need more delicately than PLA does.
Top layer count and thickness
Each successive top layer bridges across the sag left by the layer beneath it, not across the original infill gap directly — the first top layer bridges the actual infill void and sags slightly; the second top layer bridges the reduced, partially-filled gap left by that sag; and so on. With enough top layers, this compounding effect eventually closes the gap completely and produces a flat, solid-looking surface even if the very first layer over the infill was imperfect. Simplify3D’s commonly cited heuristic is that the solid top section should be at least roughly 0.5mm thick in total — for a 0.2mm layer height, that works out to a minimum of about three top layers, and the exact number needed scales with layer height rather than being a fixed count that applies regardless of settings. Too few top layers is one of the most common and easiest-to-fix causes of visible pillowing, and it is worth checking this specific setting before assuming the problem is cooling or infill.
Print temperature and speed
Higher nozzle temperature makes filament flow more easily and bond better between layers, but it also means the plastic stays soft and moldable for longer after deposition — directly working against the rapid solidification that top-layer bridging needs. A slightly lower printing temperature for the top surface specifically, where the slicer supports this, can improve stability without meaningfully compromising the rest of the print’s layer adhesion, since the top surface is the last thing printed rather than a structural layer bearing load from above.
Print speed interacts with cooling in the same way it does everywhere else in FDM: printing the top layers too fast does not give the cooling fan enough time per unit length to actually remove heat before the nozzle has already moved on and deposited the next section. Slowing the top surface speed specifically — separate from the general print speed — gives the fan more dwell time over each section of the bridging top layer, which is the same underlying logic covered in the bridging post applied to the top surface rather than an open-air span.
Diagnosing which cause is actually yours
The visual character of the defect is a genuinely useful diagnostic before changing any settings. If you can see straight lines through the top surface texture that trace the infill pattern underneath, the top layer count is too low — the geometry below is showing through rather than being properly obscured. If the surface has small distinct holes or gaps that look like missed extrusion, infill density is too sparse and the top layers are sagging fully into the gaps rather than just drooping slightly. If the surface is fully closed with no visible holes but covered in fine ripples or a wavy texture, the top surface print speed is too fast relative to the cooling fan’s capability, or the fan itself is running too slow. If only the centre of a large flat top is rough while the edges near the perimeter walls are clean, that is classic pillowing caused by inadequate top layer thickness relative to a wide infill span — the edges benefit from the perimeter wall’s support nearby while the centre has the furthest distance to bridge.
One important distinction worth flagging clearly: if the bumps are larger, more random in size and placement, and inconsistent rather than following a regular pillow-like pattern, that is more likely to be wet filament producing surface bubbling than genuine pillowing. Check for popping or crackling sounds during printing, which is the signature of moisture rather than a cooling or infill problem, and dry the filament per the filament quality post before assuming the fix is a settings change. Pillowing and moisture-related surface defects can look superficially similar, and treating one as the other wastes time.
Where the settings live and what to change first
The recommended order, based on which fix produces the most improvement for the least effort: check top layer count first, since this is a single number and the fix is immediate. In Bambu Studio: Process → Strength → Top shell layers. In OrcaSlicer: Process → Strength → Top shell layers, same location. Increase incrementally — from 3 to 4 or 5 layers — rather than jumping straight to a much higher number, and reprint a small test section rather than a full model to check the result.
Second, verify the part cooling fan is genuinely running at 100% for the top layers specifically, not just for the print generally. In both slicers this sits under Process → Cooling, with the fan speed setting sometimes split between a general speed and an overhang or bridge-specific speed that also governs top surface bridging in some slicer versions — check that whichever setting actually applies to top layers is set to maximum for PLA.
Third, raise infill density modestly if it is currently below roughly 15-20%. In both slicers: Process → Strength → Infill density. Given the non-linear relationship described above, moving from 10% to 20-25% is worth testing before assuming a much higher infill is required — the jump from low to moderate density delivers most of the available improvement.
Fourth, if the problem persists after the above, reduce top surface print speed specifically. Both slicers expose a Top surface speed setting separate from general print speed under Process → Speed, and slowing this by 20-30% relative to the current value gives the cooling fan more time per pass without slowing the entire print.
Ironing: the finishing pass, not the fix
Ironing is a slicer feature that runs the nozzle back over the completed top surface at a very low flow rate and often at an angle offset from the top infill direction, smoothing the visible surface texture cosmetically. It is genuinely effective for improving the final appearance of a top surface and is worth enabling for any display piece where top surface finish matters. But it is a cosmetic finishing pass applied after the structural cause of pillowing, not a structural fix for it. Ironing over a top surface that is pillowing badly because of insufficient top layers or poor cooling will smooth the visible texture somewhat but does not address the underlying sag, and the result is often still visibly imperfect compared to a top surface that was properly supported and cooled in the first place. Fix the root cause first using the settings above; use ironing afterward as a final polish rather than as the primary solution.
In Bambu Studio: Process → Others → Ironing, with a Type dropdown offering Top, Topmost, or All surfaces. In OrcaSlicer: Process → Others → Ironing, same options. Top or Topmost is the sensible default for most models — applying ironing only to the actual top surfaces of the print rather than every horizontal plane throughout, which would add unnecessary time without a corresponding visual benefit on surfaces nobody will see.
The quick reference
| What you see | Likely cause | Fix |
|---|---|---|
| Infill pattern visible through the surface | Top layer count too low | Increase top shell layers |
| Small holes or gaps in the surface | Infill too sparse | Raise infill density to 20-25% |
| Fine ripples or waves, surface fully closed | Top surface too fast or cooling too weak | Slow top surface speed, max out part cooling fan |
| Only the centre of a large flat top is rough | Top thickness inadequate for the span | Increase top shell layers, consider denser infill under large flat areas |
| Large, irregular bumps with popping sounds during printing | Wet filament, not pillowing | Dry the filament before adjusting any settings |
Pillowing is entirely preventable once you understand it as a bridging problem happening at a small scale, everywhere the top layer crosses an infill gap. Diagnose the specific visual signature, adjust the corresponding setting rather than guessing at everything simultaneously, and use ironing as a final polish rather than a substitute for getting the underlying structure right.