A cold pull is one of the oldest maintenance techniques in FDM printing and one of the most underused. It solves the majority of clogged nozzle problems without buying anything, without removing the nozzle, and without the risk of damaging a hotend that a needle or a torch carries. The technique also sounds slightly counterintuitive the first time you hear it explained — heat the nozzle up, then cool it down partway, then yank the filament out — and understanding why that specific sequence works is what turns it from a fiddly ritual into a reliable diagnostic and repair tool.
What a cold pull actually is
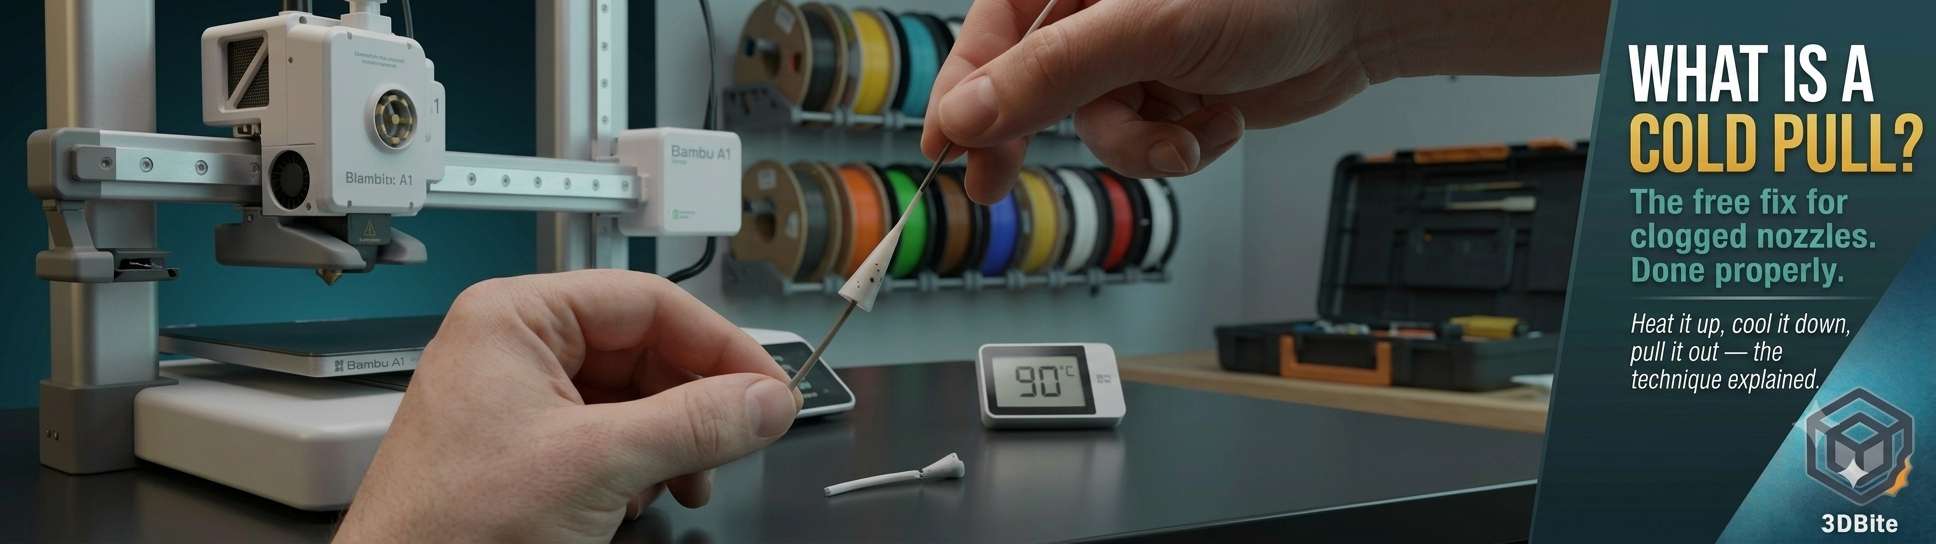
A cold pull — also called an atomic pull, for reasons nobody seems entirely sure of — is a cleaning method where you heat the nozzle to normal printing temperature, push fresh filament through until it flows cleanly, let the hotend cool down to a specific intermediate temperature while holding light pressure on the filament, and then pull the filament straight out in one firm, continuous motion. Done correctly, the tip of the filament that comes out is a perfect cast of the nozzle’s internal geometry — a cone tapering down to a thin point — with any debris, carbonised residue, or contamination that was stuck inside the nozzle embedded in that cast, pulled out along with it rather than left behind.
The reason this works and a straightforward hot pull does not is entirely about temperature and material state. At full printing temperature, the filament is fully molten and offers no grip — pulling it out at that temperature just removes liquid plastic and leaves the actual debris stuck to the nozzle walls where it was. Cooling the plastic down first changes its physical state to something semi-solid: firm enough to hold together and grip onto anything stuck to the nozzle wall as you pull, but not yet fully hard, so it can still be extracted rather than snapping. That narrow window — soft enough to grab debris, firm enough not to break apart during the pull — is the entire technique.
Why nylon is the preferred material, not just PLA
PLA works for a cold pull and is the material most people reach for because it is what they have on hand. Nylon is the better tool for the job specifically, and the reason is mechanical rather than a matter of preference. Nylon remains semi-flexible across a wider temperature window than PLA, which gives it a longer and more forgiving grab-and-release window during the pull. It is also tougher and less brittle at the pull temperature, meaning it is less likely to snap partway through the pull and leave a broken plug lodged inside the heat break — which is precisely the failure that turns a simple cleaning job into a genuine repair problem. If you keep a dedicated cold-pull cleaning filament in the toolbox — nylon-specific cleaning filament is sold cheaply for exactly this purpose — it is worth having on hand rather than relying on whatever PLA happens to be loaded.
When to do one
A cold pull is the right first response to several distinct symptoms, and knowing which symptom you are looking at helps set expectations for whether it will actually fix the problem.
Inconsistent or reduced extrusion during a print, where flow drops without any change to settings, is the classic partial clog signature. Print quality that has degraded gradually over time — rougher wall surfaces, weaker layer bonding — with no corresponding settings change is another. Filament that curls or deflects to one side as it exits the nozzle rather than extruding straight down suggests a partial obstruction on one side of the nozzle bore specifically, and a cold pull is the correct diagnostic step before assuming a hardware fault. A sudden total blockage where nothing extrudes at all is the most urgent case and the one where a cold pull, tried first, solves the problem without needing to remove the nozzle at all in a large proportion of cases.
It is also worth doing preventatively rather than only reactively. Switching between materials that print at meaningfully different temperatures — PLA at 200°C to nylon at 250°C+, for example — leaves the potential for old, lower-temperature filament residue to burn and carbonise when the nozzle is subsequently heated much higher for the new material. Running a cold pull between such material swaps clears any residue from the previous material before it has the chance to bake onto the nozzle walls at the new, higher temperature. For anyone printing PLA-CF or other abrasive filaments regularly, a periodic cold pull as preventative maintenance — alongside the hardened nozzle discipline covered in the abrasive filaments guide — catches accumulating debris before it becomes a genuine clog.
The step-by-step process
- Heat the nozzle to the normal printing temperature for whatever material you are using to perform the pull — around 200-210°C for PLA, roughly 240-250°C for nylon.
- Remove the current filament and load the cleaning filament — PLA or nylon — through the extruder.
- Manually push the filament through until it extrudes cleanly from the nozzle tip. If it will not extrude at all because of a total blockage, a thin needle smaller than the nozzle’s own bore diameter (0.35mm for a 0.4mm nozzle, never larger) can help clear the immediate obstruction first, but never force a needle that is the same size as or larger than the nozzle orifice — doing so permanently enlarges the bore and ruins the nozzle’s dimensional accuracy for every future print.
- Turn the heater off and let the hotend begin cooling, while maintaining gentle, light downward pressure on the filament as the temperature drops. This keeps the softening filament in contact with the nozzle walls rather than pulling away from them prematurely.
- Watch the temperature and wait for the target pull temperature — roughly 80-90°C for PLA, 100-110°C for PETG, around 130°C for nylon. Different guides give slightly different exact numbers within these ranges, which reflects genuine variation between specific filament formulations rather than one of them being wrong; treat these as a starting point and adjust based on what happens during your own pull.
- Hold at that temperature for around 30 seconds to let it stabilise evenly through the nozzle rather than pulling the instant the display reads the target number, since the surface reading and the internal temperature are not identical the moment the display changes.
- Pull the filament out firmly, in one continuous motion, rather than a series of small tugs. A single confident pull is more likely to extract the debris cleanly than a hesitant, stop-start pull that risks the filament snapping partway.
- Inspect the tip. A successful pull shows a clean cone shape tapering to a point, matching the internal geometry of the nozzle, with any dark specks or burnt residue visible embedded in that cone — that is the clog, now removed rather than still inside the nozzle.
- Repeat if the tip still shows debris or an incomplete cast. Two or three pulls are common before the tip comes out completely clean; this is normal rather than a sign anything has gone wrong.
- Reheat to normal printing temperature and extrude a test length to confirm flow is consistent before resuming or starting a new print.
Getting the temperature right: the diagnostic feedback loop
The pull temperature is the one variable that genuinely needs feeling out rather than following a fixed number, and the good news is that the filament itself tells you which direction to adjust. If the filament breaks or snaps during the pull rather than coming out as one continuous piece, the temperature was too low — the plastic had already hardened too much to be pulled cleanly, and increasing the pull temperature by roughly 5°C on the next attempt is the correct response. If the filament stretches significantly (some guides suggest more than 5mm of stretch before it separates) or feels gooey and soft rather than firm, the temperature was too high — it had not solidified enough to grip the debris properly, and decreasing by 5°C is the fix.
This is genuinely a feel-based skill that improves with repetition. The first few cold pulls on a new machine or a new filament type will likely need a temperature adjustment or two before landing in the right window. Once you have found the right pull temperature for your specific setup and filament, it stays consistent for future pulls with the same material.
What can go wrong, and how to avoid it
Pulling too cold — below roughly 70°C for PLA — is the most common mistake, and the consequence is a snapped filament that leaves a plug of material inside the heat break rather than removing it. If this happens, the fix is to reheat to full printing temperature and try again with fresh filament pushed through to soften and clear the broken plug before attempting a properly-timed pull. This is annoying but recoverable, not a hardware failure.
Pulling too hot has a similar underlying problem from the other direction: the filament stretches significantly before releasing, which can leave a thin trail of material still inside the nozzle bore that was never actually gripped and extracted. The fix is the same principle in reverse — wait for the temperature to drop further and try again.
Using an oversized needle to help clear an initial total blockage before the pull is the mistake that causes lasting damage rather than a recoverable annoyance. A 0.5mm needle forced into a 0.4mm nozzle stretches and permanently enlarges the brass orifice, and every subsequent print through that nozzle will over-extrude because the bore is no longer the size the slicer assumes it is. Always use a needle strictly smaller than the nozzle’s stated diameter, and never force it if it does not pass through easily.
When a cold pull is not the answer
If repeated cold pulls consistently come out clean but a specific print quality problem persists — particularly if the tip of the filament looks blunted, rounded, or flattened rather than forming a sharp, well-defined cone — that is not a clog. It is a sign that the nozzle orifice itself is physically worn, which is especially common on nozzles that have printed abrasive materials without the hardened steel upgrade covered in the abrasive filaments guide. A worn nozzle bore cannot be cleaned back into shape; the only fix is replacement.
Similarly, if a cold pull does not resolve a total blockage after a couple of attempts, and a fine needle carefully worked through the bore at full temperature does not restore flow either, the clog may be located higher up in the heat break rather than at the nozzle tip itself — which a cold pull performed with the nozzle still attached cannot always reach. At that point, removing the nozzle and inspecting the heat break threads directly with a torch light, then clearing any visible residue ring with a piece of PTFE tube or a thin Allen key while the assembly is still hot, is the next step. For genuinely carbonised, baked-on residue that nothing mechanical will shift, an acetone soak works for PLA specifically (PLA is one of the few filaments that dissolves in acetone to any useful degree) but does nothing for PETG, ABS, nylon, or TPU, which need mechanical or thermal clearing methods instead.
Preventing the need for frequent cold pulls
A printer that needs a cold pull every 50 hours or so, rather than occasionally, usually has an identifiable cause upstream rather than simply being unlucky. Dust and airborne debris settling on an open spool and being dragged into the hotend along with the filament is a common and preventable contributor — a simple filament dust filter, even a printed clip holding a small sponge with a drop of oil, catches a meaningful amount of this before it ever reaches the nozzle. Filament that has not been dried properly, as covered in the cheap filament post, also contributes to clog formation, since moisture-related bubbling and inconsistent extrusion leaves more residue behind over time than clean, dry filament does. Regular basic nozzle exterior cleaning, covered in the maintenance guide, addresses the outside of the problem; a cold pull addresses the inside; keeping filament dry and dust-free reduces how often either is needed in the first place.
Summary
A cold pull is free, takes about ten minutes once you have the technique down, and solves the majority of clogged nozzle problems without removing any hardware or risking the kind of damage a poorly executed needle-and-torch approach can cause. The core sequence — heat, push fresh filament through, cool to a semi-solid intermediate temperature while holding pressure, pull in one firm motion, inspect the tip — is worth learning properly rather than reaching for a nozzle replacement or a full hotend rebuild at the first sign of inconsistent extrusion. Keep a length of nylon or dedicated cleaning filament in the toolbox specifically for this, and treat a periodic preventative cold pull as cheap insurance the same way the maintenance routine treats a monthly rail lubrication — a small, quick task that keeps a larger problem from developing.